Tooth Fairy Box
Losing a tooth is always exciting for kids. After all, who doesn't want a visit from the Tooth Fairy, especially if she's bringing money?
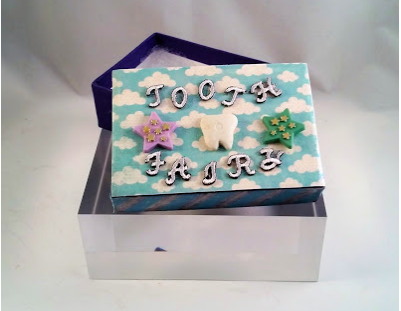
Make it even more fun with this cute tooth fairy box embellished with Joy® Embroidered Letters! This project is so easy to make by up-cycling a cardboard jewelry box. You will need:
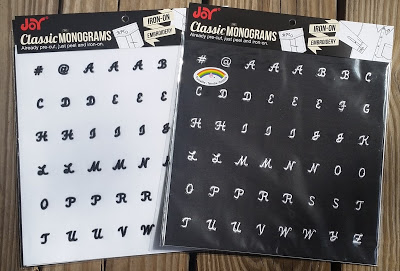
- Joy® Embroidered Letters - Classic Monograms in White
- patterned paper
- scissors
- pencil
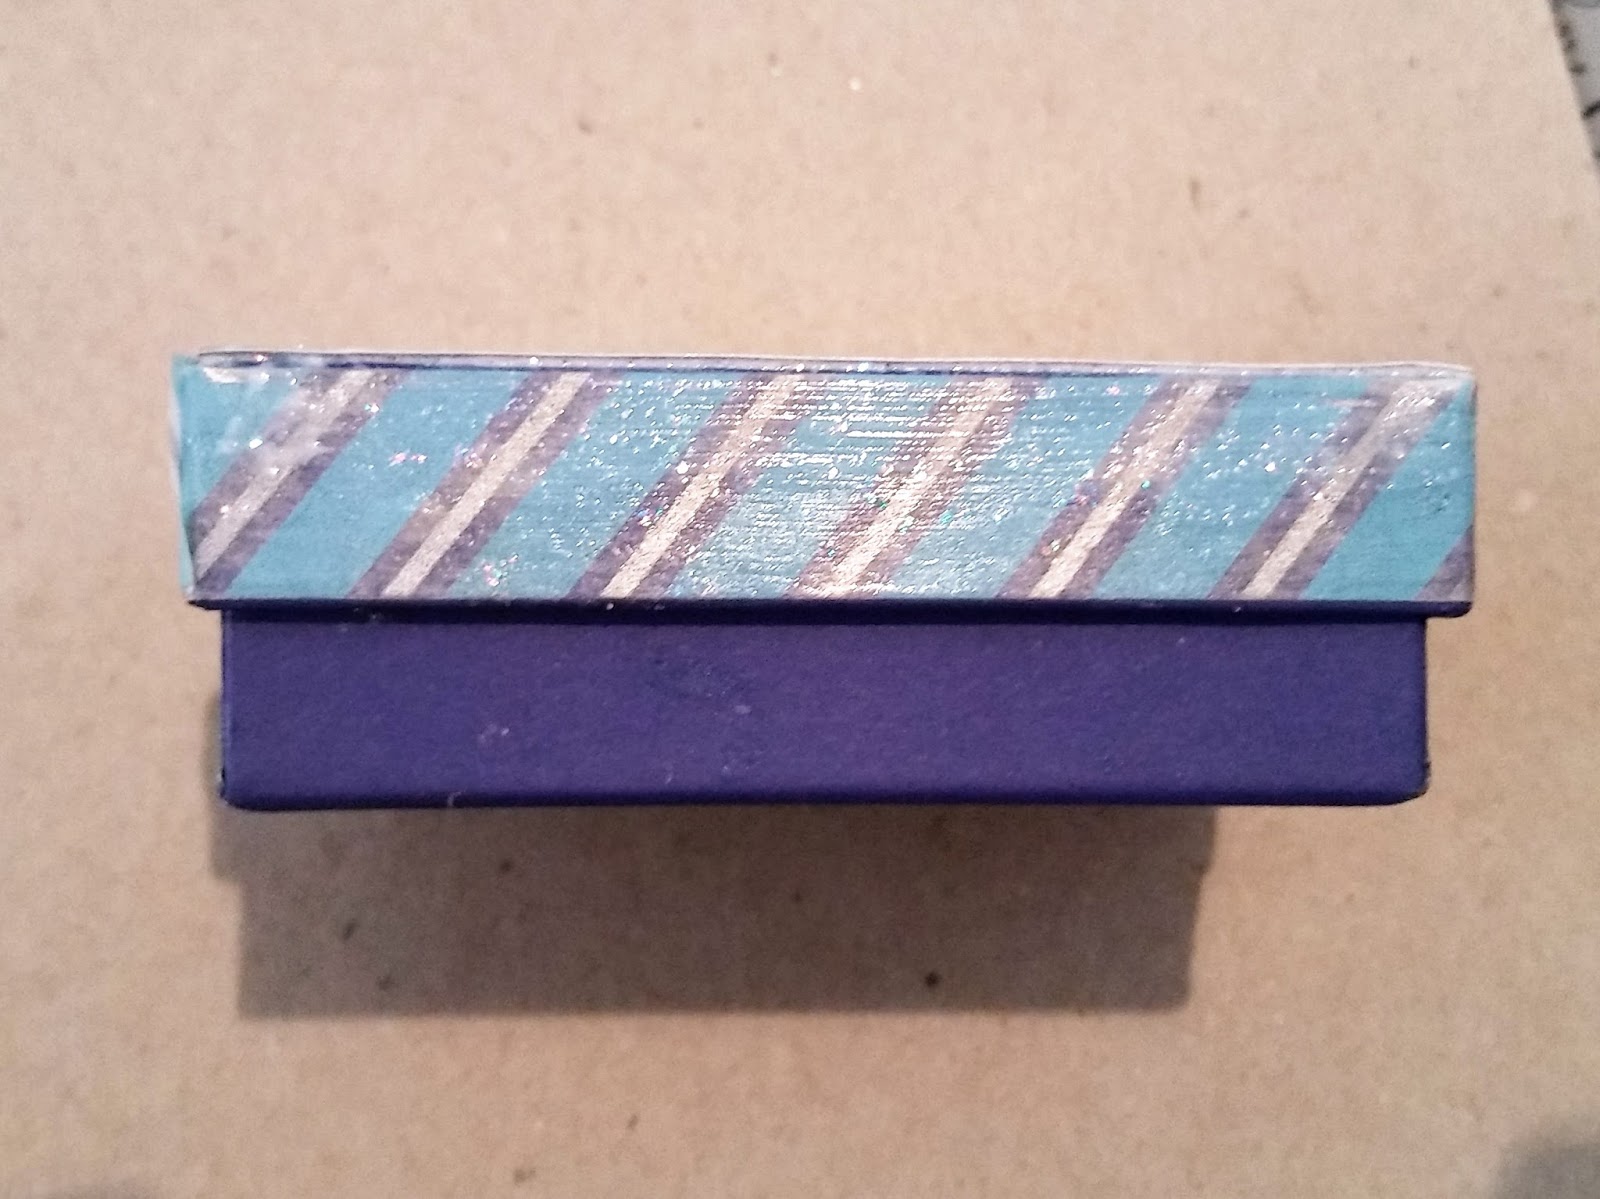
- washi tape
- glitter decoupage glue
- foam paintbrush
- all-purpose craft glue
- tooth-themed embellishments
- acrylic paint (optional)
Instructions:
1. Trace around the top of the box onto the back of a piece of patterned paper. Cut out then adhere to the box top. Paint the bottom part of the box if desired.
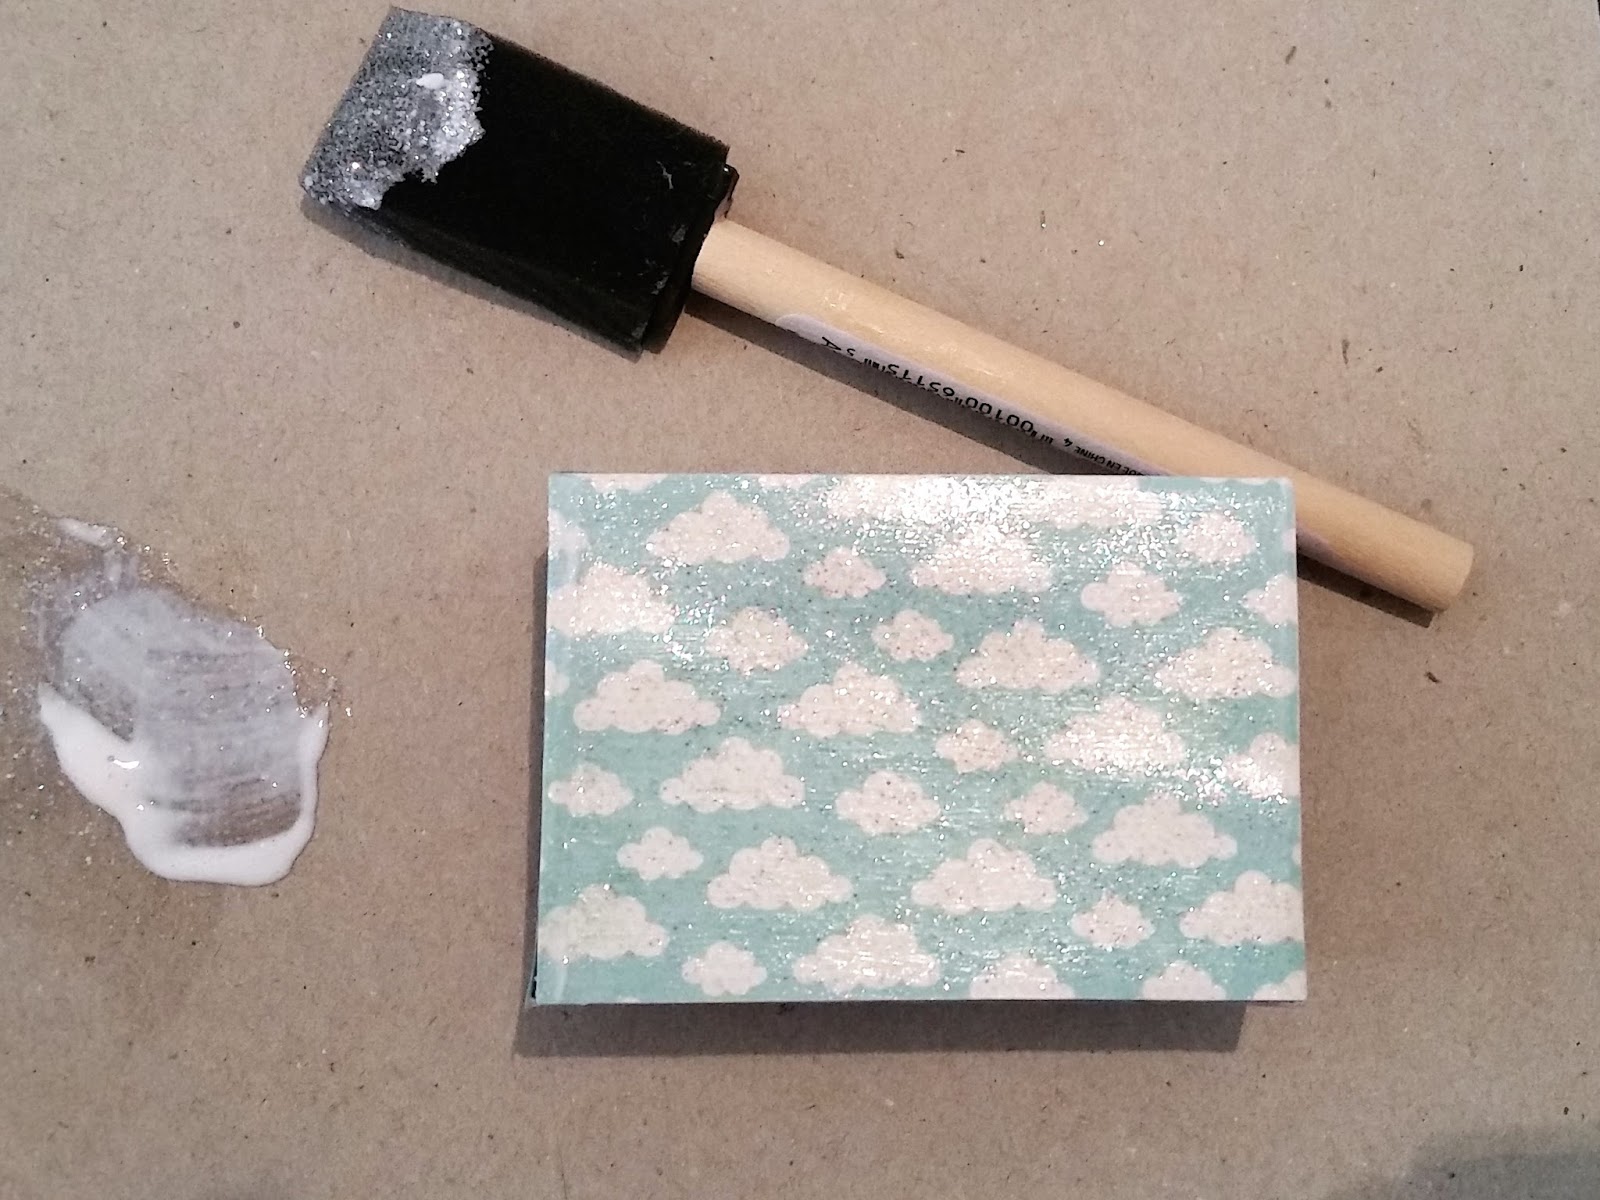
2. Line sides of the box top with washi tape then paint the top and sides with glitter découpage glue.
3. Attach the iron-on letters with all-purpose craft glue. White letters are dyeable, so change the color with a permanent marker if desired.
4. Attach tooth-themed embellishments to the box top with all-purpose glue to finish.
Now your kiddo can have a cute way to store the tooth for the Tooth Fairy, and the Tooth Fairy can leave the money in the box!
Joy® iron-on embroidered letters are available in a variety of fonts, sizes and colors. White letters can also be colored with dye, paint, markers and more to create custom colors!