FREE Standard Shipping with $50 Order
|
Minimum Order is $15
10% Discount on $300 Order
|
25% Discount on $600 Order

Personalized Travel Tissue Holder

Laura Bray
|
August 15, 2017

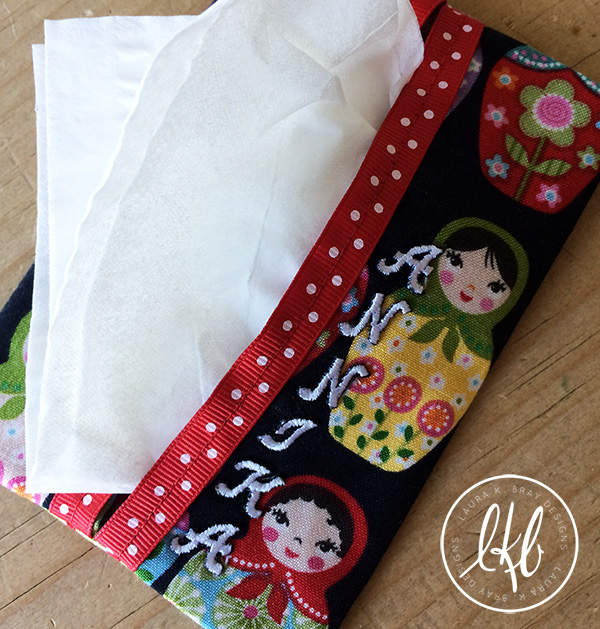
Back-to-school usually also means the beginning of cold & flu season. I used to send my daughter to school with her own personal pack of travel tissue, but she always shoved them into her book bag carelessly, which ripped the cheap, plastic covering and the tissues would end up getting dirty and unusable. Once I started making fabric travel tissue holders for her, the tissues stayed in place because the fabric was a bit tougher. I also think my daughter might be more careful with the fabric tissue holder because...Hello! Cuteness! This year, I'm planning to personalize her tissue holder because she tells me she's kind of famous for always sharing a tissue when someone is in need and, if the tissue holder get passed around, it's sure to come back to her eventually if her name is on it, right? There are fabric tissue holder tutorials all over the web. They are easy to sew and make a good beginner's project. Here's a quick explanation of how I make mine:
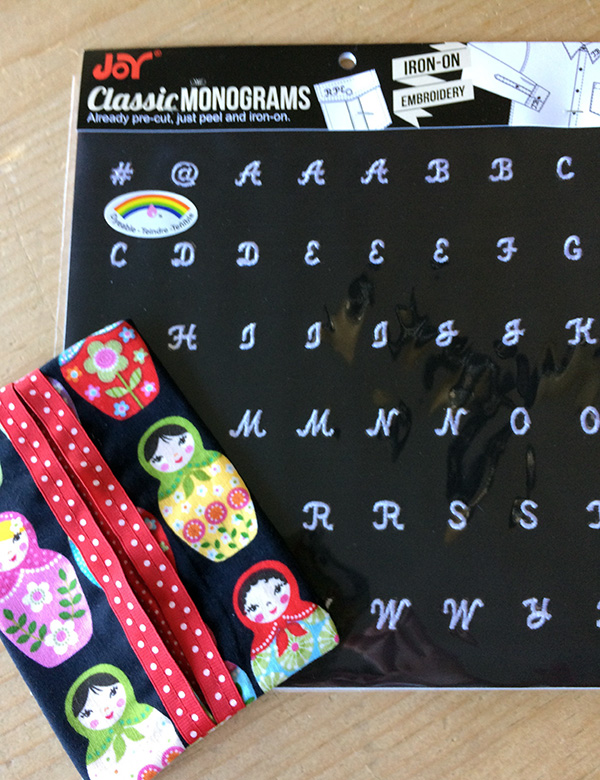
Supplies:

  • Joy Embroidered Iron-on Letters - available for purchase at your local fabric or craft store
  • Iron and ironing board
  • 6.5" x 7" piece of fabric for the outside
  • 6.5" x 7" piece of fabric for the inside 
  • Sewing machine and basic sewing supplies 

Instructions:

  1.  Pin fabric pieces together, right sides facing each other.
  2.  Sew 1/4" around the outer edge. Leave a small opening on one long side.
  3.  Turn the fabric right side out and press, making sure your opening is pressed inside.
  4.  Lay the square, outside fabric facing down, on your ironing board. Fold short edges towards the middle, so the edges meet each other. Press in place.
  5.  Stitch the ends down. Turn cozy right side out.
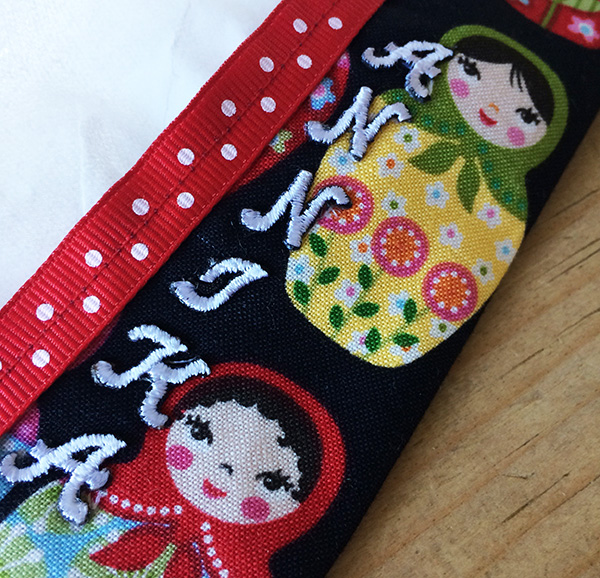
  6.  Remove the Joy letters from the sheet and arrange them in place. Cover with a pressing cloth, then iron-on the letters for 30 seconds.
  7.  Allow to cool for 1 minute before you handle.

If you want some tips for how to prepare for the cold season, check out my blog post on the topic. Stay healthy!

Leave a Reply

Your email address will not be published. Required fields are marked *

Recent Projects

Luck O' the Irish DIY Door Hanger

St. Patrick’s Day is just around the corner!  Celebrate the Luck O' the Irish with this colorful door décor that is a fun alternative to a traditional wreath.  You will need: Joy® Iron On Embroidered Letter sheet - Gold Script Kunin Classics™ Felt 9” x 12” Craft Cuts– Red, Orange, Yellow, Apple Green, Lagoon, Royal Blue, Orchid, Pirate Green, Neon Green, Gold and Goldenrod (one each) Kunin Premium™ Felt 9” x 12” Craft Cuts– White and Black (two each). Expo International – Claudia 2” Fan and Lattice Lace.  Ric Rac assorted Rayon – Red, Orange, Yellow, Green, Light Blue, Royal…

Rustic Happy Fall Y'all Pumpkin Sign

HAPPY FALL Y'ALL! I am always on the look out for cute items that can be upcycled to create one of a kind home decor pieces.  This rustic pallet pumpkin was just calling out to me from the Target dollar spot and with the addition of some Joy® iron-on embroidered letters, it quickly becomes a custom keepsake. Select a combination of white Joy® iron-on embroidered letters to spell out your message. To create the apostrophe, I carefully cut the leg from the capital letter Q with a pair of detail scissors. Place the embroidered letters on an old towel in a cardboard box…

Back to School Welcome Banner

Create a "Back to School" welcome banner for your favorite teacher's classroom! Materials: JOY® Embroidered Letters 9” x 12” sheets of Kunin Classicfelt -Black , Gray, Sandstone, Candy Pink and Gold Craft glue Glitter glue Cardstock Ruler, pencils, scissors 4-foot length of ribbon Instructions: Draw a simple pencil pattern (5 pieces as shown) on cardstock and cut out.   Trace and trim each pattern piece seven times on the appropriate color of felt. Glue the pencil pieces together, overlapping as shown and let dry. 4. Peel back liner paper from the JOY letters and attach to the center of each pencil, spelling…

Scrabble-Inspired Tote Bag

I am all about recycling, but most of the tote bags that the grocery stores sell are not very cute or crafty. So in honor of family game night, I created a Scrabble-inspired bag to tote around town! This project makes the perfect quick and easy handmade gift to create for Mom for Mother's Day! Decide what words you want to spell and how they'll connect, making sure the arrangement will fit on the front of your tote bag. Draw a grid of square tiles on graph paper to fit each of your letters. I selected the Joy 1.5" Cooper Style…

Happiness Pillow

Joy® Iron-on embroidered letters in white are great for creating any color you can imagine! You can use dye, markers and even acrylic paint! To Make this Happiness Pillow you'll need: Joy® Embroidered Iron-on Letters - Letter Shop White  Acrylic Paint and Paintbrush NEW Joy® Iron-on Embroidered Flower Appliqué    Canvas Pillow Blank Pillow Form or Polyfil Iron Instructions: 1. Paint each letter to create a rainbow of H-A-P-P-I-N-E-S-S.  Set aside and let dry. 2.  Insert cardboard into pillow blank then paint the pillow with white and light blue paint.  Let dry. 3. Set iron on cotton setting; approx. 350 degrees,…
closearrow-circle-o-downtagtagsminus-circlefacebook-squaretruckpinterest-squareinstagrammenu
0
    0
    Shopping Cart
    Your cart is emptyReturn to Shop