FREE Standard Shipping with $50 Order
|
Minimum Order is $15
10% Discount on $300 Order
|
25% Discount on $600 Order

Mini Wine Cork Bulletin Board

Lisa Fulmer
|
February 15, 2016

recycled wine cork note board

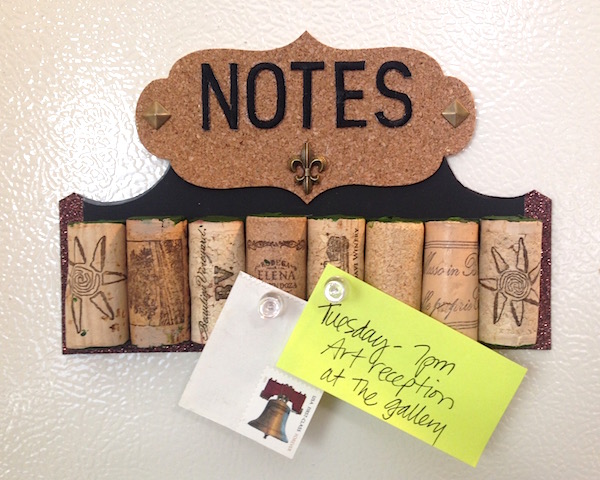
Since I made this mini wine cork bulletin board, I must confess...I do enjoy drinking wine and I save all my wine corks. And yet another confession...in spite of so many handy apps and online calendars, I still use my refrigerator for filing and reminders. I needed to designate a small space on the side for the more important items to stand out from all the rest, so this is what I came up with. Supplies:

  • Joy embroidered letters
  • Wine corks
  • Heavy cardstock
  • Acrylic paint
  • Heavy duty craft glue
  • Cork die-cut placard
  • Glitter tape
  • Metal embellishments
  • Adhesive-backed magnet sheet
  • Scissors, paper trimmer

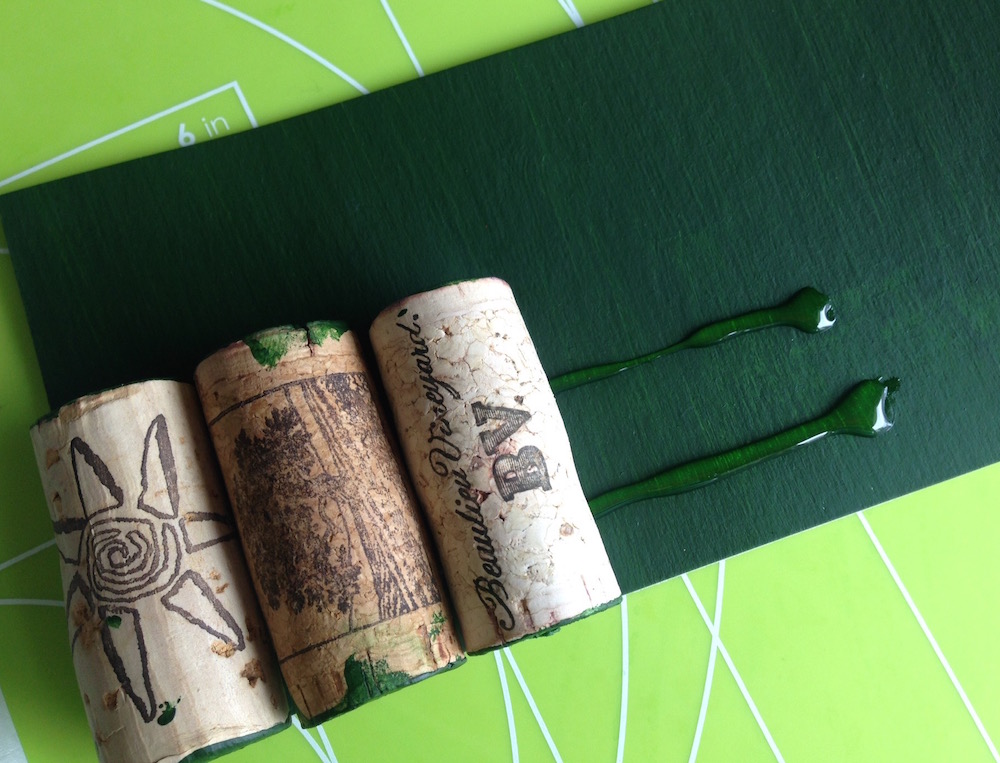
1.  If desired, dab the ends of the corks in paint to color and set aside to dry.

paint ends of recycled wine corks

2.  Glue the corks side by side to a strip of sturdy cardstock. Place a heavy book on top while the glue dries.

glue wine corks to cardboard

3.  Cut a header card from sturdy cardstock and glue a die-cut cork placard at the top. Trim the edges with glitter tape.

wine cork note board backer

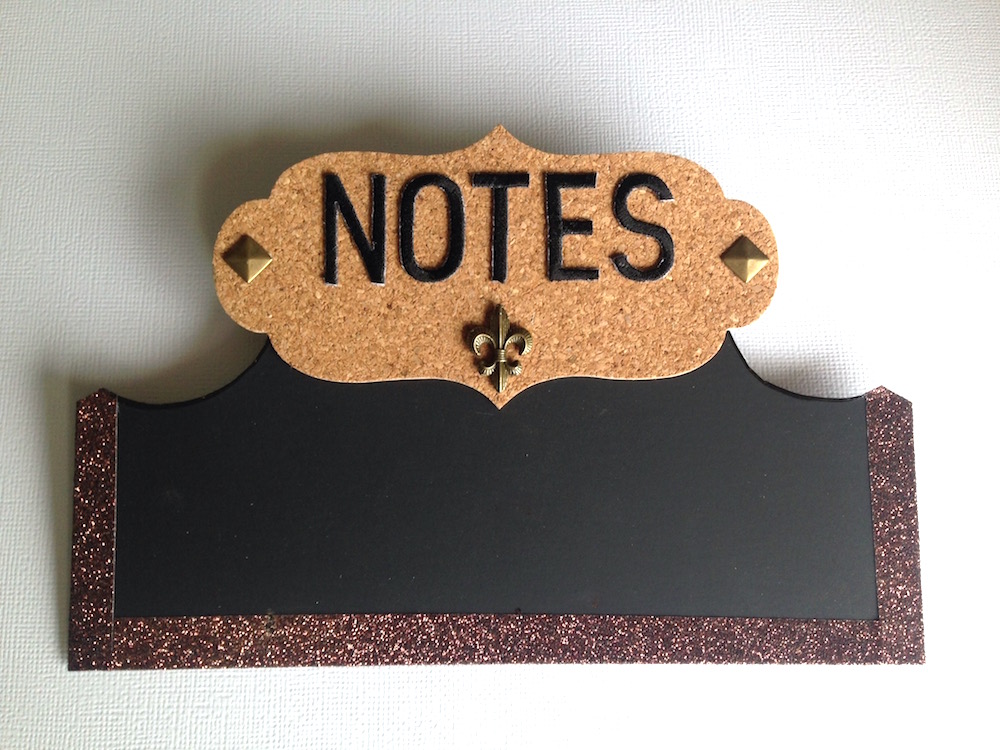
4.  Glue the Joy letters on the cork die-cut to spell "notes" or "memo" or your name. Embellish with metal charms as desired.

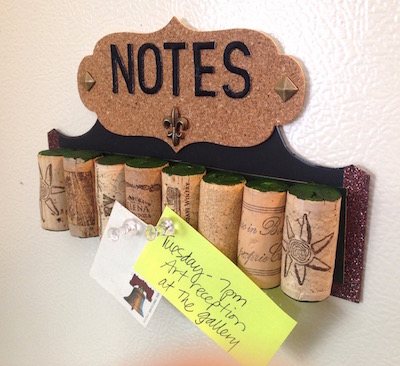
5.  Trim and glue the strip of wine corks to the header card and place a heavy book on top while the glue dries.

6.  Trim and adhere a magnet sheet to cover most of the back of your mini wine cork bulletin board.

mini wine cork bulletin board lisa fulmer

One comment on “Mini Wine Cork Bulletin Board”

  1. This is adorable! I collect wine corks too and have no clue why, so I will give this a try and make a small dent in the cork stash

Leave a Reply

Your email address will not be published. Required fields are marked *

Recent Projects

Luck O' the Irish DIY Door Hanger

St. Patrick’s Day is just around the corner!  Celebrate the Luck O' the Irish with this colorful door décor that is a fun alternative to a traditional wreath.  You will need: Joy® Iron On Embroidered Letter sheet - Gold Script Kunin Classics™ Felt 9” x 12” Craft Cuts– Red, Orange, Yellow, Apple Green, Lagoon, Royal Blue, Orchid, Pirate Green, Neon Green, Gold and Goldenrod (one each) Kunin Premium™ Felt 9” x 12” Craft Cuts– White and Black (two each). Expo International – Claudia 2” Fan and Lattice Lace.  Ric Rac assorted Rayon – Red, Orange, Yellow, Green, Light Blue, Royal…

Rustic Happy Fall Y'all Pumpkin Sign

HAPPY FALL Y'ALL! I am always on the look out for cute items that can be upcycled to create one of a kind home decor pieces.  This rustic pallet pumpkin was just calling out to me from the Target dollar spot and with the addition of some Joy® iron-on embroidered letters, it quickly becomes a custom keepsake. Select a combination of white Joy® iron-on embroidered letters to spell out your message. To create the apostrophe, I carefully cut the leg from the capital letter Q with a pair of detail scissors. Place the embroidered letters on an old towel in a cardboard box…

Back to School Welcome Banner

Create a "Back to School" welcome banner for your favorite teacher's classroom! Materials: JOY® Embroidered Letters 9” x 12” sheets of Kunin Classicfelt -Black , Gray, Sandstone, Candy Pink and Gold Craft glue Glitter glue Cardstock Ruler, pencils, scissors 4-foot length of ribbon Instructions: Draw a simple pencil pattern (5 pieces as shown) on cardstock and cut out.   Trace and trim each pattern piece seven times on the appropriate color of felt. Glue the pencil pieces together, overlapping as shown and let dry. 4. Peel back liner paper from the JOY letters and attach to the center of each pencil, spelling…

Scrabble-Inspired Tote Bag

I am all about recycling, but most of the tote bags that the grocery stores sell are not very cute or crafty. So in honor of family game night, I created a Scrabble-inspired bag to tote around town! This project makes the perfect quick and easy handmade gift to create for Mom for Mother's Day! Decide what words you want to spell and how they'll connect, making sure the arrangement will fit on the front of your tote bag. Draw a grid of square tiles on graph paper to fit each of your letters. I selected the Joy 1.5" Cooper Style…

Happiness Pillow

Joy® Iron-on embroidered letters in white are great for creating any color you can imagine! You can use dye, markers and even acrylic paint! To Make this Happiness Pillow you'll need: Joy® Embroidered Iron-on Letters - Letter Shop White  Acrylic Paint and Paintbrush NEW Joy® Iron-on Embroidered Flower Appliqué    Canvas Pillow Blank Pillow Form or Polyfil Iron Instructions: 1. Paint each letter to create a rainbow of H-A-P-P-I-N-E-S-S.  Set aside and let dry. 2.  Insert cardboard into pillow blank then paint the pillow with white and light blue paint.  Let dry. 3. Set iron on cotton setting; approx. 350 degrees,…
closearrow-circle-o-downtagtagsminus-circlefacebook-squaretruckpinterest-squareinstagrammenu
0
    0
    Shopping Cart
    Your cart is emptyReturn to Shop