FREE Standard Shipping with $50 Order
|
Minimum Order is $15
10% Discount on $300 Order
|
25% Discount on $600 Order

How to Make a Personalized DIY Book Stack

Beth Watson
|
April 27, 2020

DIY book stacks are trending and Joy® embroidered letters make creating a personalized set quick and easy!  
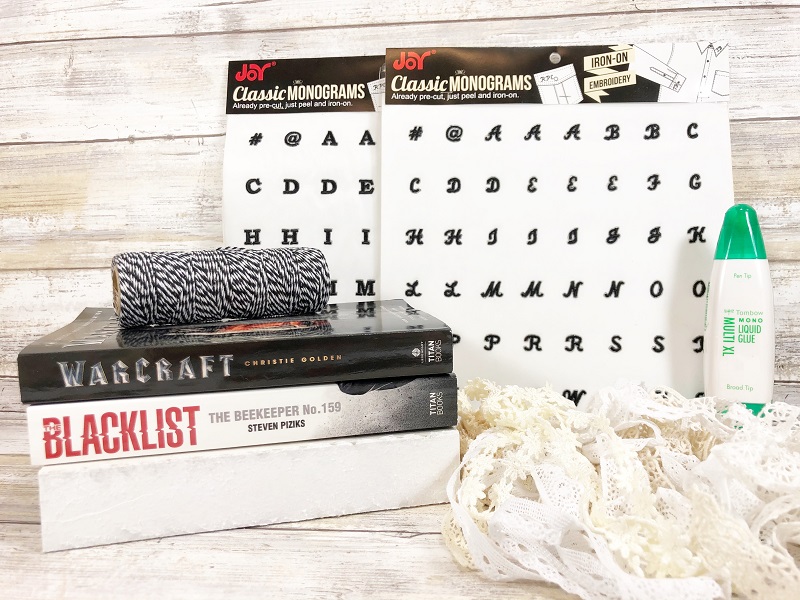
You will need:

  • Joy® Embroidered Letters - Classic Monograms - Black
  • Paperback Books (3) from the Dollar Store
  • Craft Paint - Dark Brown
  • Liquid Glue with a fine tip applicator
  • Scotch Tape
  • Ribbons - Decorative White and Black Gingham
  • Flower - Large Silk from the Dollar Store
  • Paper Towel

Instructions:

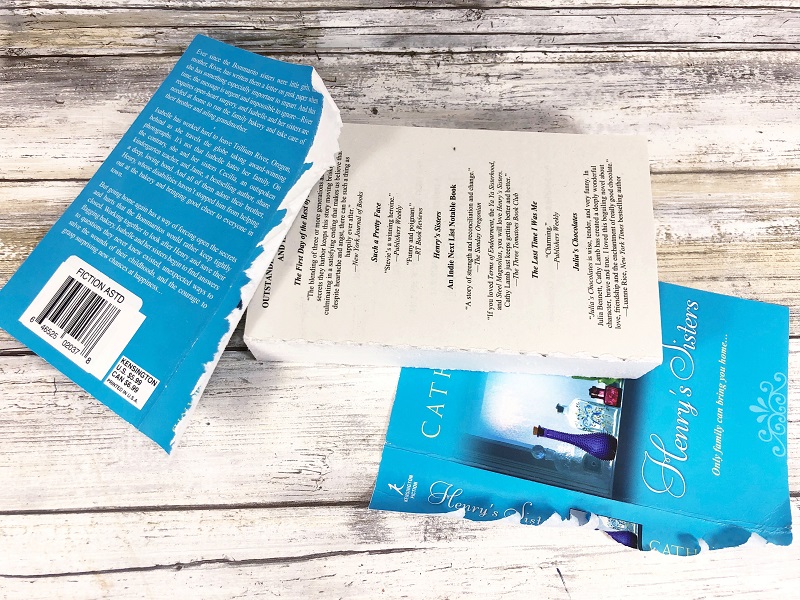
1. Peel front cover, back cover, and spine from three paperback books.  Remove any title pages.  

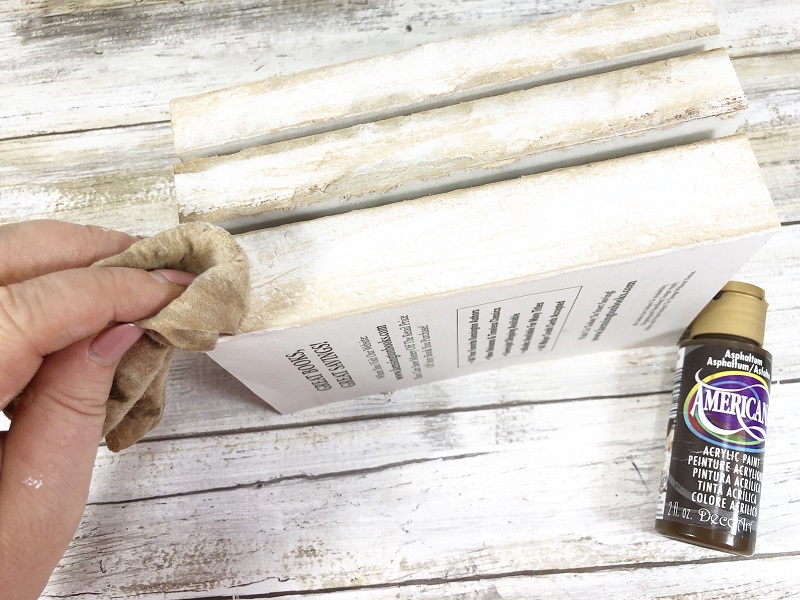
2. Apply a small amount of watered-down dark brown acrylic craft paint to spines of books with a piece of paper towel.  Remove any excess paint.

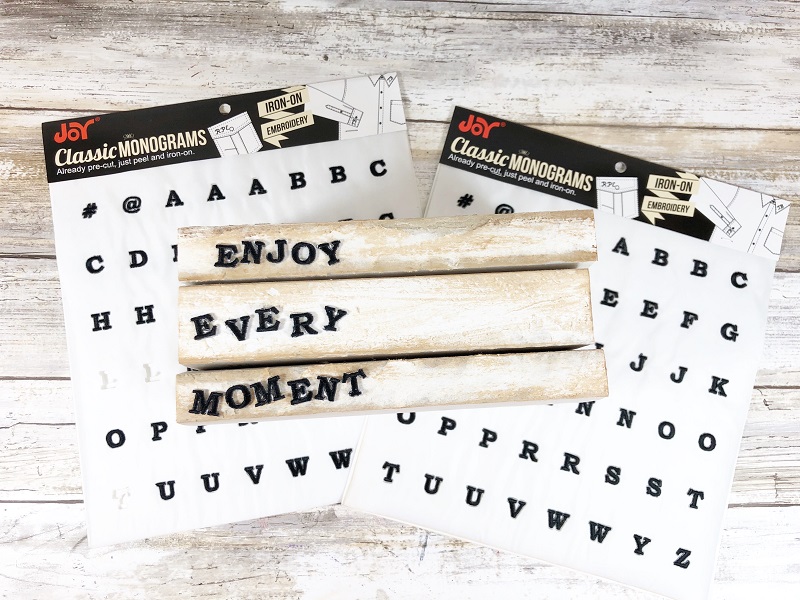
3.  Select a three word saying for the book stack.  Carefully peel the letters from the Joy® Classic Monogram embroidered letter sheet and line up on the book spines.  

4.  Place a section of scotch tape over each word, pick up from the spine of each book, and lay upside down on the work surface.  Apply liquid glue with a fine tip applicator to the backside of each letter.

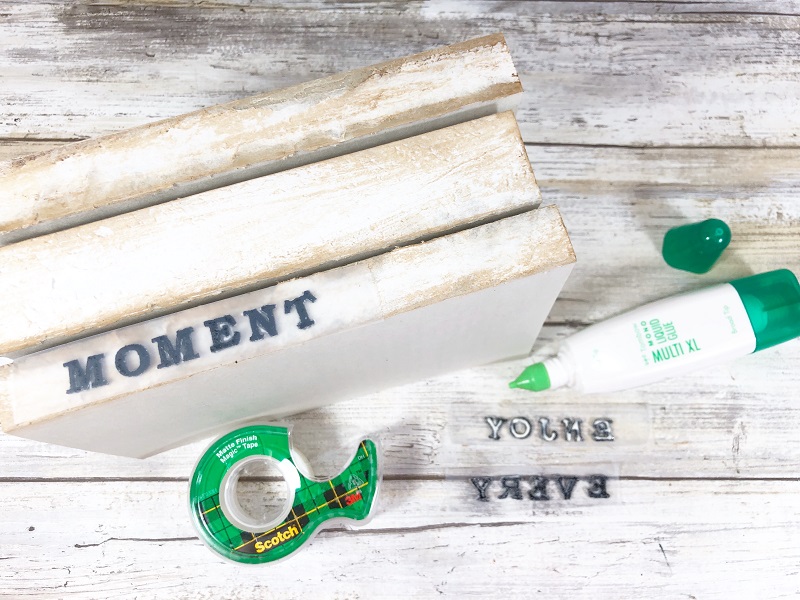
5.  Lift each section of scotch tape and apply right-side-up to the spine of each book.  Gently press down, then lift up the scotch tape.  Let dry.

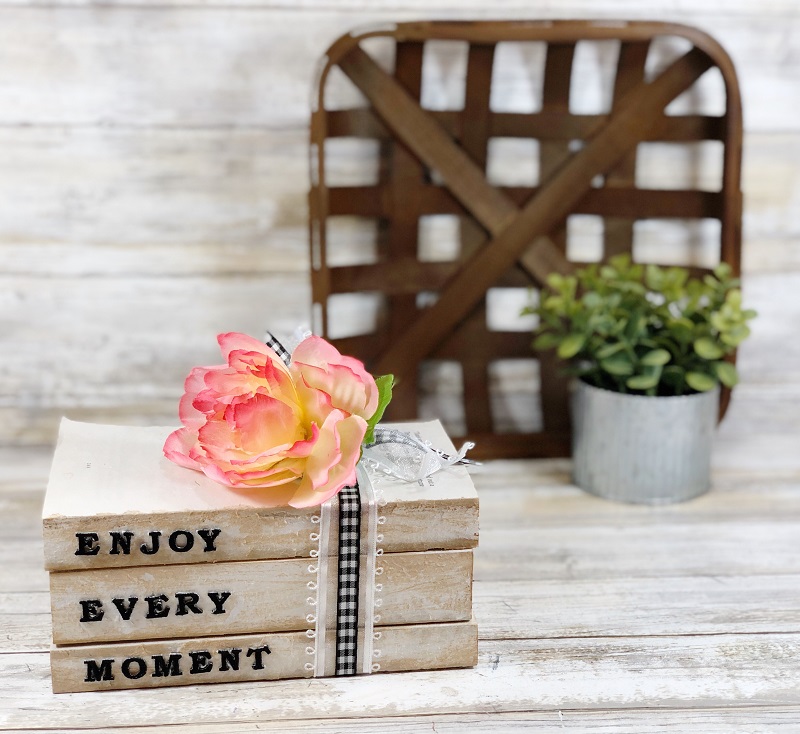
6.  Embellish the DIY Book Stack with several decorative ribbons and a silk flower, using

what you have in your craft stash!

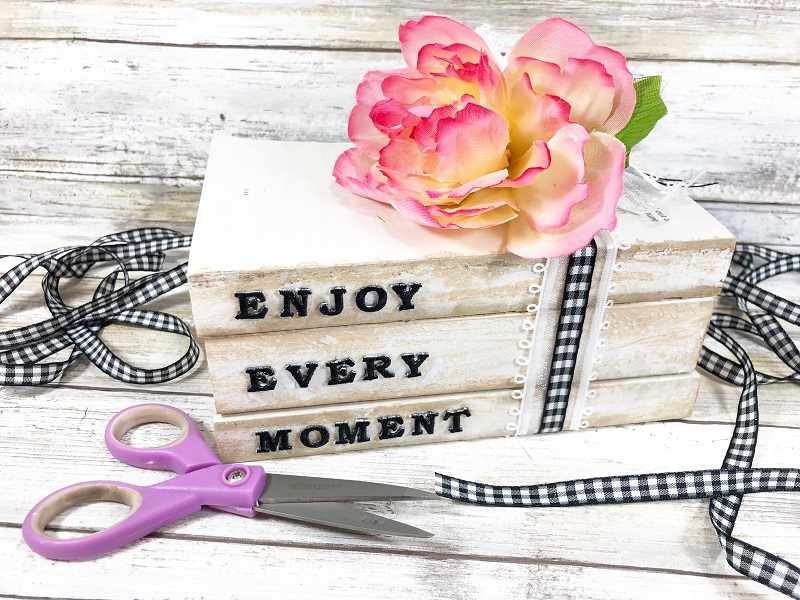
A fun twist would be to add your family or kids' names to the DIY Book Stack with Joy® embroidered letters, the possibilities are endless!

You can find a wide selection of Joy® embroidered iron-on letters and alphabet sheets in different sizes at your local craft stores!

Leave a Reply

Your email address will not be published. Required fields are marked *

Recent Projects

Luck O' the Irish DIY Door Hanger

St. Patrick’s Day is just around the corner!  Celebrate the Luck O' the Irish with this colorful door décor that is a fun alternative to a traditional wreath.  You will need: Joy® Iron On Embroidered Letter sheet - Gold Script Kunin Classics™ Felt 9” x 12” Craft Cuts– Red, Orange, Yellow, Apple Green, Lagoon, Royal Blue, Orchid, Pirate Green, Neon Green, Gold and Goldenrod (one each) Kunin Premium™ Felt 9” x 12” Craft Cuts– White and Black (two each). Expo International – Claudia 2” Fan and Lattice Lace.  Ric Rac assorted Rayon – Red, Orange, Yellow, Green, Light Blue, Royal…

Rustic Happy Fall Y'all Pumpkin Sign

HAPPY FALL Y'ALL! I am always on the look out for cute items that can be upcycled to create one of a kind home decor pieces.  This rustic pallet pumpkin was just calling out to me from the Target dollar spot and with the addition of some Joy® iron-on embroidered letters, it quickly becomes a custom keepsake. Select a combination of white Joy® iron-on embroidered letters to spell out your message. To create the apostrophe, I carefully cut the leg from the capital letter Q with a pair of detail scissors. Place the embroidered letters on an old towel in a cardboard box…

Back to School Welcome Banner

Create a "Back to School" welcome banner for your favorite teacher's classroom! Materials: JOY® Embroidered Letters 9” x 12” sheets of Kunin Classicfelt -Black , Gray, Sandstone, Candy Pink and Gold Craft glue Glitter glue Cardstock Ruler, pencils, scissors 4-foot length of ribbon Instructions: Draw a simple pencil pattern (5 pieces as shown) on cardstock and cut out.   Trace and trim each pattern piece seven times on the appropriate color of felt. Glue the pencil pieces together, overlapping as shown and let dry. 4. Peel back liner paper from the JOY letters and attach to the center of each pencil, spelling…

Scrabble-Inspired Tote Bag

I am all about recycling, but most of the tote bags that the grocery stores sell are not very cute or crafty. So in honor of family game night, I created a Scrabble-inspired bag to tote around town! This project makes the perfect quick and easy handmade gift to create for Mom for Mother's Day! Decide what words you want to spell and how they'll connect, making sure the arrangement will fit on the front of your tote bag. Draw a grid of square tiles on graph paper to fit each of your letters. I selected the Joy 1.5" Cooper Style…

Happiness Pillow

Joy® Iron-on embroidered letters in white are great for creating any color you can imagine! You can use dye, markers and even acrylic paint! To Make this Happiness Pillow you'll need: Joy® Embroidered Iron-on Letters - Letter Shop White  Acrylic Paint and Paintbrush NEW Joy® Iron-on Embroidered Flower Appliqué    Canvas Pillow Blank Pillow Form or Polyfil Iron Instructions: 1. Paint each letter to create a rainbow of H-A-P-P-I-N-E-S-S.  Set aside and let dry. 2.  Insert cardboard into pillow blank then paint the pillow with white and light blue paint.  Let dry. 3. Set iron on cotton setting; approx. 350 degrees,…
closearrow-circle-o-downtagtagsminus-circlefacebook-squaretruckpinterest-squareinstagrammenu
0
    0
    Shopping Cart
    Your cart is emptyReturn to Shop