FREE Standard Shipping with $50 Order
|
Minimum Order is $15
10% Discount on $300 Order
|
25% Discount on $600 Order

It's a Sugar Plum Christmas≈

Julie McGuffee
|
December 12, 2019

Christmas is a time for sugar plums and candy!

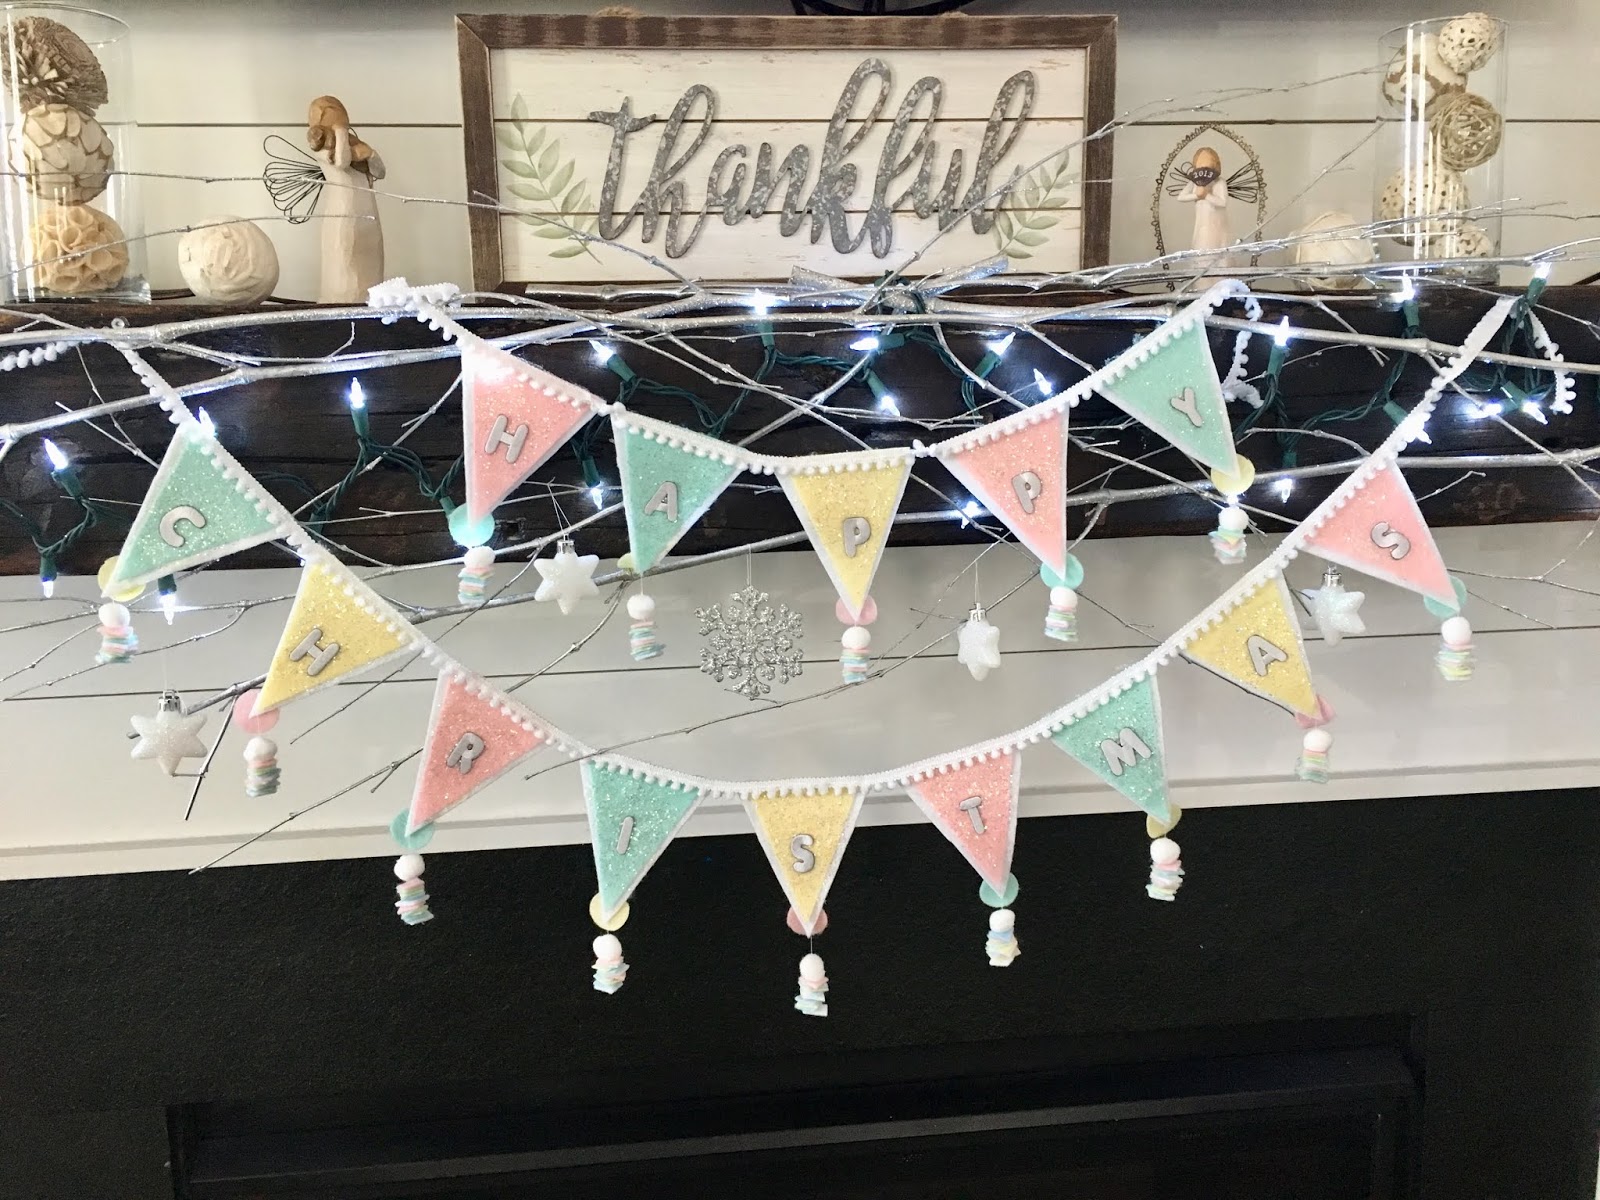
When visions of sugar plums dance in your head….. it’s almost Christmas, so let's make a sugar plum garland!
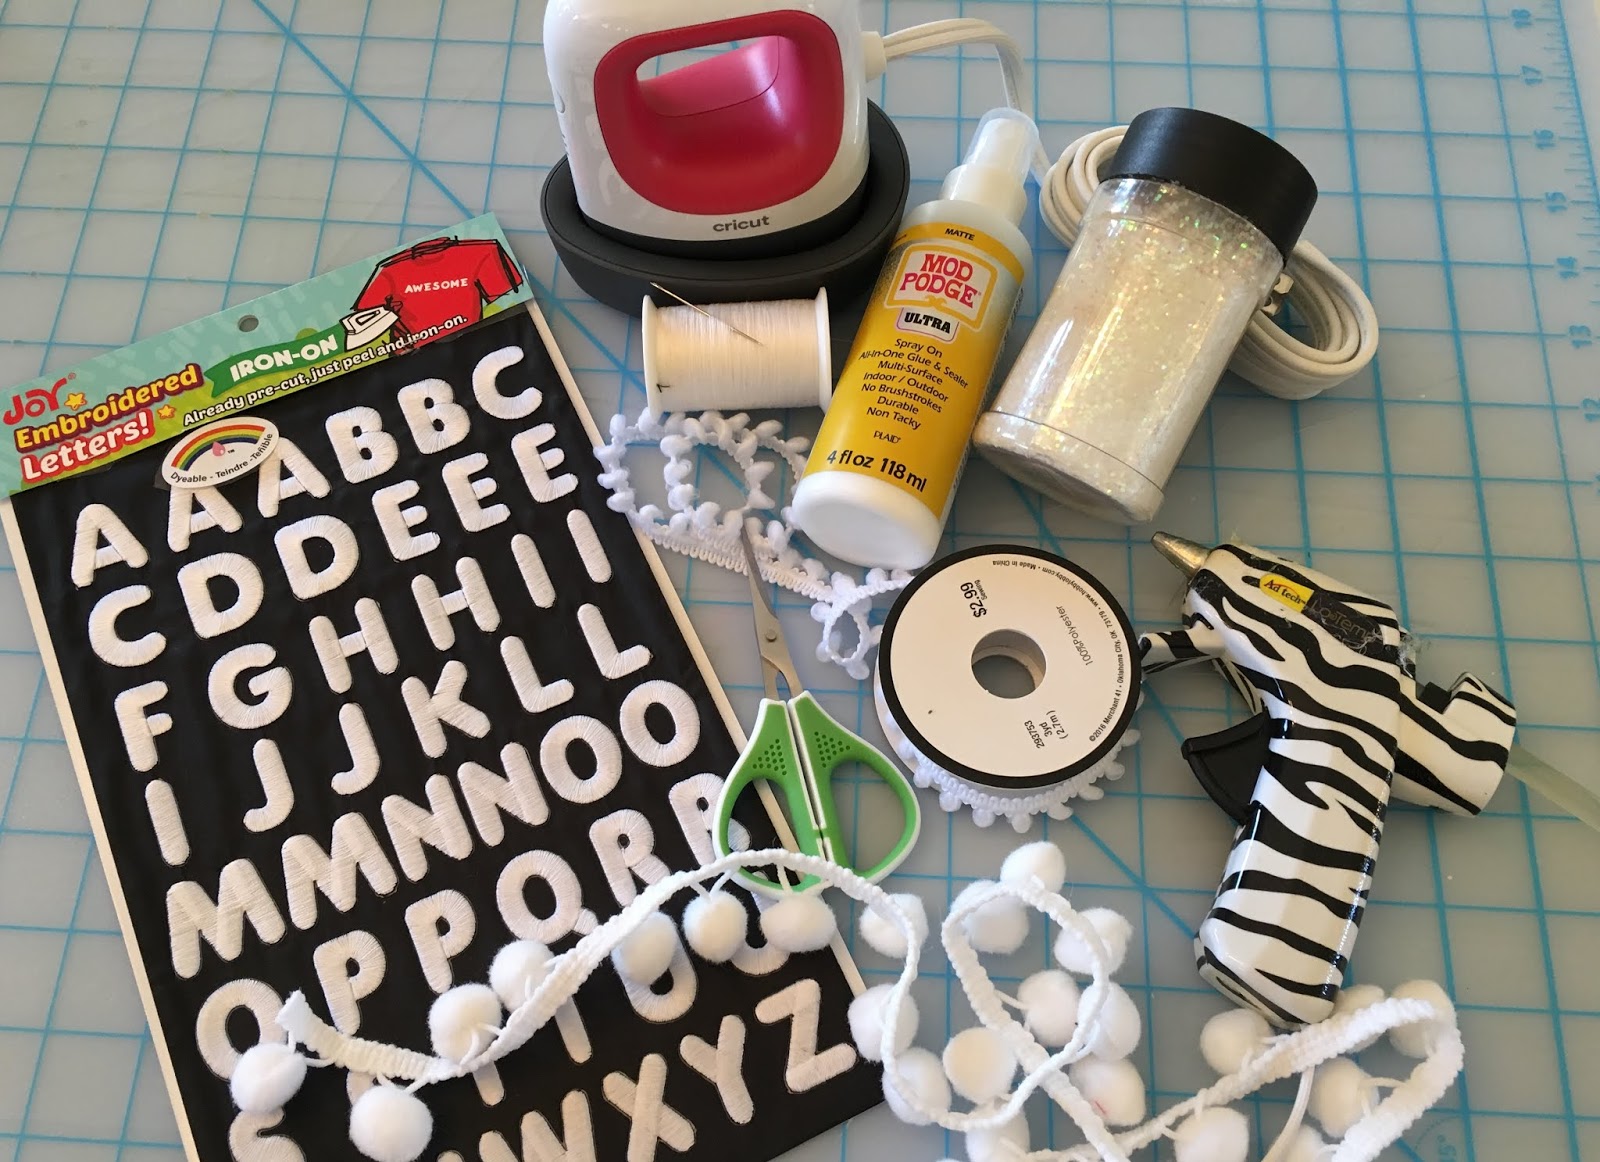
You will need:

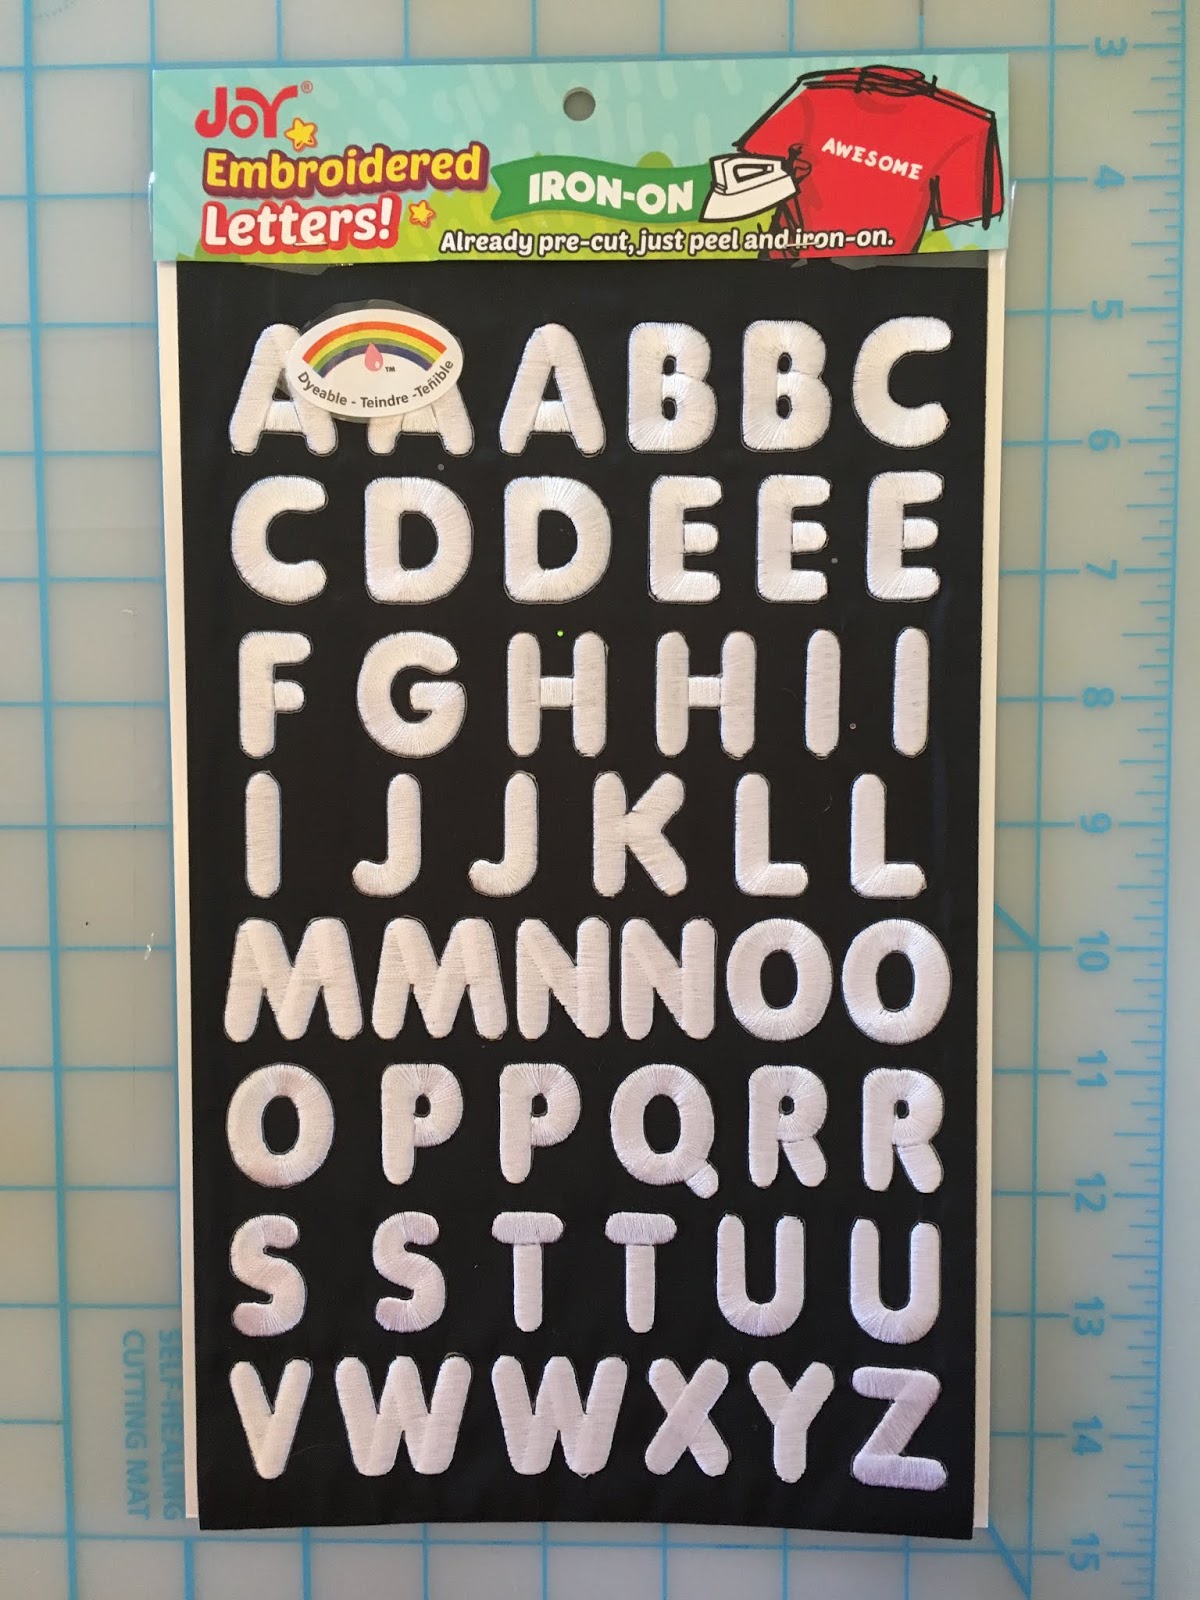
Joy® Embroidered iron-on letter sheet – White

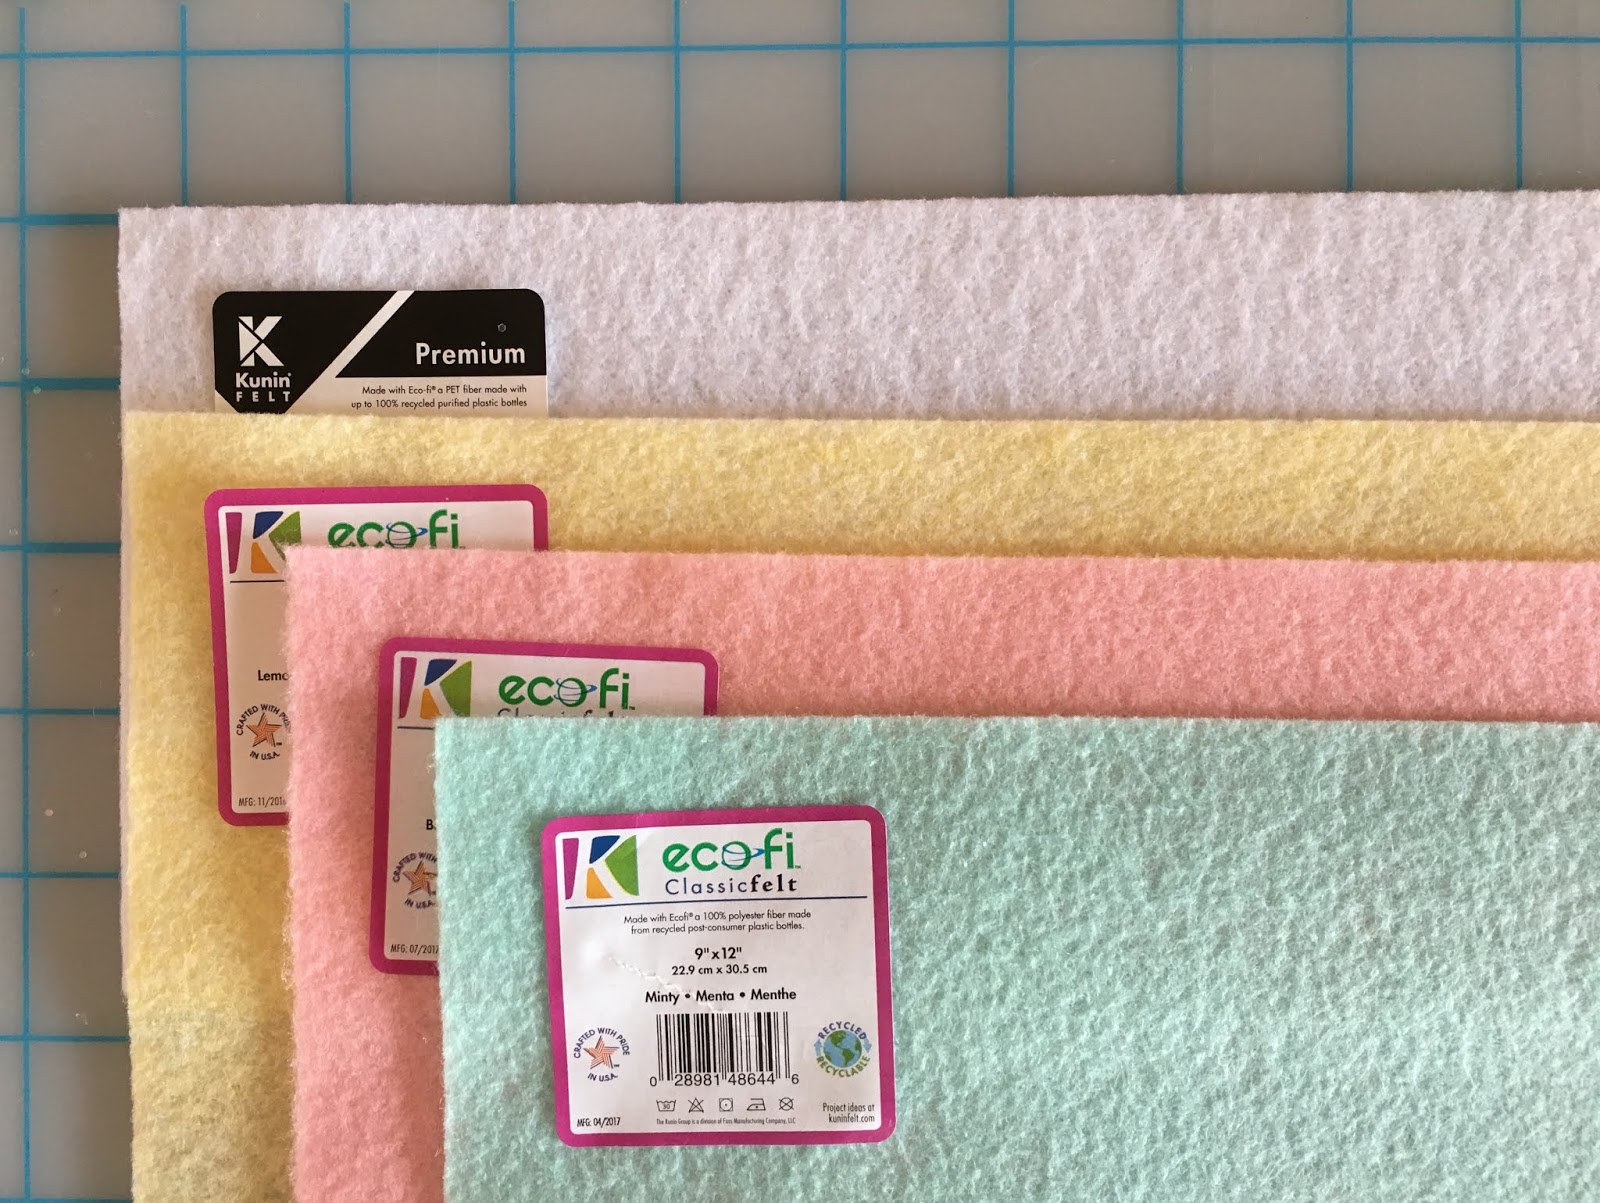
Kunin® Classic™ 9” x 12” Craft Cuts – 1 each Lemon Frost, Baby Pink & Minty Kunin® Premium 9” x 12” Craft Cuts – White

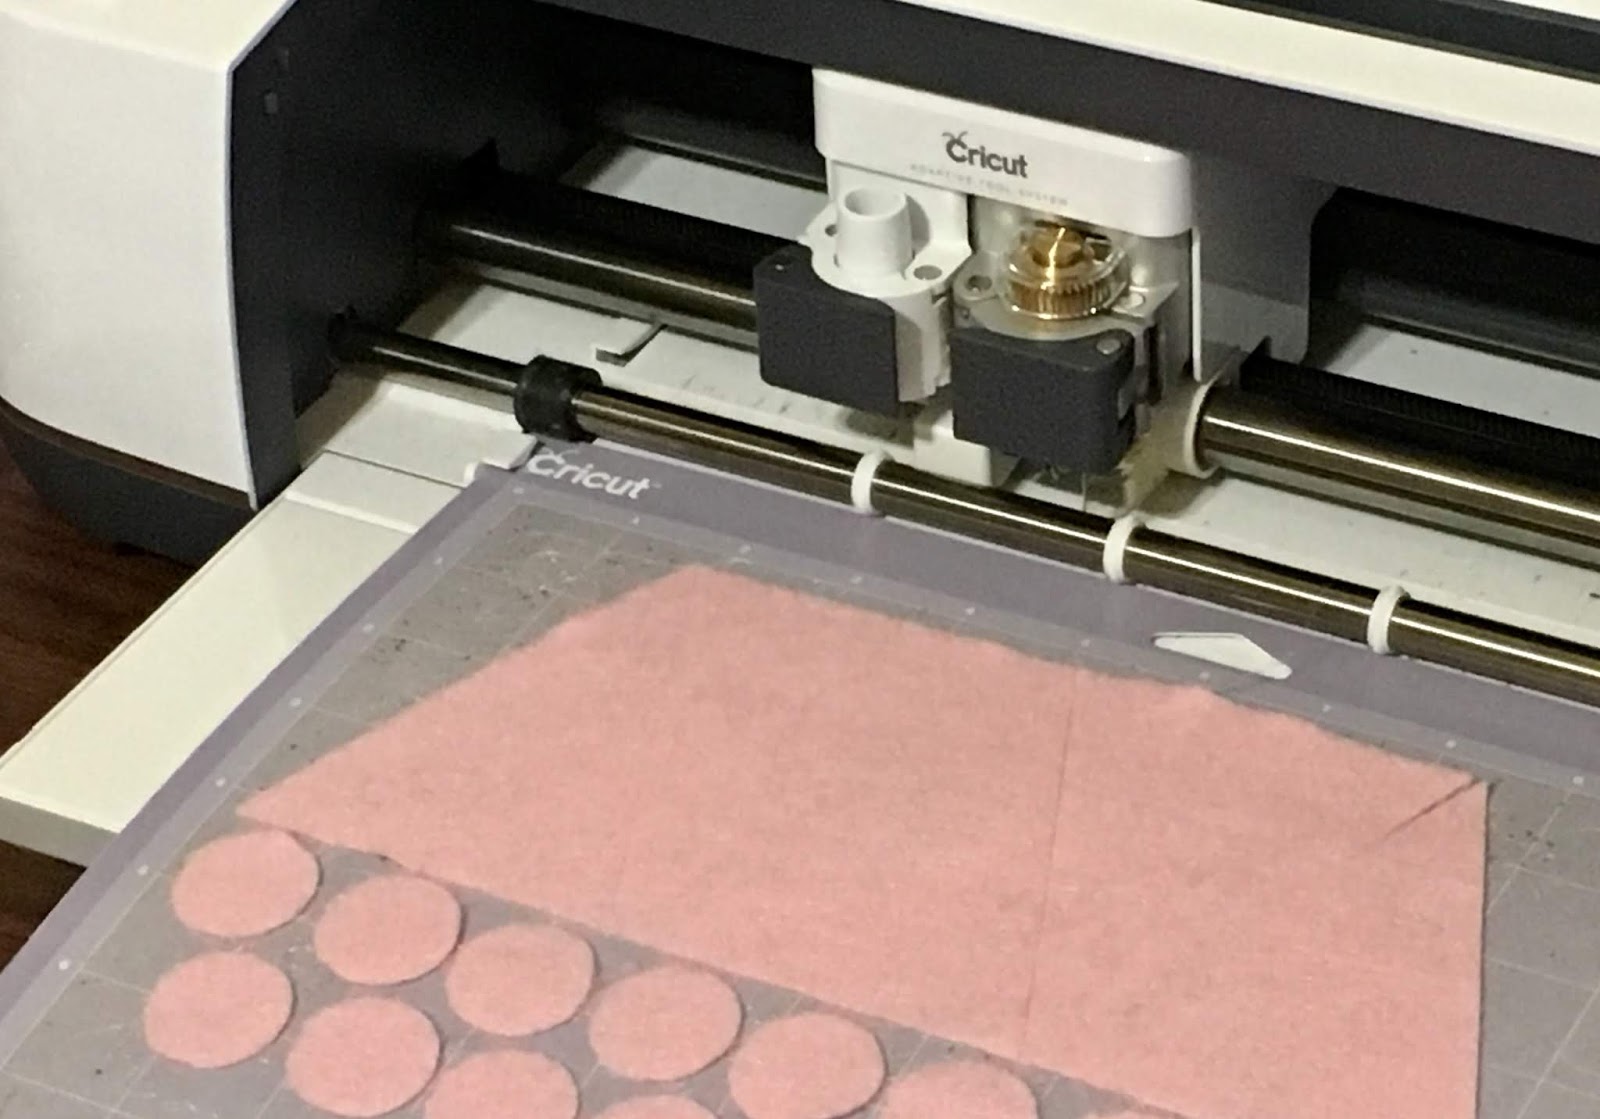
Cricut® Maker™ with Rotary blade

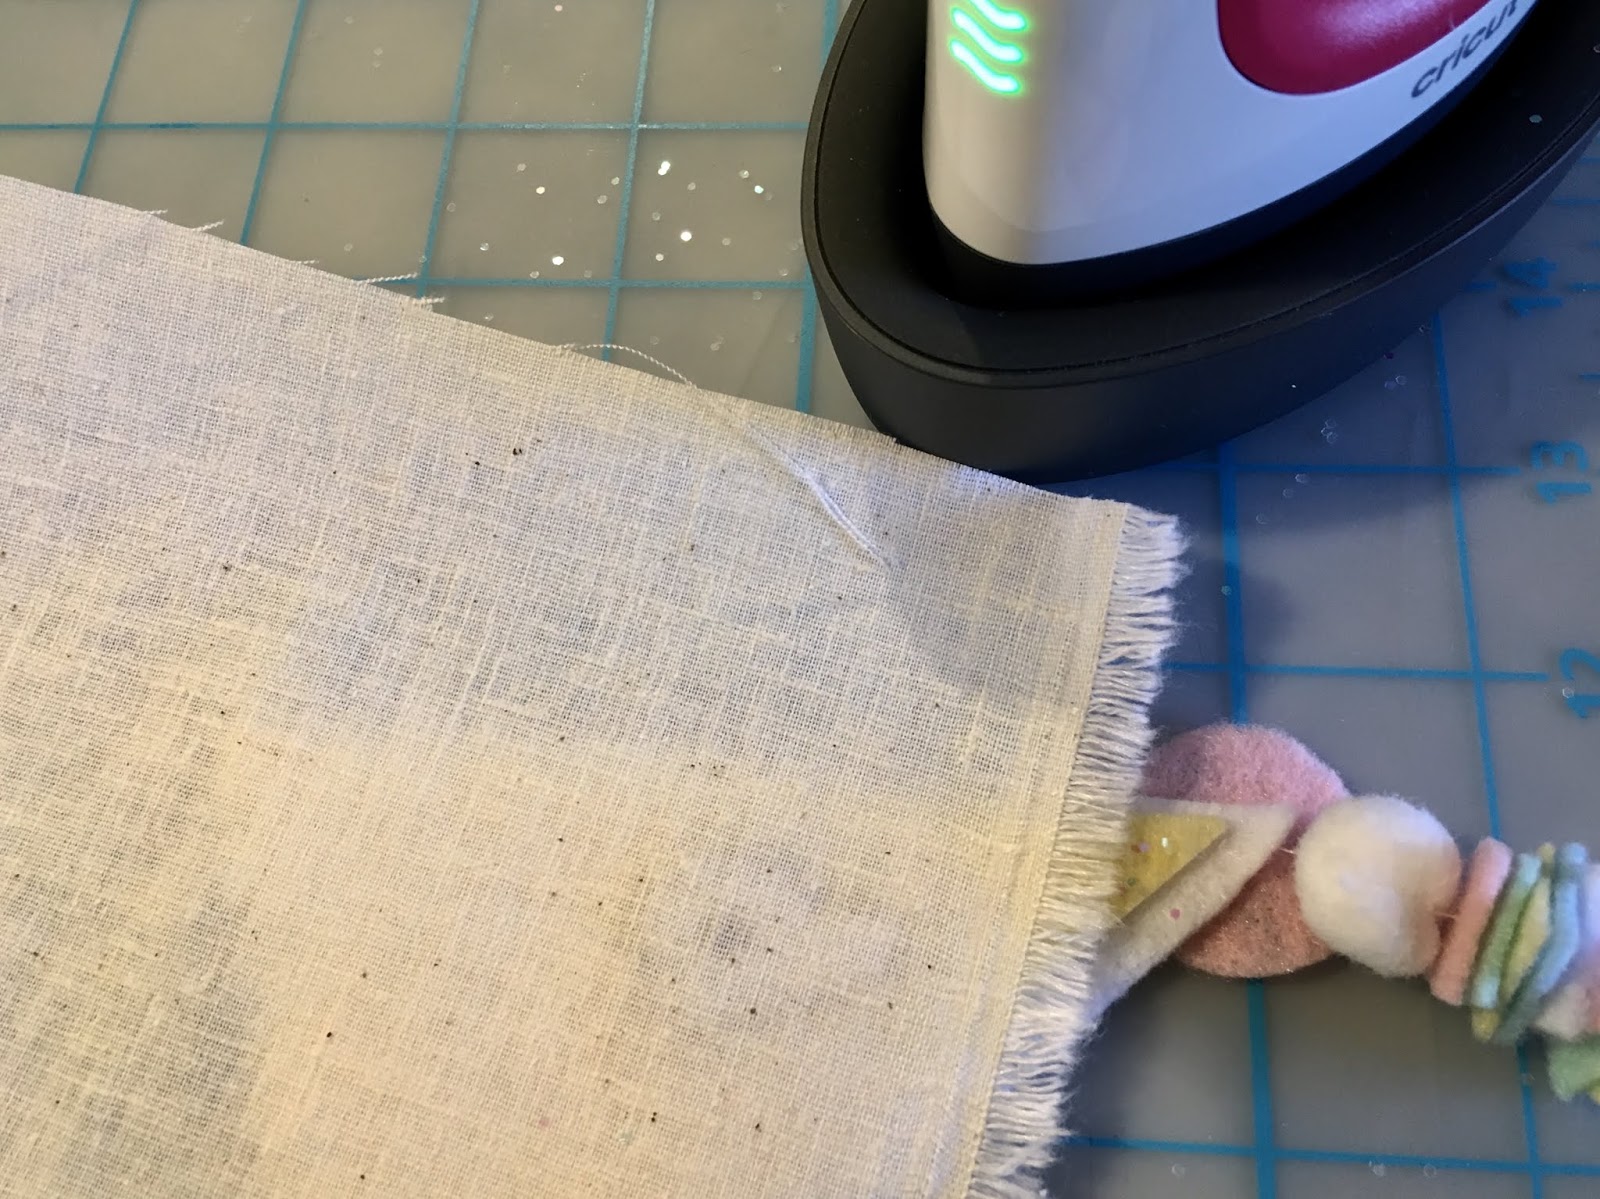
    Cricut® Easy Press Mini, or iron

      Mod Podge® Ultra – Matte

        Crystal glitter

          Glue gun & lo-temp glue sticks

            Mini pom-pom trim – 3 yd spool

              Bag of small craft pom-poms, or cut from pom-pom trim

                Tacky glue or large, extra strength glue stick

                  Needle and thread

                    Scissors & wax paper

                    Instructions:

                    1. Using the “shapes” feature in Cricut Design Space, create:

                    ·       4” x 3” triangles - 5

                    ·       ½” circles - 15 

                    ·       ½” x 11” rectangles  - 3

                    2. Cut one set of shapes from each piece of felt - Lemon FrostBaby Pink and Minty felt as follows: 

                                Place the felt horizontally across the top of the mat. Insert “Felt” in the “Browse all Materials” tab, then select “Felt Acrylic”.  Use the rotary blade to cut. After cutting is complete, pull the felt surrounding the shape from the mat, then carefully lift the shapes. Increase the size of the triangles to 4 ½” x 3 ½” then cut the shapes from white felt.

                    3. Place the colored triangles onto a piece of wax paper.  Spray with Mod Podge Ultra then sprinkle liberally with glitter. Allow to dry then shake off excess glitter.

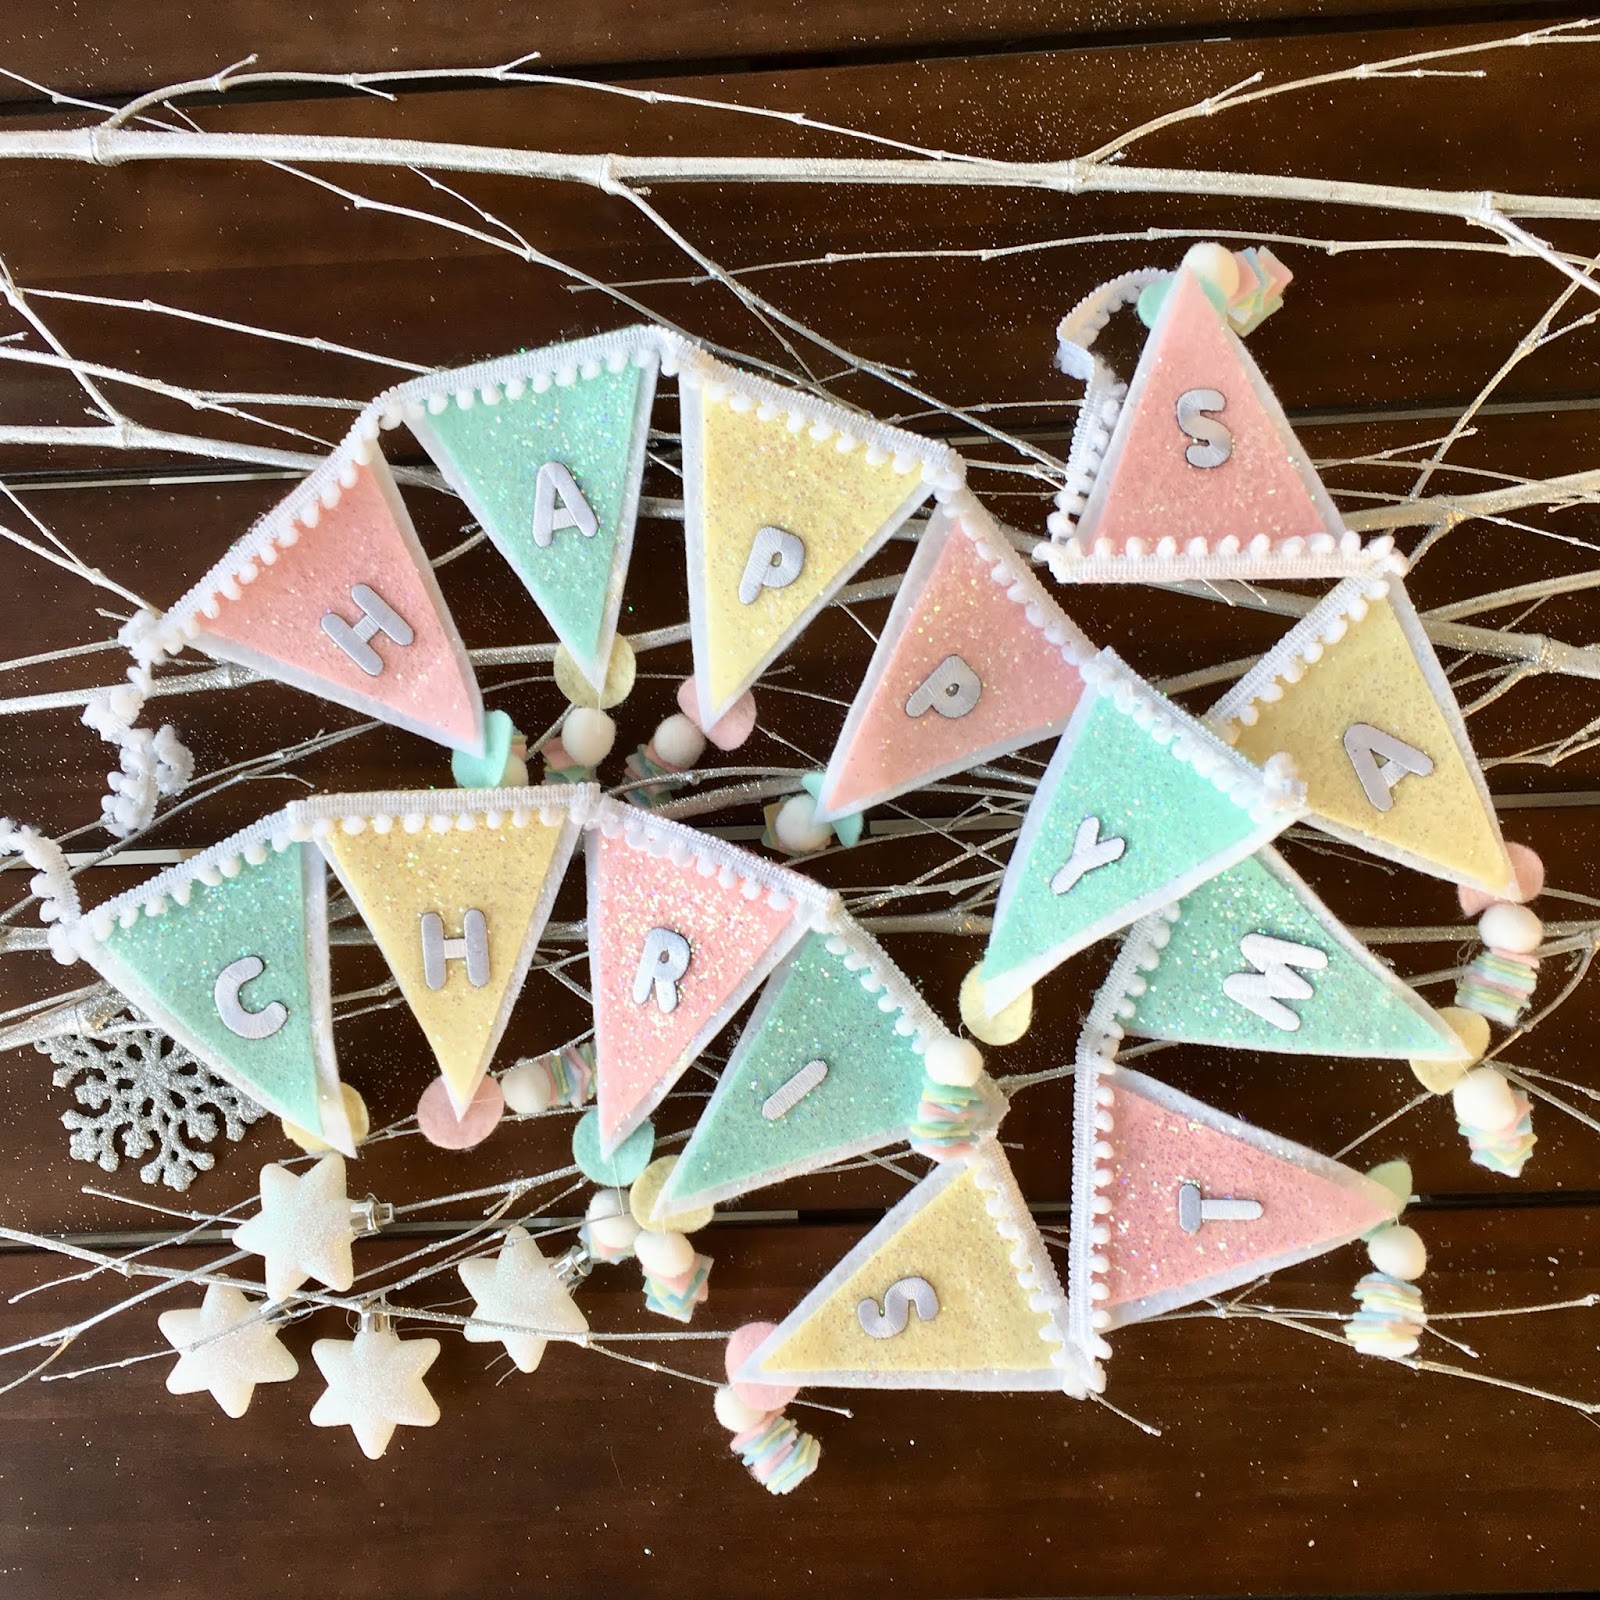
                    4. Cover one side of each white felt triangle with glue then, with top edges aligned, center a colored triangle on top.  Press firmly in place.  Tip: Use a craft stick to spread an even layer of tacky glue on the felt, or use a glue stick. Premium felt is stiffer and an extra strength glue stick also works extremely well. *HAPPY (or MERRY) CHRISTMAS requires 14 pennants.

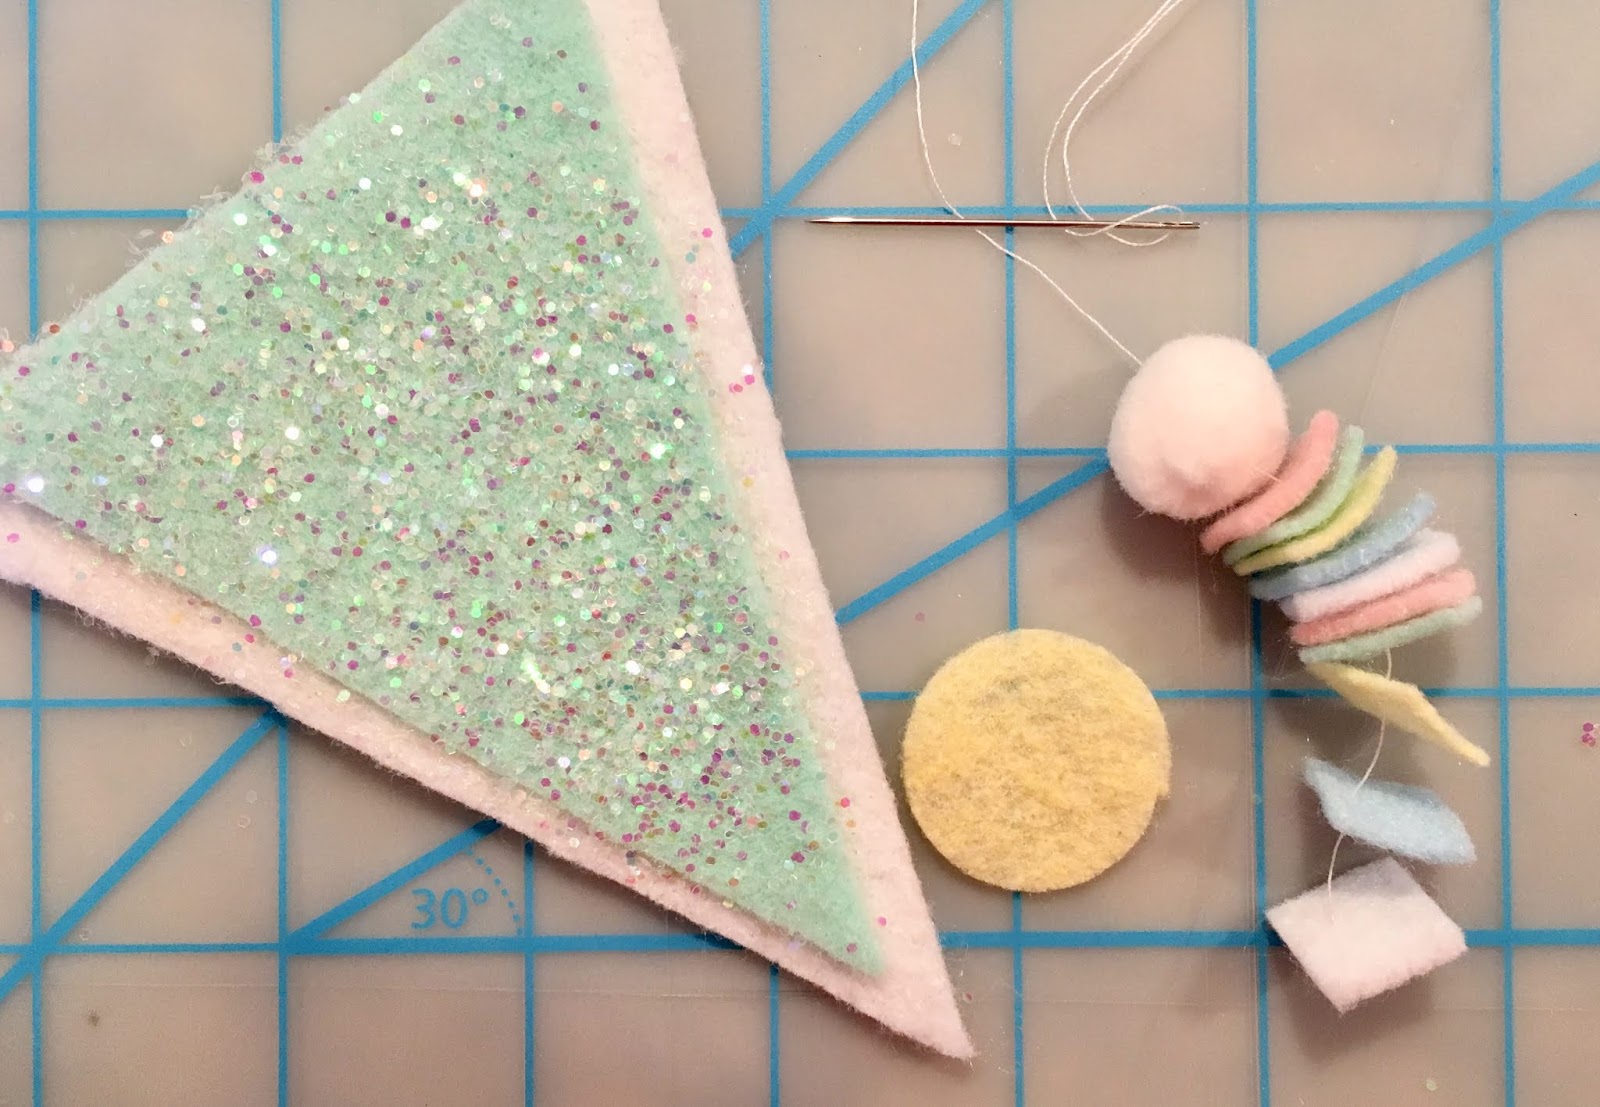
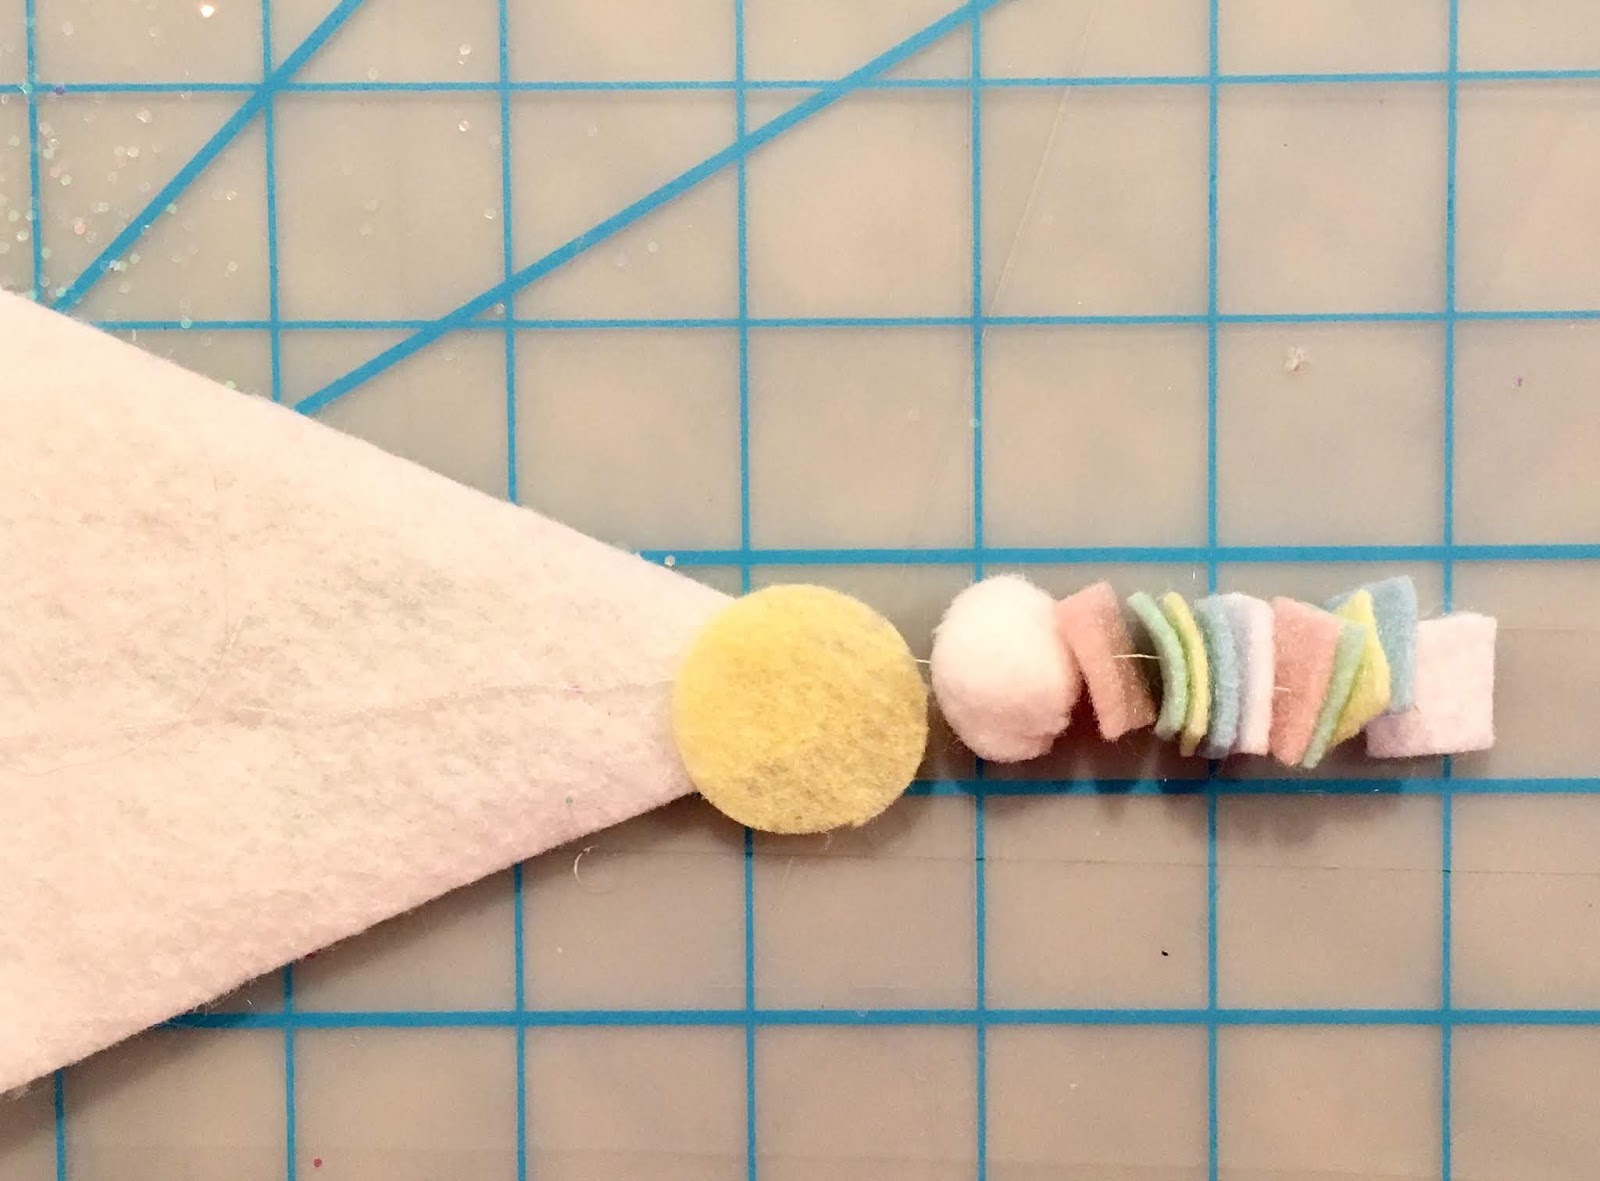
                    5. Cut the colored felt strips into ½” squares. For 14 pennants you will need 28 squares of each color. Alternating colors, loosely thread the squares, two of each color and one pom-pom onto a length of thread.  Stitch the end of the thread to the tip of the pennant to secure then glue a felt circle over the end at the back. Use a different color felt than the felt on the pennant for contrast.

                    6. Remove the letters needed for the garland from the embroidered letter sheet. Alternating pennant colors, iron one letter to each pennant. Position letters right side up, cover with a pressing cloth then iron in place. 

                    7. Place the pennants in order on a flat surface then use lo-temp glue to adhere the mini pom-pom trim across the top of all the pennants.  Leave a small space between each one and make sure to add extra trim at each end to hang your garland!

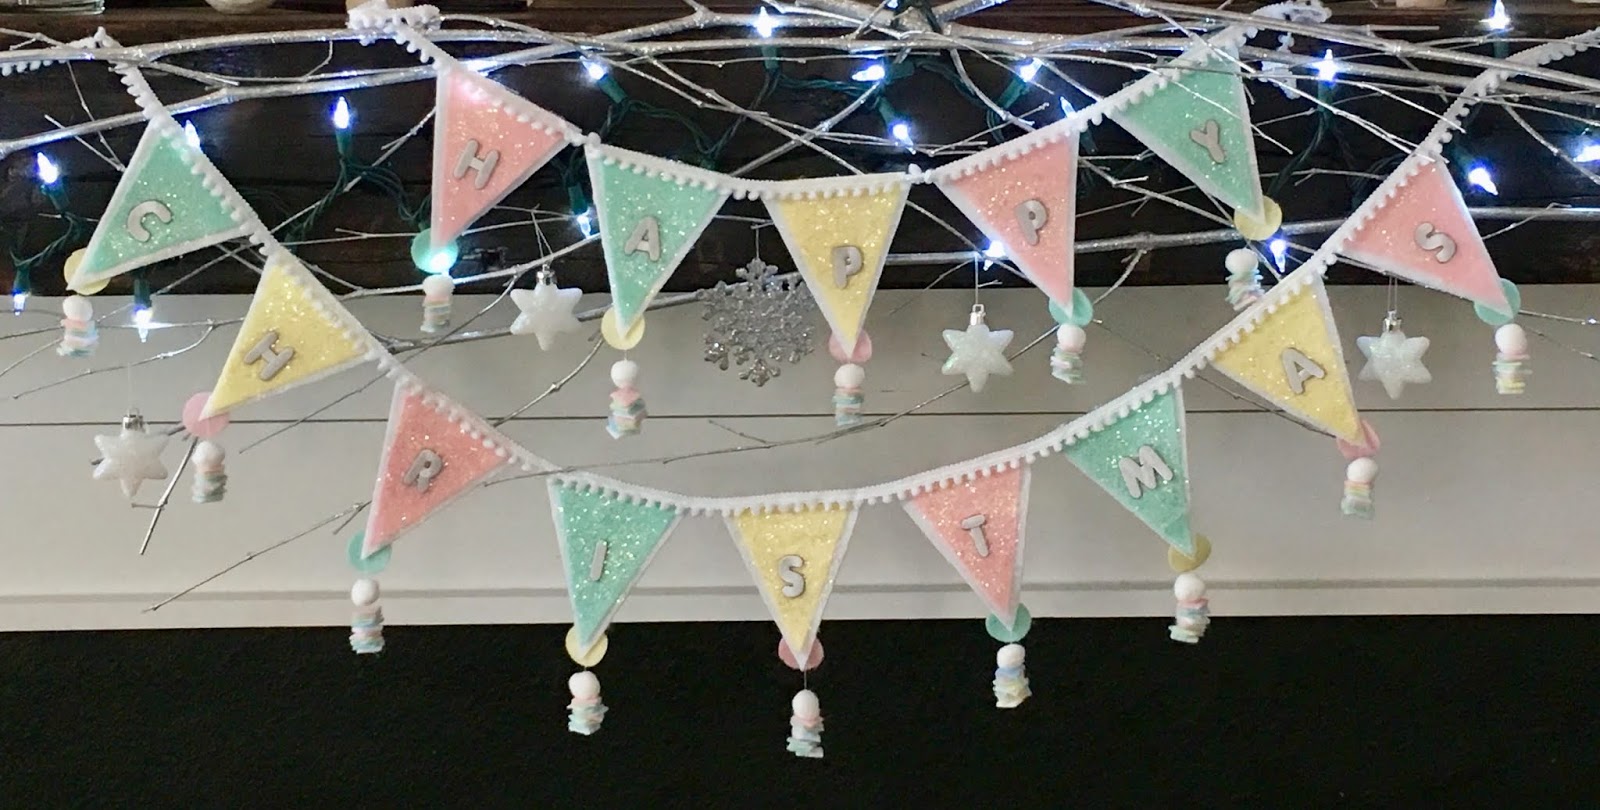
                     HAVE YOURSELVES A VERY MERRY CHRISTMAS!

                     Joy® Embroidered Iron-on letters are available in a variety of fonts, sizes and colors ready for all  your personalizing needs!

                    Leave a Reply

                    Your email address will not be published. Required fields are marked *

                    Recent Projects

                    Luck O' the Irish DIY Door Hanger

                    St. Patrick’s Day is just around the corner!  Celebrate the Luck O' the Irish with this colorful door décor that is a fun alternative to a traditional wreath.  You will need: Joy® Iron On Embroidered Letter sheet - Gold Script Kunin Classics™ Felt 9” x 12” Craft Cuts– Red, Orange, Yellow, Apple Green, Lagoon, Royal Blue, Orchid, Pirate Green, Neon Green, Gold and Goldenrod (one each) Kunin Premium™ Felt 9” x 12” Craft Cuts– White and Black (two each). Expo International – Claudia 2” Fan and Lattice Lace.  Ric Rac assorted Rayon – Red, Orange, Yellow, Green, Light Blue, Royal…

                    Rustic Happy Fall Y'all Pumpkin Sign

                    HAPPY FALL Y'ALL! I am always on the look out for cute items that can be upcycled to create one of a kind home decor pieces.  This rustic pallet pumpkin was just calling out to me from the Target dollar spot and with the addition of some Joy® iron-on embroidered letters, it quickly becomes a custom keepsake. Select a combination of white Joy® iron-on embroidered letters to spell out your message. To create the apostrophe, I carefully cut the leg from the capital letter Q with a pair of detail scissors. Place the embroidered letters on an old towel in a cardboard box…

                    Back to School Welcome Banner

                    Create a "Back to School" welcome banner for your favorite teacher's classroom! Materials: JOY® Embroidered Letters 9” x 12” sheets of Kunin Classicfelt -Black , Gray, Sandstone, Candy Pink and Gold Craft glue Glitter glue Cardstock Ruler, pencils, scissors 4-foot length of ribbon Instructions: Draw a simple pencil pattern (5 pieces as shown) on cardstock and cut out.   Trace and trim each pattern piece seven times on the appropriate color of felt. Glue the pencil pieces together, overlapping as shown and let dry. 4. Peel back liner paper from the JOY letters and attach to the center of each pencil, spelling…

                    Scrabble-Inspired Tote Bag

                    I am all about recycling, but most of the tote bags that the grocery stores sell are not very cute or crafty. So in honor of family game night, I created a Scrabble-inspired bag to tote around town! This project makes the perfect quick and easy handmade gift to create for Mom for Mother's Day! Decide what words you want to spell and how they'll connect, making sure the arrangement will fit on the front of your tote bag. Draw a grid of square tiles on graph paper to fit each of your letters. I selected the Joy 1.5" Cooper Style…

                    Happiness Pillow

                    Joy® Iron-on embroidered letters in white are great for creating any color you can imagine! You can use dye, markers and even acrylic paint! To Make this Happiness Pillow you'll need: Joy® Embroidered Iron-on Letters - Letter Shop White  Acrylic Paint and Paintbrush NEW Joy® Iron-on Embroidered Flower Appliqué    Canvas Pillow Blank Pillow Form or Polyfil Iron Instructions: 1. Paint each letter to create a rainbow of H-A-P-P-I-N-E-S-S.  Set aside and let dry. 2.  Insert cardboard into pillow blank then paint the pillow with white and light blue paint.  Let dry. 3. Set iron on cotton setting; approx. 350 degrees,…
                    closearrow-circle-o-downtagtagsminus-circlefacebook-squaretruckpinterest-squareinstagrammenu
                    0
                      0
                      Shopping Cart
                      Your cart is emptyReturn to Shop