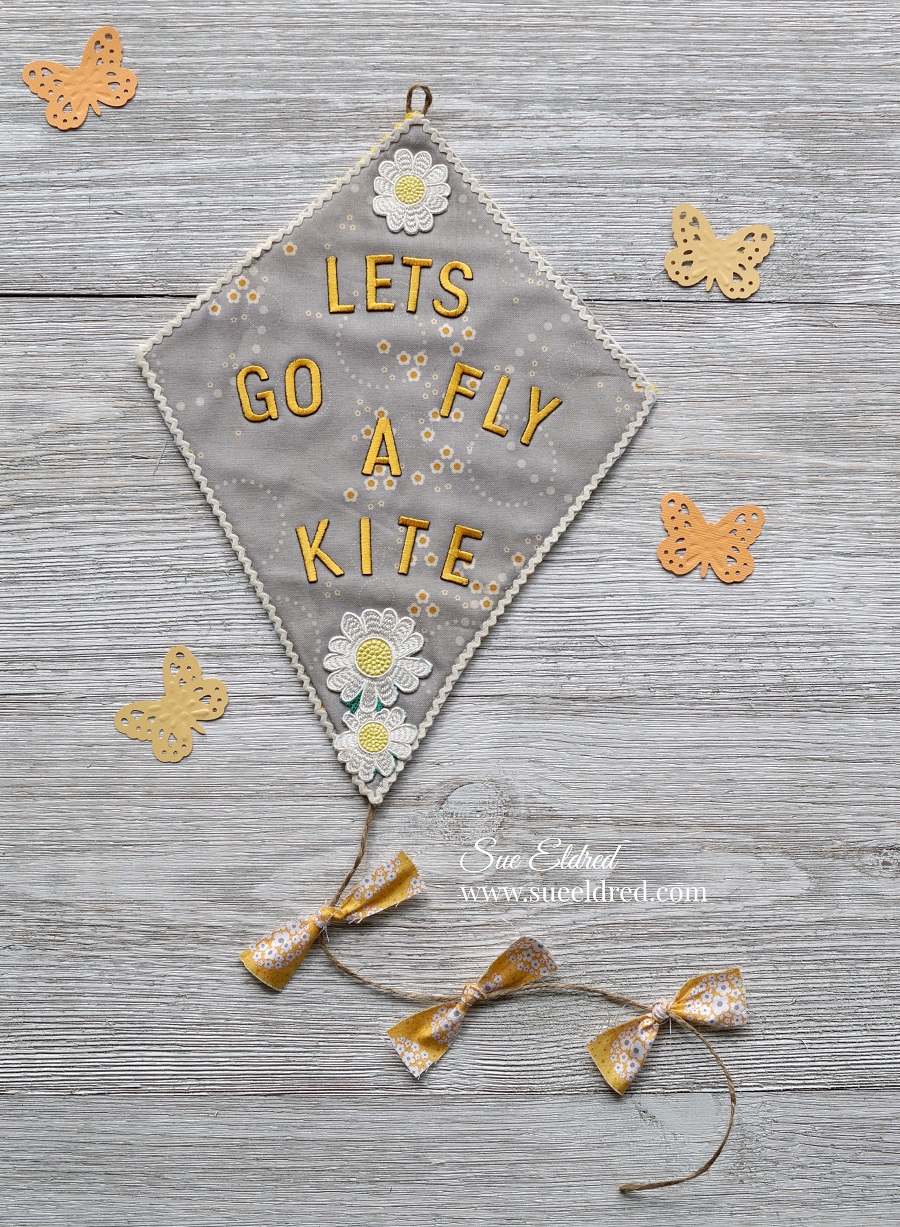
FREE Standard Shipping with $50 Order
|
Minimum Order is $15
10% Discount on $300 Order
|
25% Discount on $600 Order

Kite Wall Hanging

Sue Eldred
|
March 14, 2019

Are you ready for Spring?  Then let's go fly a kite! 

It's time to put away the winter décor and celebrate the beautiful sunny skies of Spring with with just enough breeze to fly a kite, or at least make a fabric one to decorate the wall! You will need:

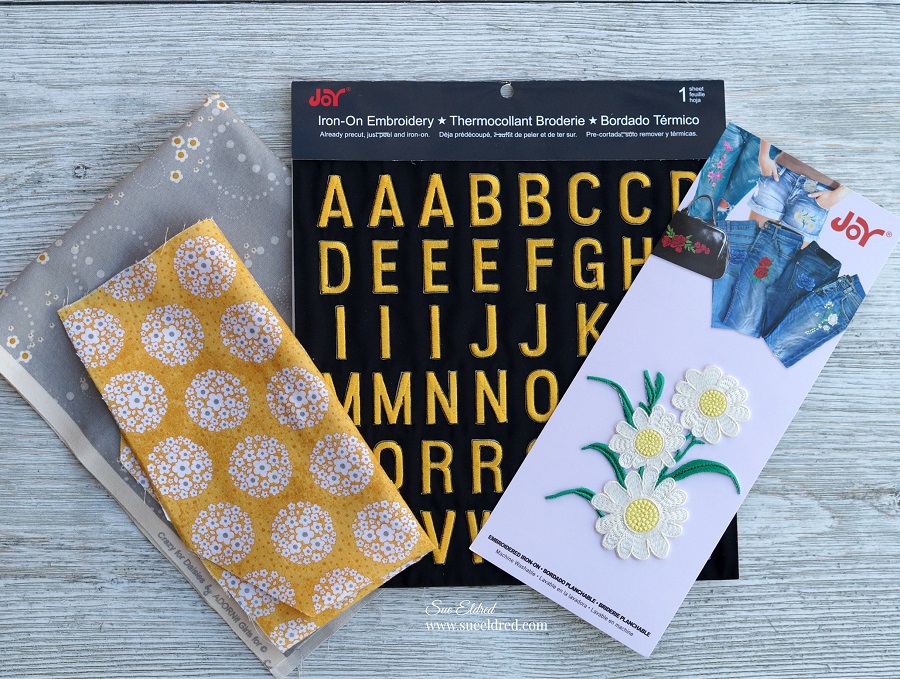
  • Joy® iron-on embroidered letter sheet
  • Joy® iron-on embroidered floral appliqué
  • 9" x 12" white felt
  • 9" x 12" cotton fabric - 2 pieces

  • 12" x 12" White Cardstock
  • Scissors
  • Ric Rac trim
  • Twine
  • Fabri Tac Glue
  • Sewing Machine
  • Iron

Instructions:

1. Create a kite pattern:  

Cut the white cardstock to 9" x 12" then fold in half lengthways.  On the two long sides make a mark at 4".  For the top of the kite, draw a line from the top middle fold to the 4" mark on each side.  For the bottom of the kite, draw a line from the 4" mark to the bottom middle folds.

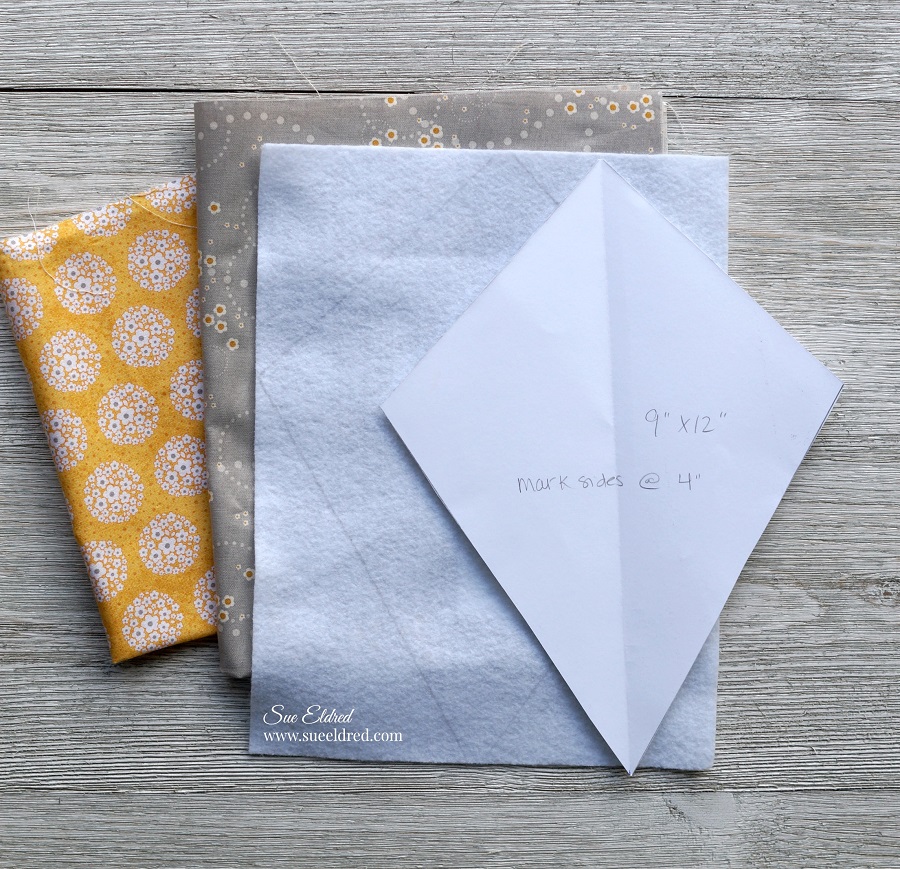
2. Trace then cut out the kite pattern on the back of both of the printed fabrics and the white felt.

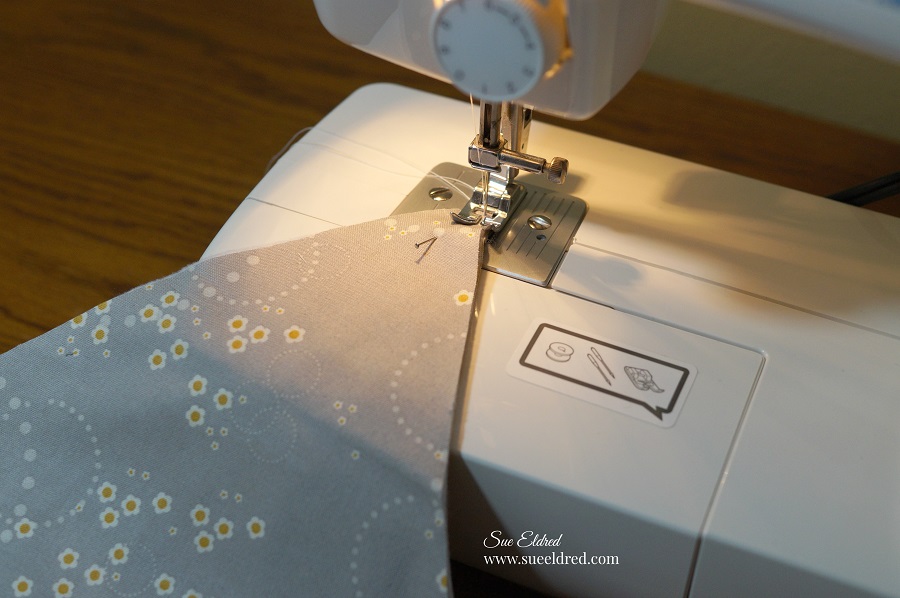
3. Sandwich the white felt between the two patterned pieces.  Pin in place then top stitch around the kite. 4. Remove the letters from the letter sheet and arrange the words "LETS GO FLY A KITE" onto the front of the kite with the shiny side down. 5. Following directions on the packaging,  cover with a soft clean cloth and iron on cotton setting for 30 seconds.  Turn kite over and repeat for an additional 30 seconds.

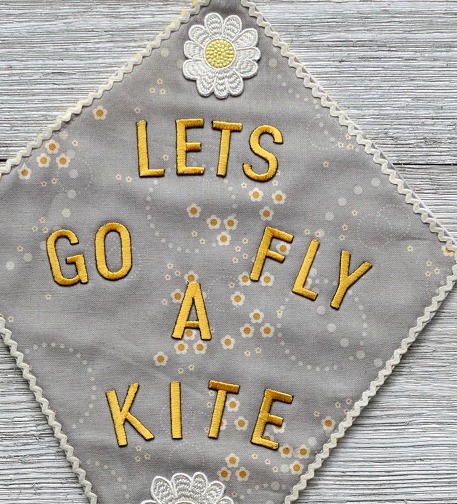
6. Cut the top flower and leaves off the floral appliqué. Arrange the flowers on the kite then iron in place. 7. Glue ric rac trim around the edge of the kite to finish.

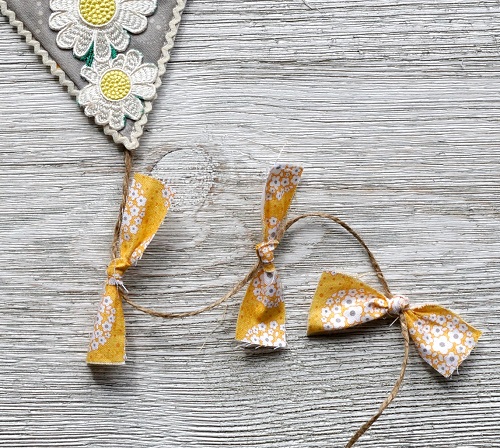
8. To make the tail, cut strips of fabric and tie onto a 14" piece of twine.  Glue one end of the twine to the back of the kite.  Make a small loop with a second piece of twine and glue to the top of the kite.

Look for Joy® iron-on embroidered letters and floral appliqués at your local craft store.

One comment on “Kite Wall Hanging”

Leave a Reply

Your email address will not be published. Required fields are marked *

Recent Projects

Luck O' the Irish DIY Door Hanger

St. Patrick’s Day is just around the corner!  Celebrate the Luck O' the Irish with this colorful door décor that is a fun alternative to a traditional wreath.  You will need: Joy® Iron On Embroidered Letter sheet - Gold Script Kunin Classics™ Felt 9” x 12” Craft Cuts– Red, Orange, Yellow, Apple Green, Lagoon, Royal Blue, Orchid, Pirate Green, Neon Green, Gold and Goldenrod (one each) Kunin Premium™ Felt 9” x 12” Craft Cuts– White and Black (two each). Expo International – Claudia 2” Fan and Lattice Lace.  Ric Rac assorted Rayon – Red, Orange, Yellow, Green, Light Blue, Royal…

Rustic Happy Fall Y'all Pumpkin Sign

HAPPY FALL Y'ALL! I am always on the look out for cute items that can be upcycled to create one of a kind home decor pieces.  This rustic pallet pumpkin was just calling out to me from the Target dollar spot and with the addition of some Joy® iron-on embroidered letters, it quickly becomes a custom keepsake. Select a combination of white Joy® iron-on embroidered letters to spell out your message. To create the apostrophe, I carefully cut the leg from the capital letter Q with a pair of detail scissors. Place the embroidered letters on an old towel in a cardboard box…

Back to School Welcome Banner

Create a "Back to School" welcome banner for your favorite teacher's classroom! Materials: JOY® Embroidered Letters 9” x 12” sheets of Kunin Classicfelt -Black , Gray, Sandstone, Candy Pink and Gold Craft glue Glitter glue Cardstock Ruler, pencils, scissors 4-foot length of ribbon Instructions: Draw a simple pencil pattern (5 pieces as shown) on cardstock and cut out.   Trace and trim each pattern piece seven times on the appropriate color of felt. Glue the pencil pieces together, overlapping as shown and let dry. 4. Peel back liner paper from the JOY letters and attach to the center of each pencil, spelling…

Scrabble-Inspired Tote Bag

I am all about recycling, but most of the tote bags that the grocery stores sell are not very cute or crafty. So in honor of family game night, I created a Scrabble-inspired bag to tote around town! This project makes the perfect quick and easy handmade gift to create for Mom for Mother's Day! Decide what words you want to spell and how they'll connect, making sure the arrangement will fit on the front of your tote bag. Draw a grid of square tiles on graph paper to fit each of your letters. I selected the Joy 1.5" Cooper Style…

Happiness Pillow

Joy® Iron-on embroidered letters in white are great for creating any color you can imagine! You can use dye, markers and even acrylic paint! To Make this Happiness Pillow you'll need: Joy® Embroidered Iron-on Letters - Letter Shop White  Acrylic Paint and Paintbrush NEW Joy® Iron-on Embroidered Flower Appliqué    Canvas Pillow Blank Pillow Form or Polyfil Iron Instructions: 1. Paint each letter to create a rainbow of H-A-P-P-I-N-E-S-S.  Set aside and let dry. 2.  Insert cardboard into pillow blank then paint the pillow with white and light blue paint.  Let dry. 3. Set iron on cotton setting; approx. 350 degrees,…
closearrow-circle-o-downtagtagsminus-circlefacebook-squaretruckpinterest-squareinstagrammenu
0
    0
    Shopping Cart
    Your cart is emptyReturn to Shop