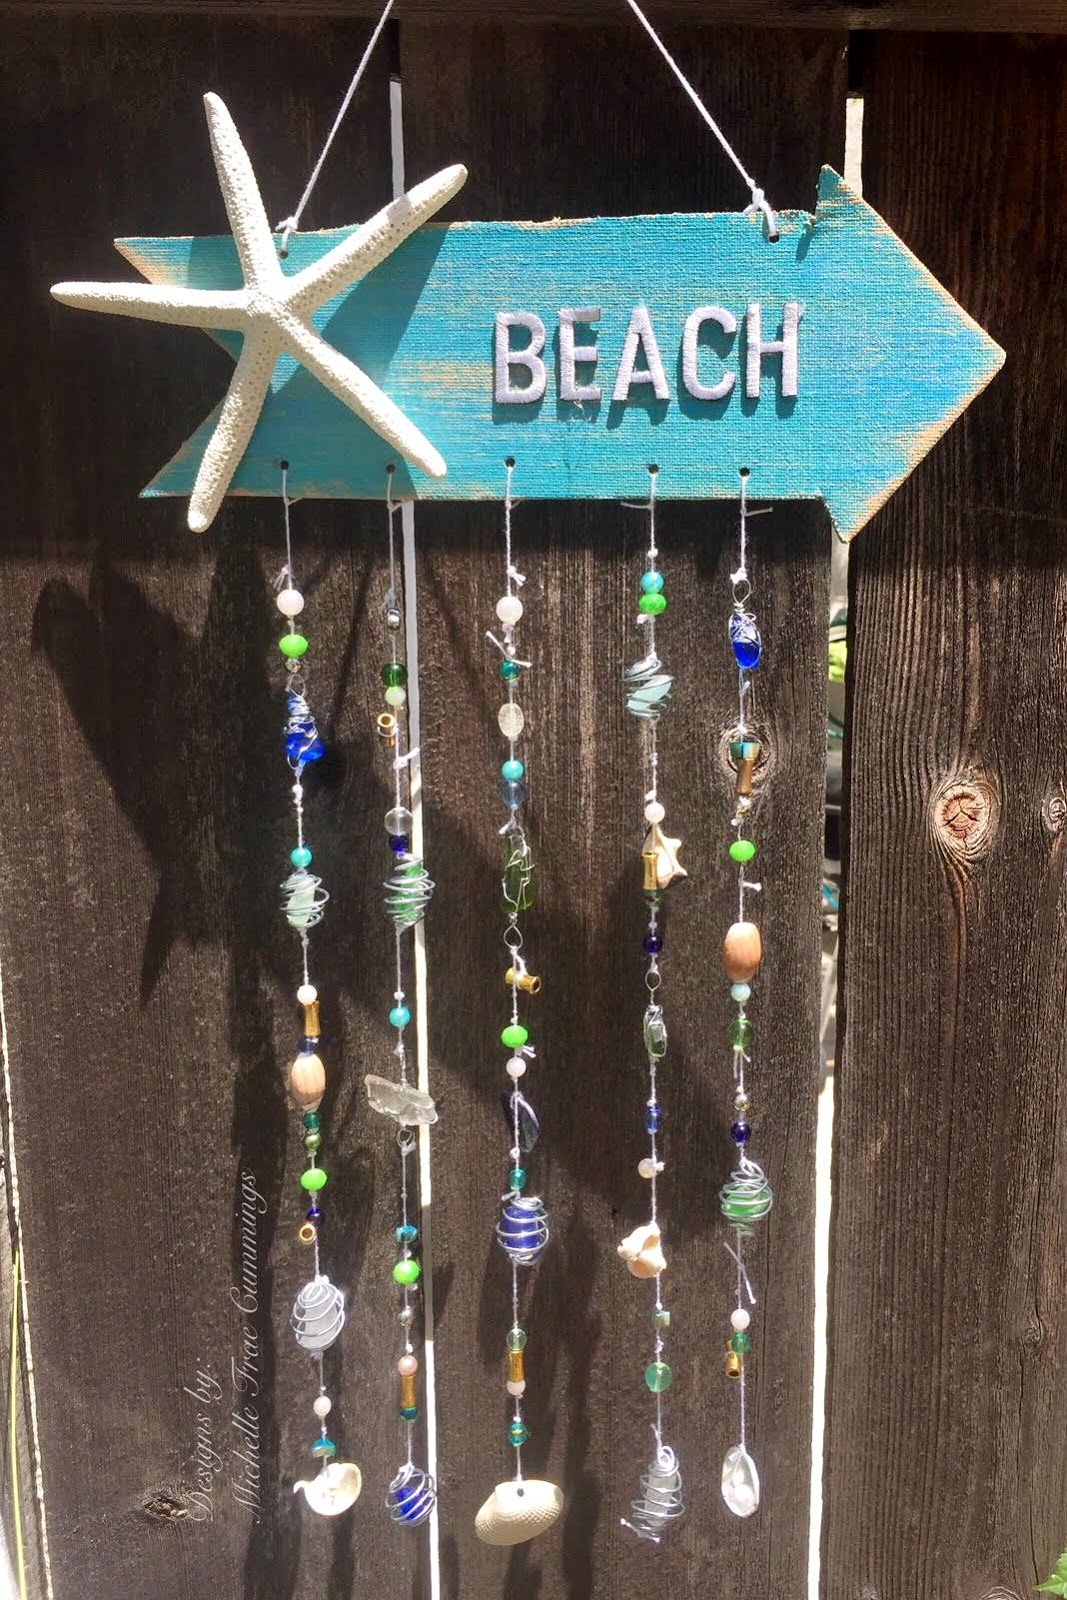
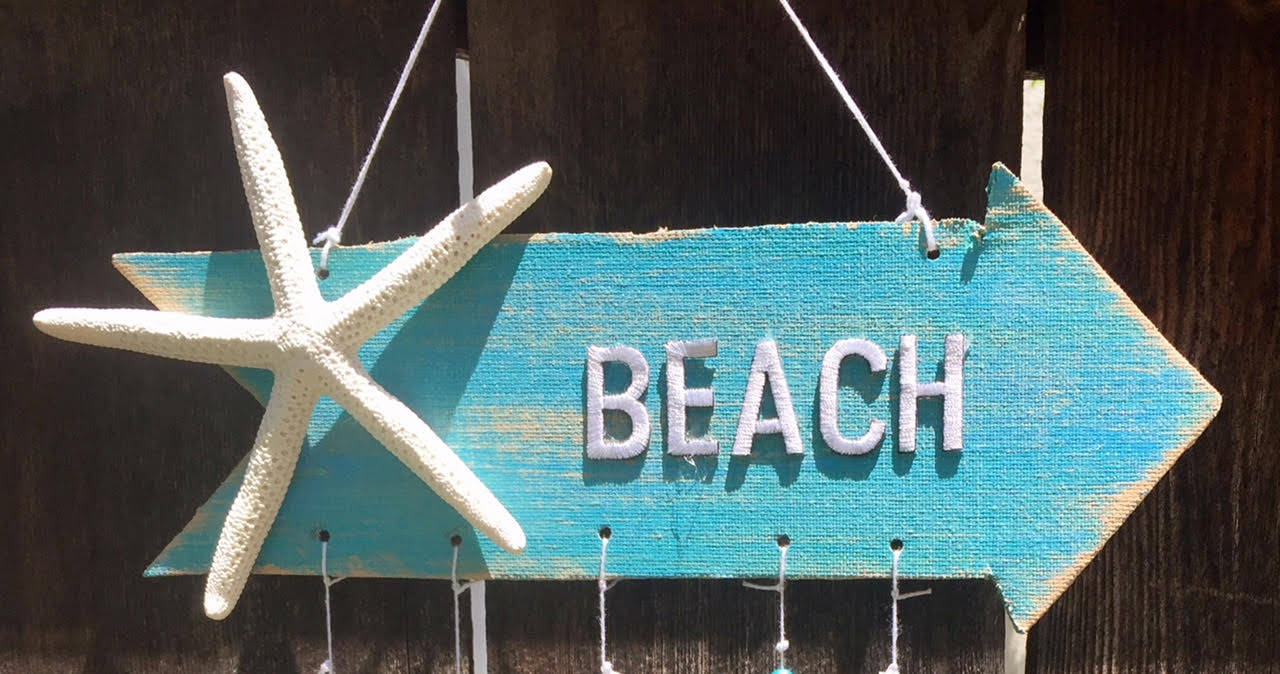
FREE Standard Shipping with $50 Order
|
Minimum Order is $15
10% Discount on $300 Order
|
25% Discount on $600 Order

Beach Sign

Michelle Frae Cummings
|
July 24, 2018

I love the beach! 

I'm fortunate to live close enough to the beach to visit often, so the shells and sea glass used in this project are from my many walks along the shore.  Enjoy!

You will need:

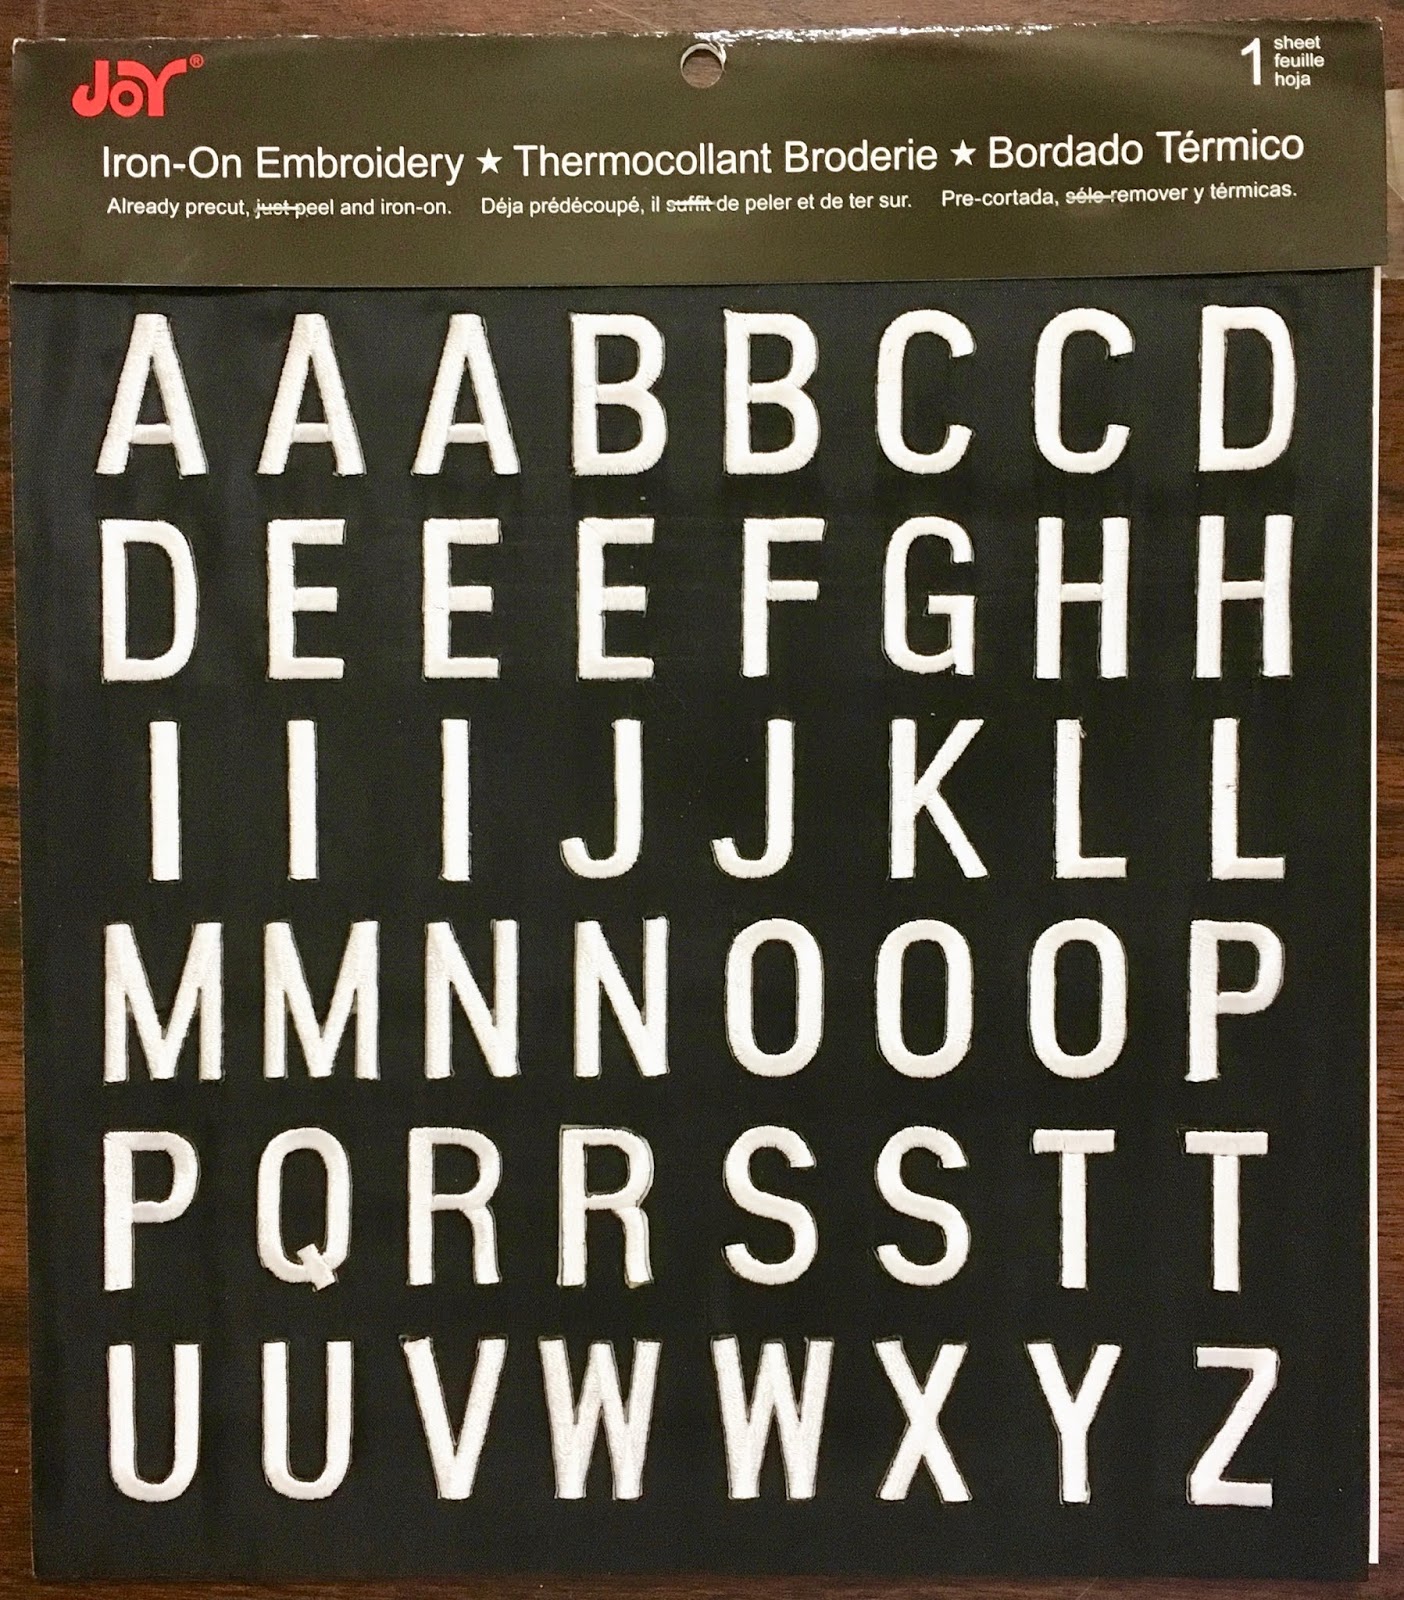
  1. Joy® iron-on letter sheet.
  2. Thin canvas panel or thick cardboard.
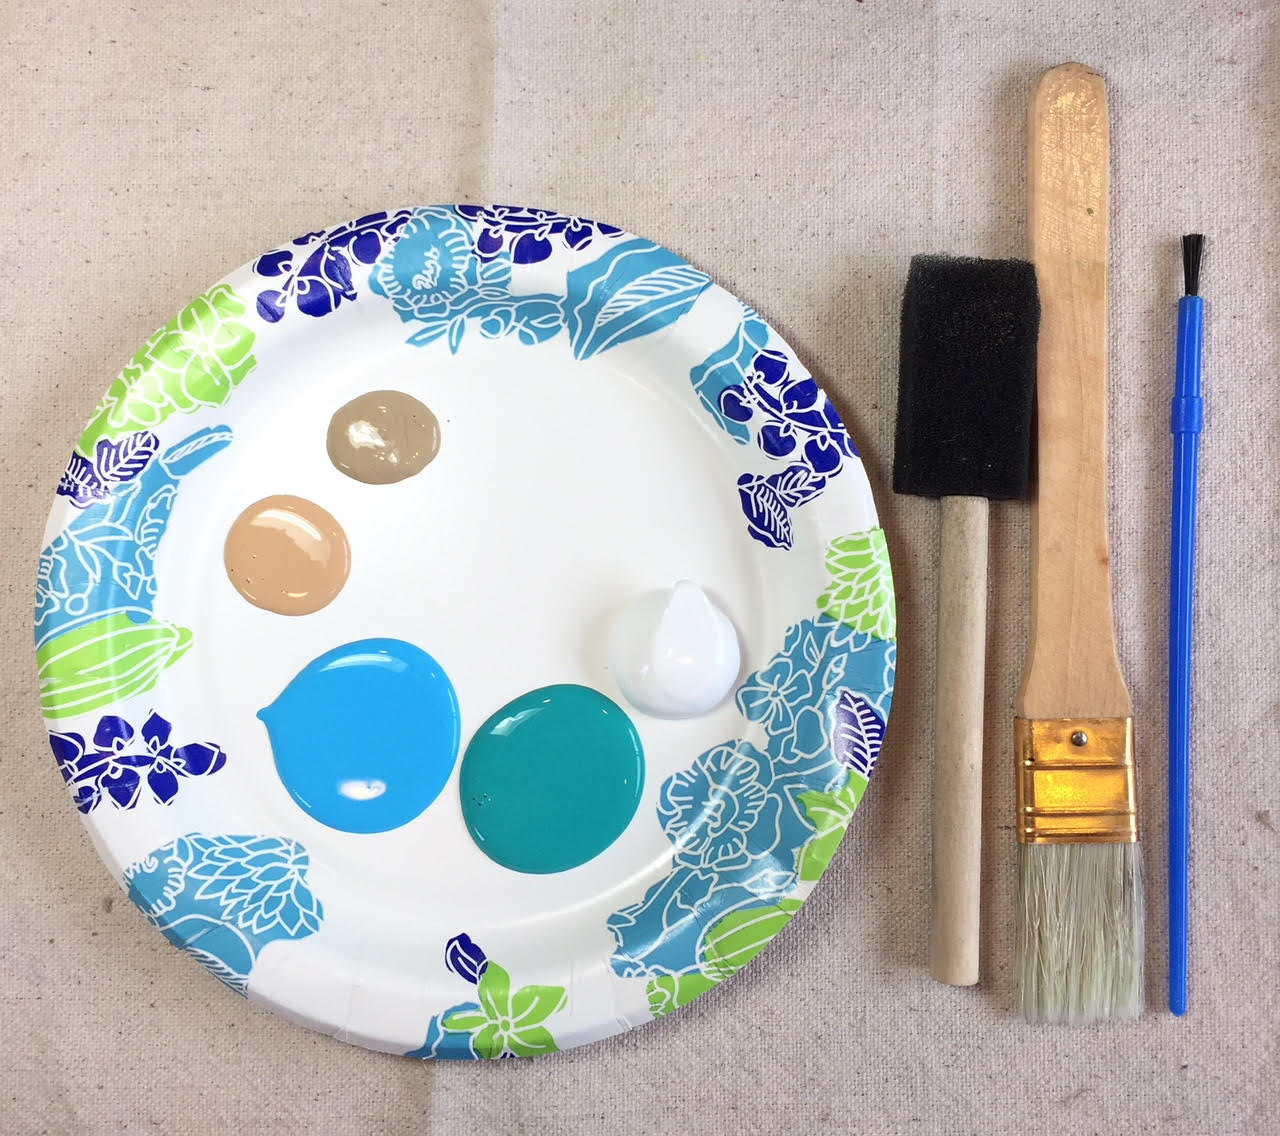
  3. White gesso.
  4. Acrylic paint in blues and light browns.
  5. Foam brush and dry bristle brush.
  6. Pencil, scissors, glue gun and heavy duty hole punch.
  7. White twine and wire for wrapping.
  8. Assorted sea shells and sea glass.
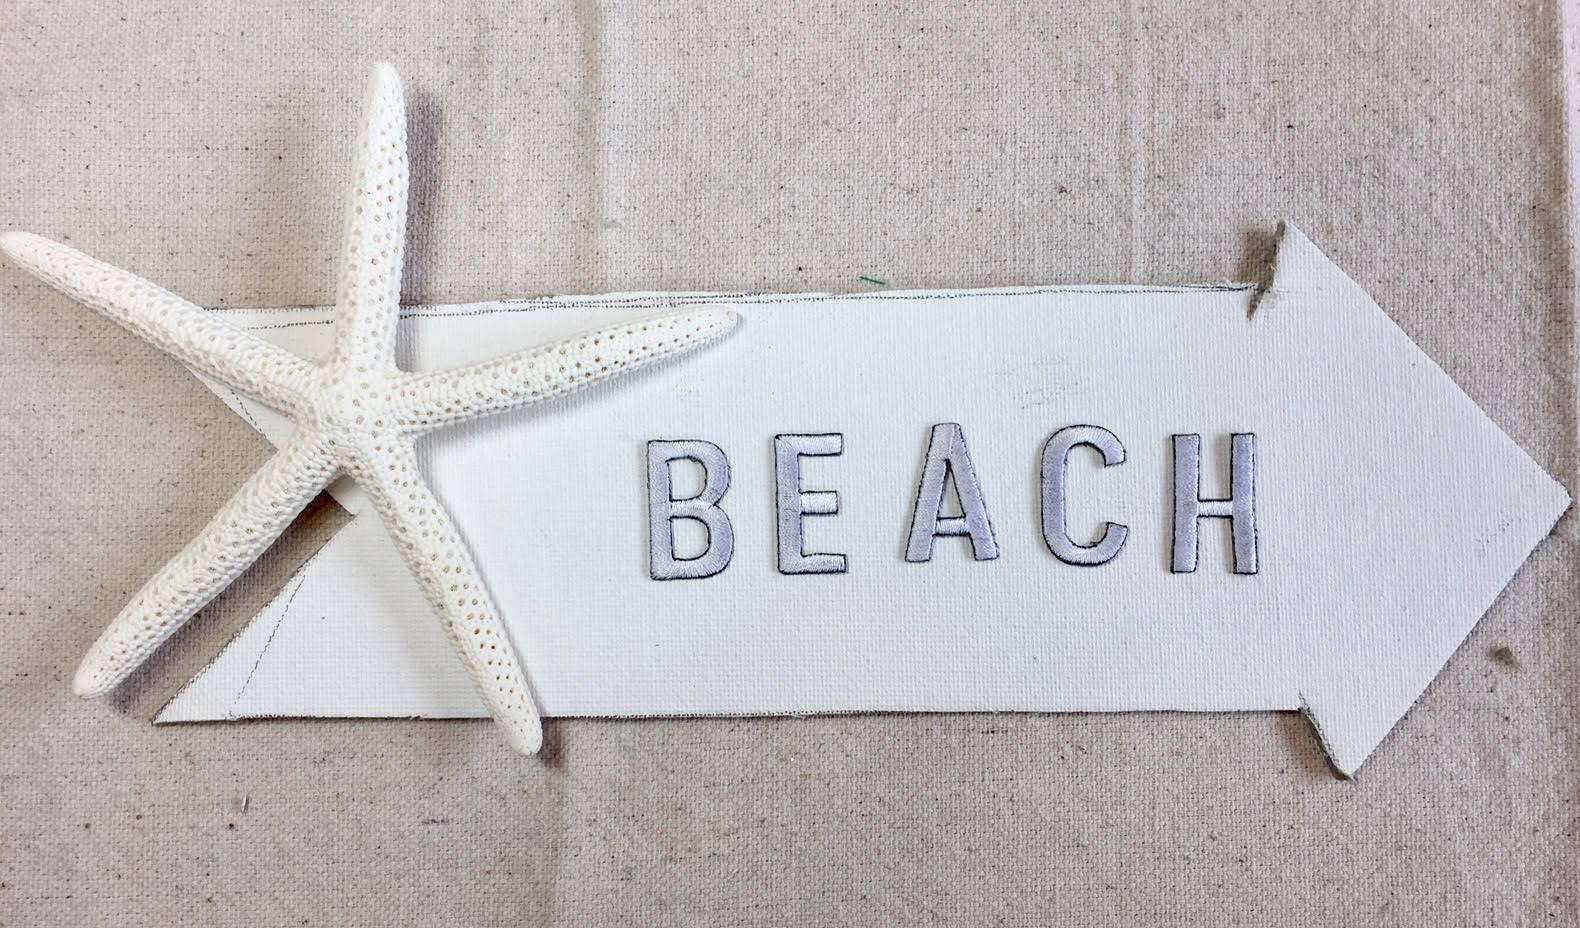
  9. Large bleached starfish.

Instructions:

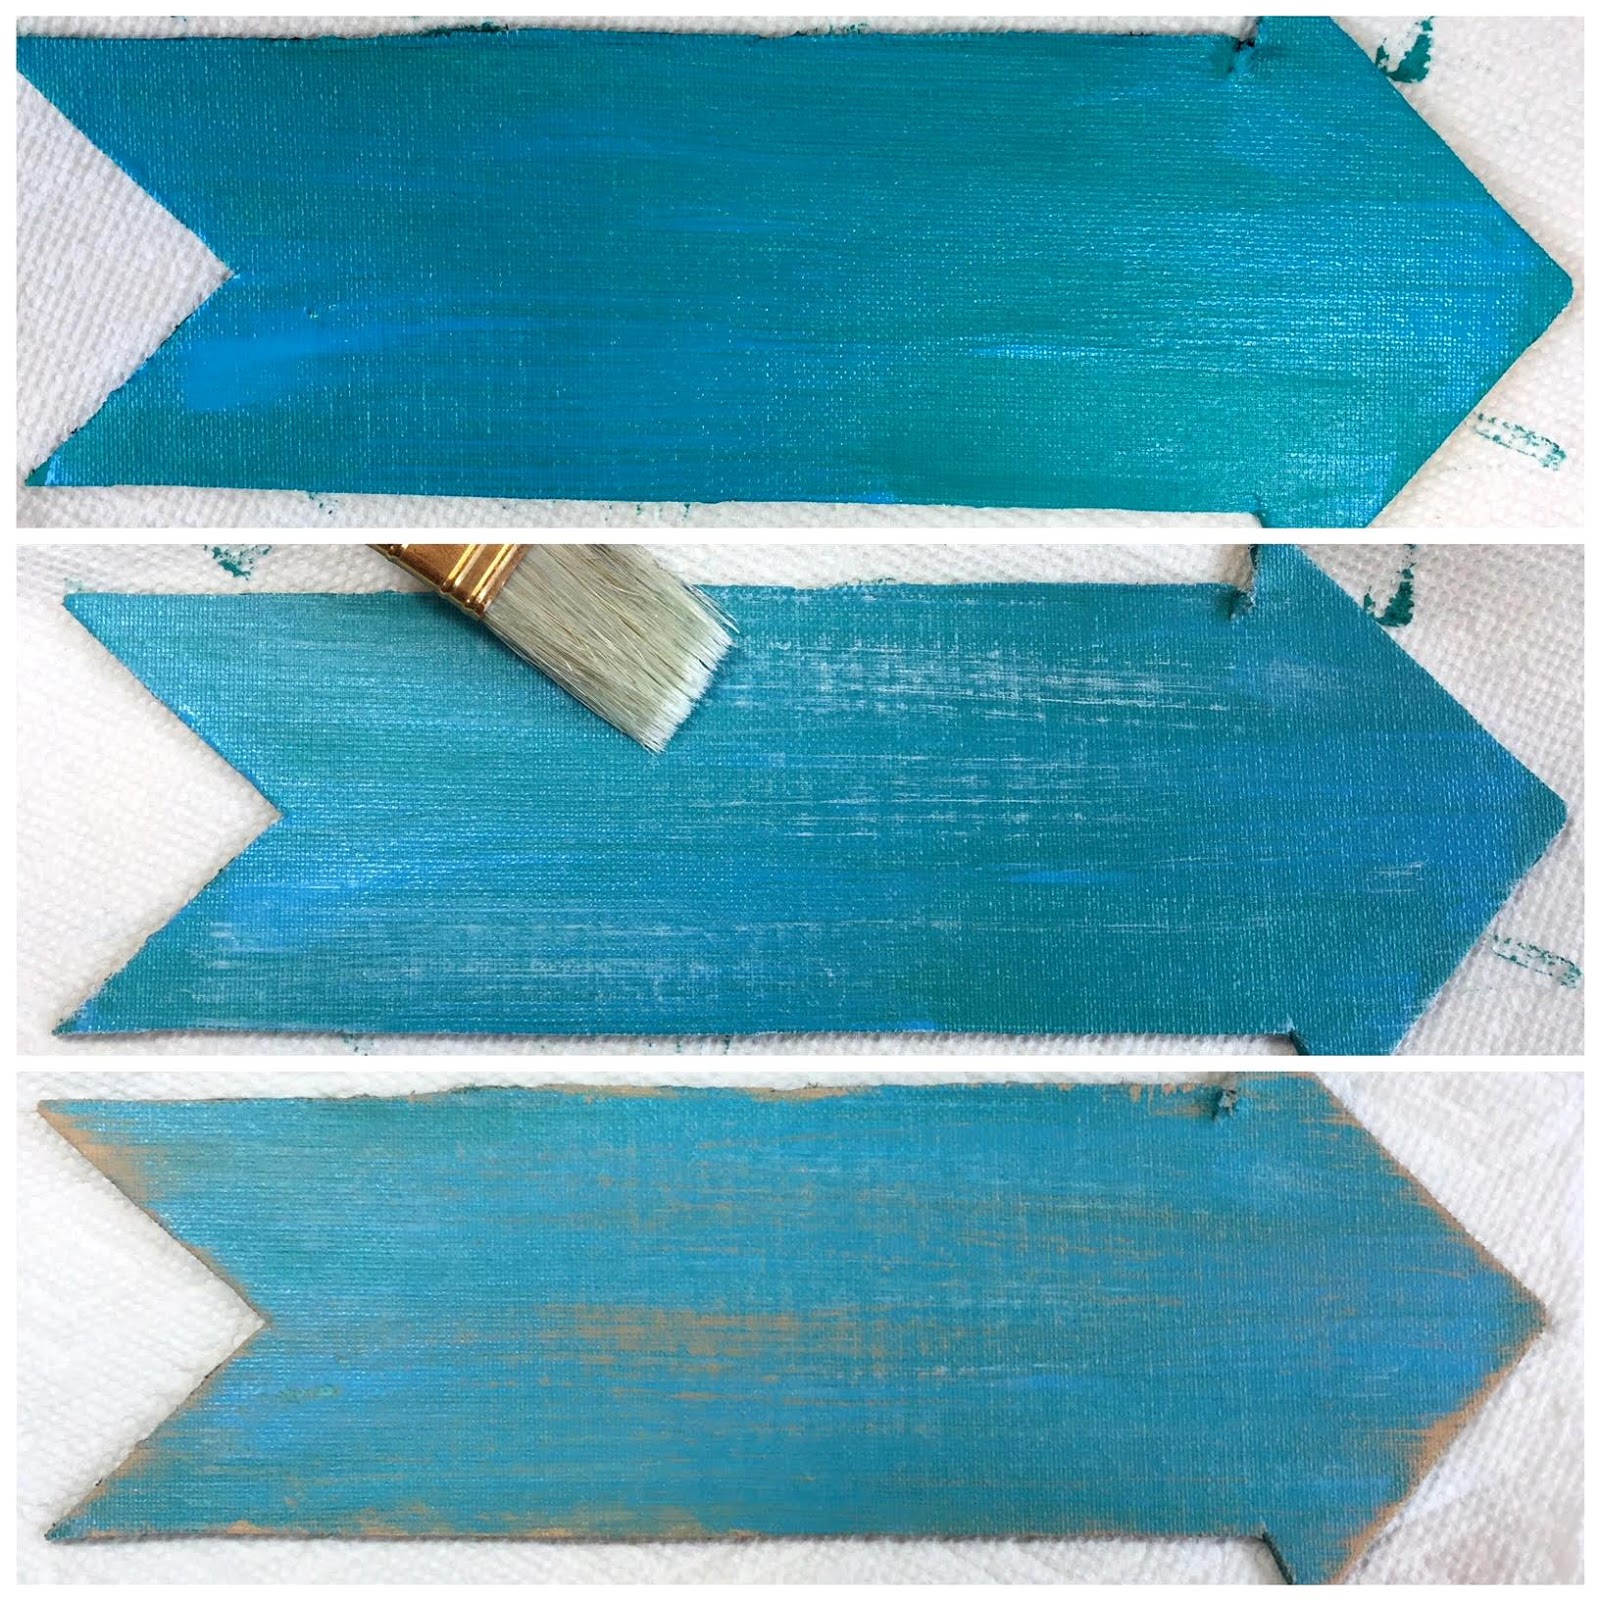
1. Determine the size for the arrow.  Sketch the design onto the canvas, then cut out. 

2.  Paint the arrow with the blues first and let dry completely. Using the dry bristle brush, gently sweep some of the gesso across the sign. Let this dry then add some brown with the same dry brush to create a weather worn look. 

3. If you like the 'dry' look for the sea glass and the 'wet' look for the shells, paint the shells with some clear nail polish with glitter in it. This is totally optional, it all depends on your personal style.

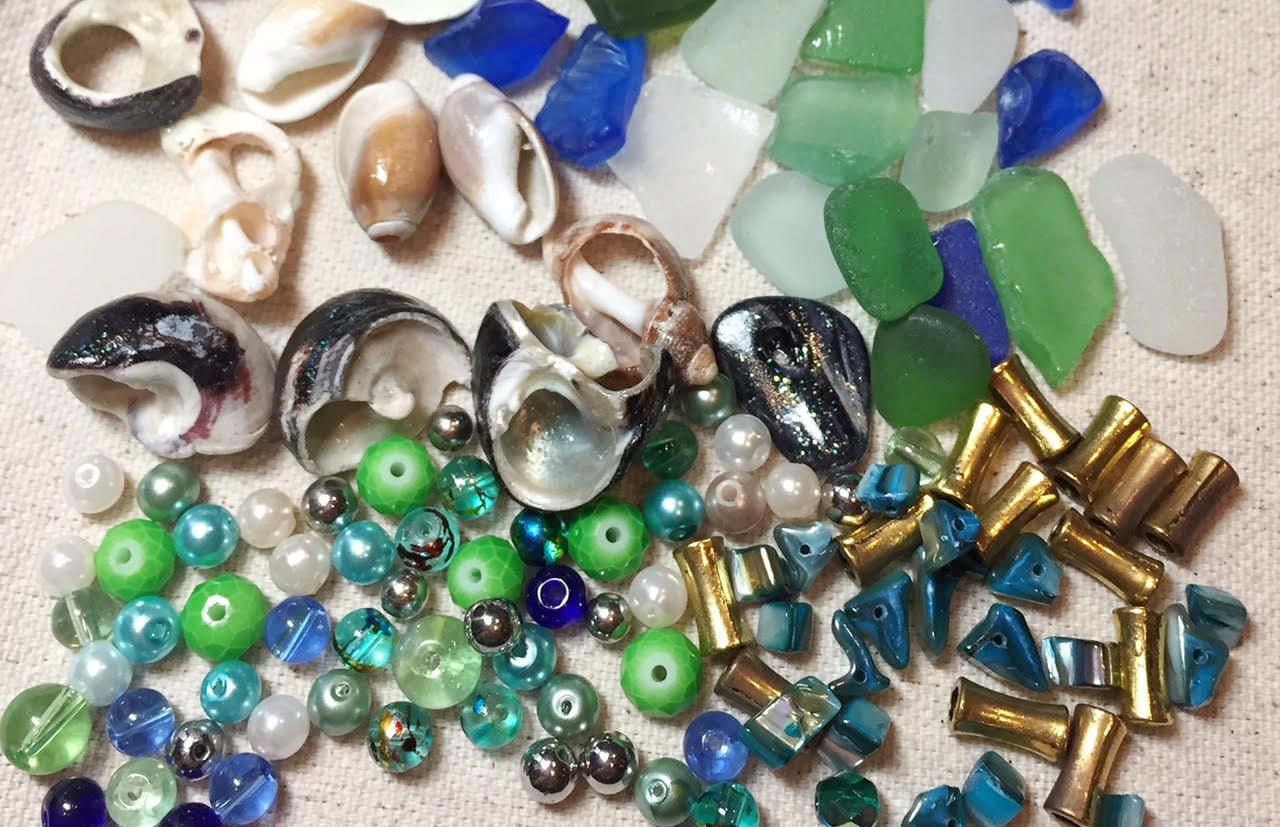
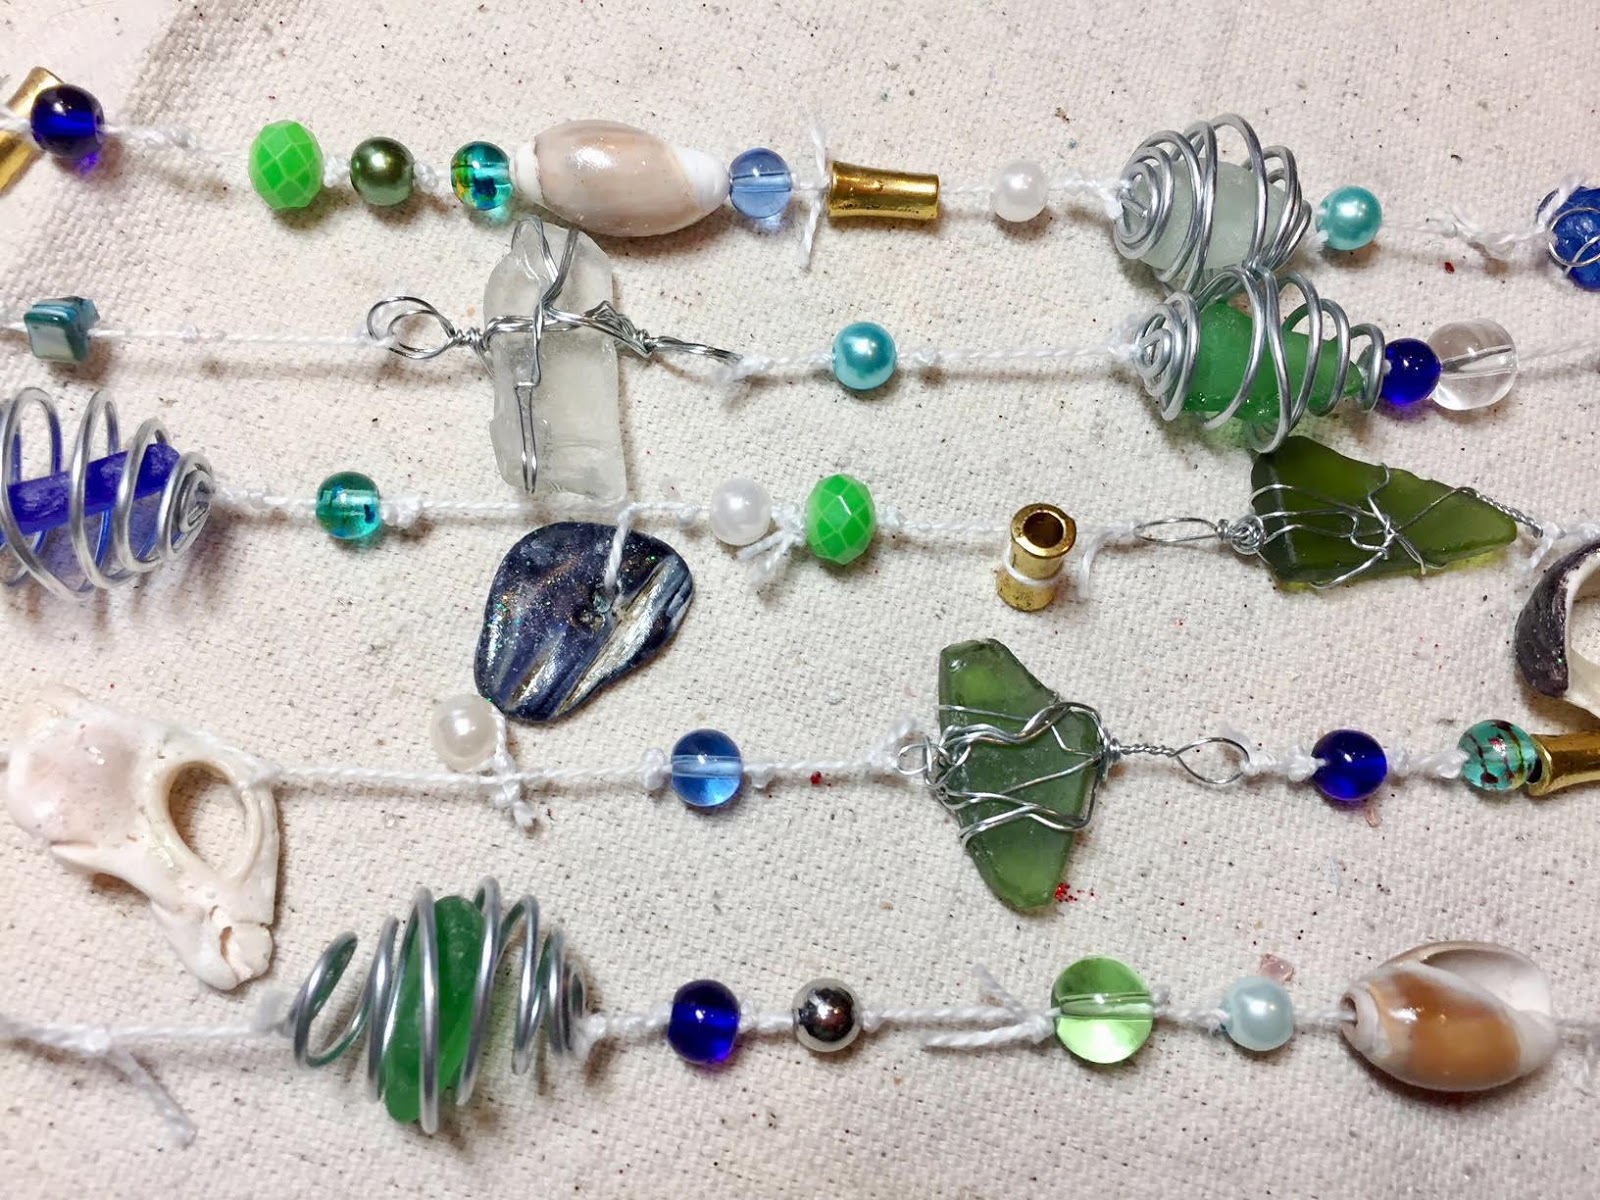
4.  Working in sections, thread the beads, knotting them in between. Wire wrap some sea glass here and there and add them to the mix. If wire wrapping is not your thing, the craft stores sell all sorts of ocean themed charms for your sign. You can also find sea glass at any craft or hobby shop. There is really no right or wrong way to do this. The finished length of each strand measures about 12"

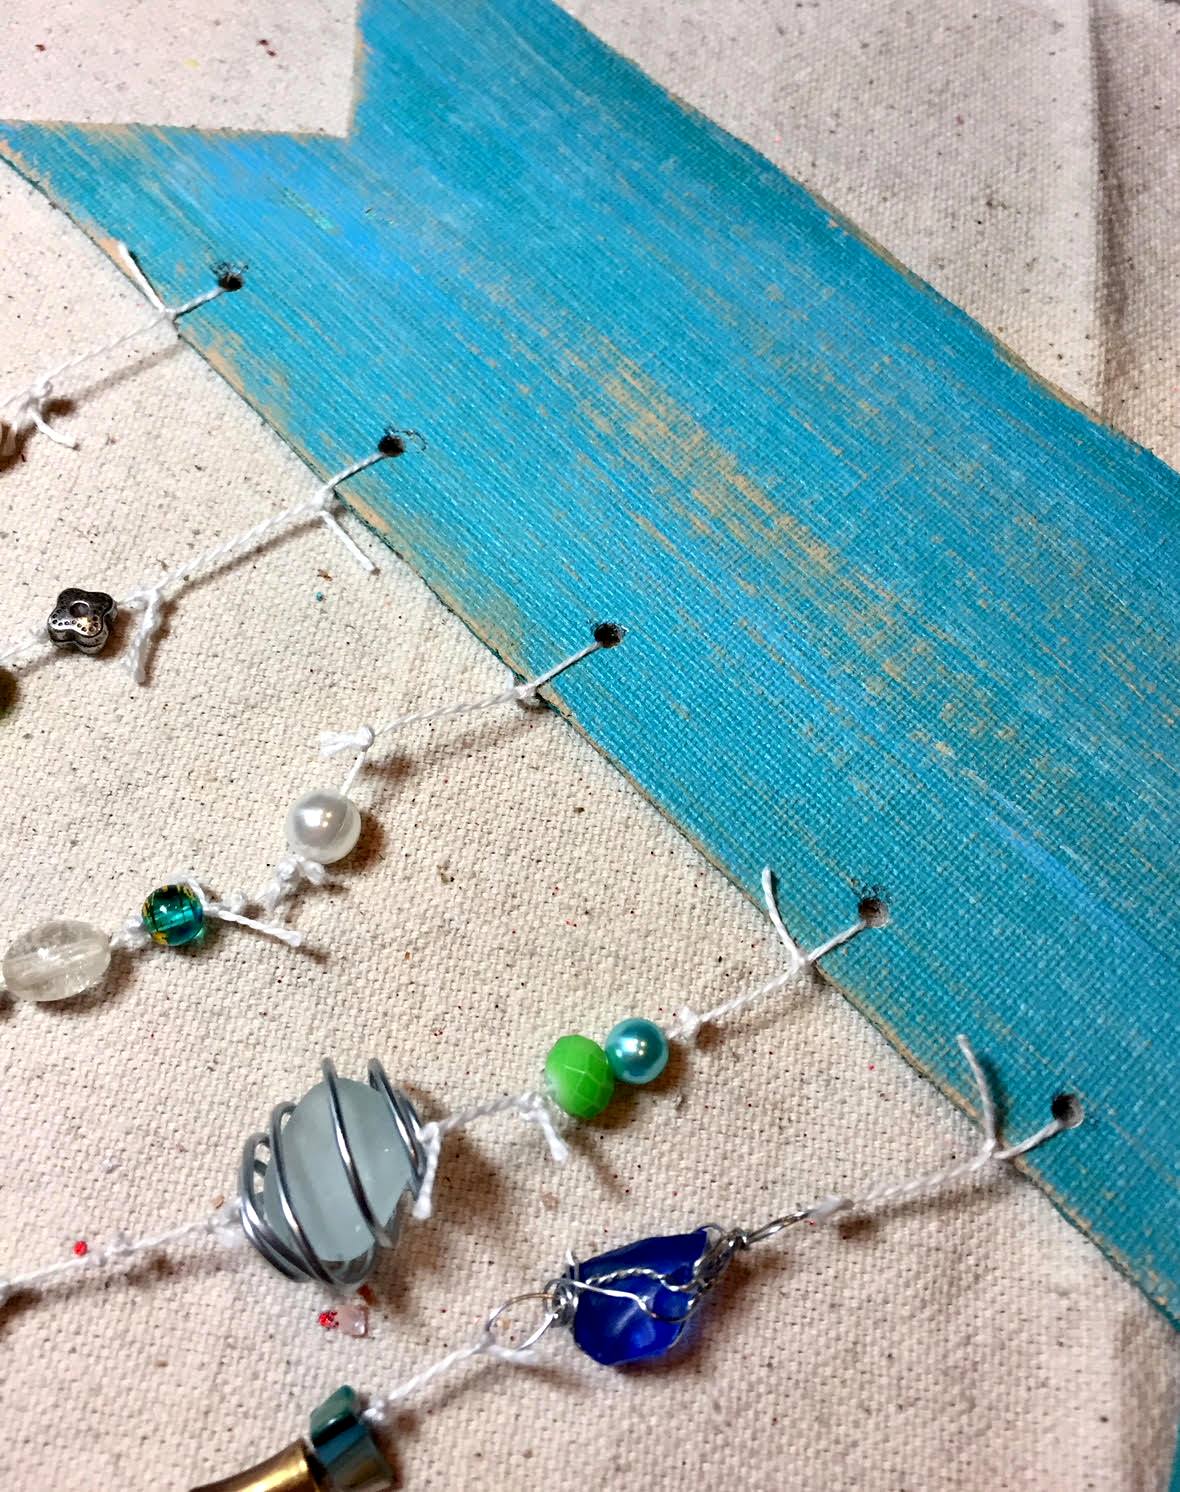
5.  Make holes in the canvas with the punch then tie your strands in place. 

6.  Add your letters and starfish with hot glue. 

Look for Joy® iron-on embroidered letters and letter sheets at your 

favorite craft stores.

Leave a Reply

Your email address will not be published. Required fields are marked *

Recent Projects

Luck O' the Irish DIY Door Hanger

St. Patrick’s Day is just around the corner!  Celebrate the Luck O' the Irish with this colorful door décor that is a fun alternative to a traditional wreath.  You will need: Joy® Iron On Embroidered Letter sheet - Gold Script Kunin Classics™ Felt 9” x 12” Craft Cuts– Red, Orange, Yellow, Apple Green, Lagoon, Royal Blue, Orchid, Pirate Green, Neon Green, Gold and Goldenrod (one each) Kunin Premium™ Felt 9” x 12” Craft Cuts– White and Black (two each). Expo International – Claudia 2” Fan and Lattice Lace.  Ric Rac assorted Rayon – Red, Orange, Yellow, Green, Light Blue, Royal…

Rustic Happy Fall Y'all Pumpkin Sign

HAPPY FALL Y'ALL! I am always on the look out for cute items that can be upcycled to create one of a kind home decor pieces.  This rustic pallet pumpkin was just calling out to me from the Target dollar spot and with the addition of some Joy® iron-on embroidered letters, it quickly becomes a custom keepsake. Select a combination of white Joy® iron-on embroidered letters to spell out your message. To create the apostrophe, I carefully cut the leg from the capital letter Q with a pair of detail scissors. Place the embroidered letters on an old towel in a cardboard box…

Back to School Welcome Banner

Create a "Back to School" welcome banner for your favorite teacher's classroom! Materials: JOY® Embroidered Letters 9” x 12” sheets of Kunin Classicfelt -Black , Gray, Sandstone, Candy Pink and Gold Craft glue Glitter glue Cardstock Ruler, pencils, scissors 4-foot length of ribbon Instructions: Draw a simple pencil pattern (5 pieces as shown) on cardstock and cut out.   Trace and trim each pattern piece seven times on the appropriate color of felt. Glue the pencil pieces together, overlapping as shown and let dry. 4. Peel back liner paper from the JOY letters and attach to the center of each pencil, spelling…

Scrabble-Inspired Tote Bag

I am all about recycling, but most of the tote bags that the grocery stores sell are not very cute or crafty. So in honor of family game night, I created a Scrabble-inspired bag to tote around town! This project makes the perfect quick and easy handmade gift to create for Mom for Mother's Day! Decide what words you want to spell and how they'll connect, making sure the arrangement will fit on the front of your tote bag. Draw a grid of square tiles on graph paper to fit each of your letters. I selected the Joy 1.5" Cooper Style…

Happiness Pillow

Joy® Iron-on embroidered letters in white are great for creating any color you can imagine! You can use dye, markers and even acrylic paint! To Make this Happiness Pillow you'll need: Joy® Embroidered Iron-on Letters - Letter Shop White  Acrylic Paint and Paintbrush NEW Joy® Iron-on Embroidered Flower Appliqué    Canvas Pillow Blank Pillow Form or Polyfil Iron Instructions: 1. Paint each letter to create a rainbow of H-A-P-P-I-N-E-S-S.  Set aside and let dry. 2.  Insert cardboard into pillow blank then paint the pillow with white and light blue paint.  Let dry. 3. Set iron on cotton setting; approx. 350 degrees,…
closearrow-circle-o-downtagtagsminus-circlefacebook-squaretruckpinterest-squareinstagrammenu
0
    0
    Shopping Cart
    Your cart is emptyReturn to Shop