FREE Standard Shipping with $50 Order
|
Minimum Order is $15
10% Discount on $300 Order
|
25% Discount on $600 Order

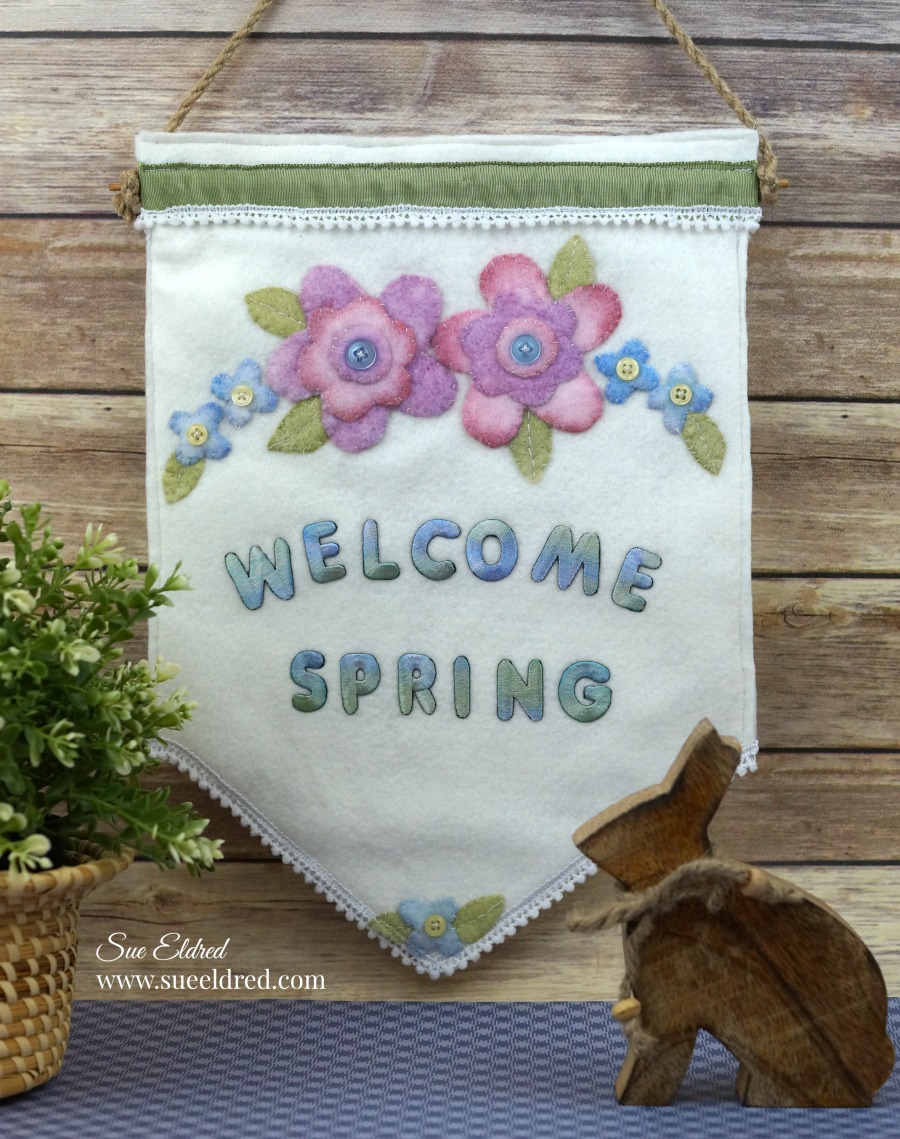
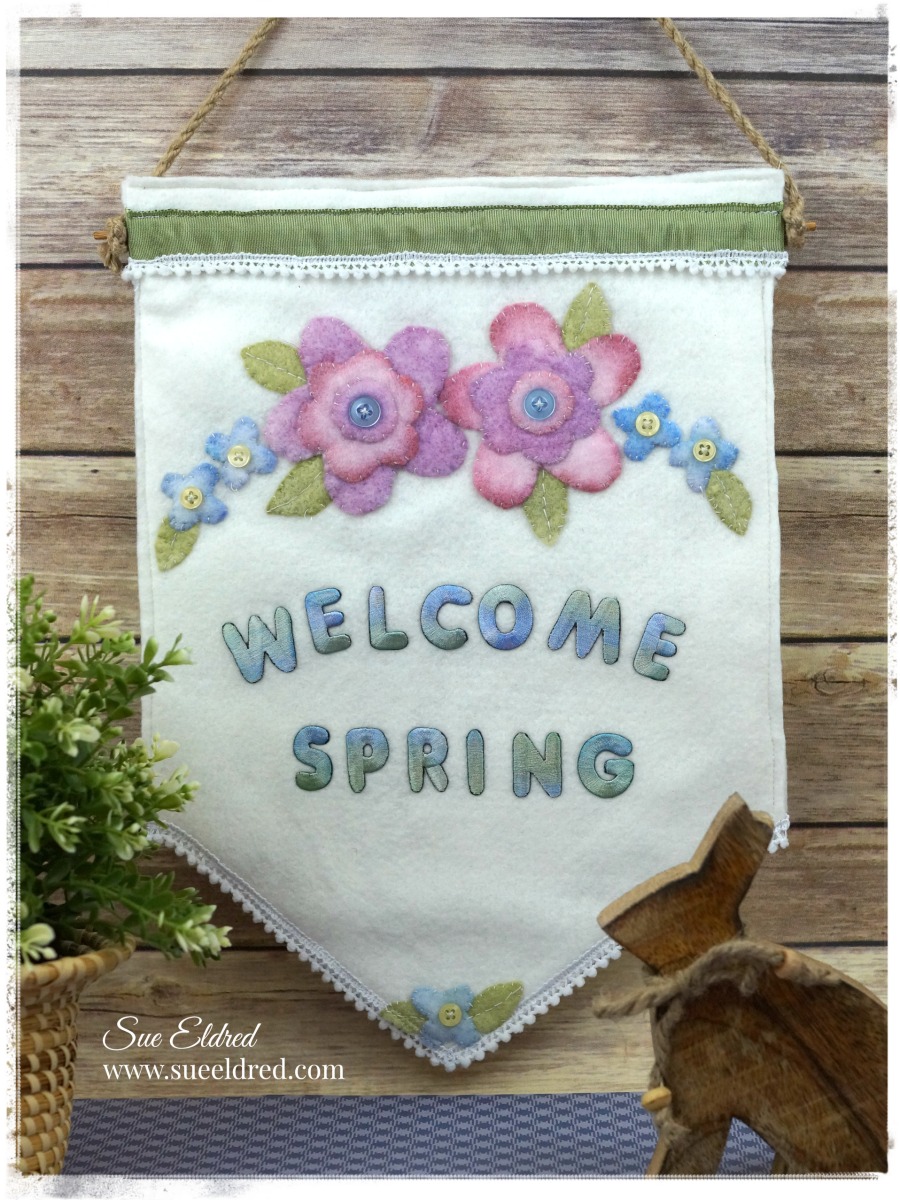
Welcome Spring Banner

Sue Eldred
|
March 15, 2018

Time to get ready for Spring!

As soon as the calendar turns to March, I start thinking Spring. 

It's right around the corner and I can hardly wait.

To make the "Welcome Spring" banner you'll need:

  • Joy® iron-on letter sheet - white
  • Classic Felt - 9" x 12" x 2
  • Dye Ink - blue, green, pink and lavender 
  • Small misting bottles - 2
  • 9' dowel
  • 18" jute or yarn
  • Needle and thread
  • Felt glue
  • Silicone mat
  • Buttons
  • Trim

1. Add several drops of dye ink to each misting bottle.  

2. Remove letters from the backing sheet and place on a silicone mat (or wax paper).

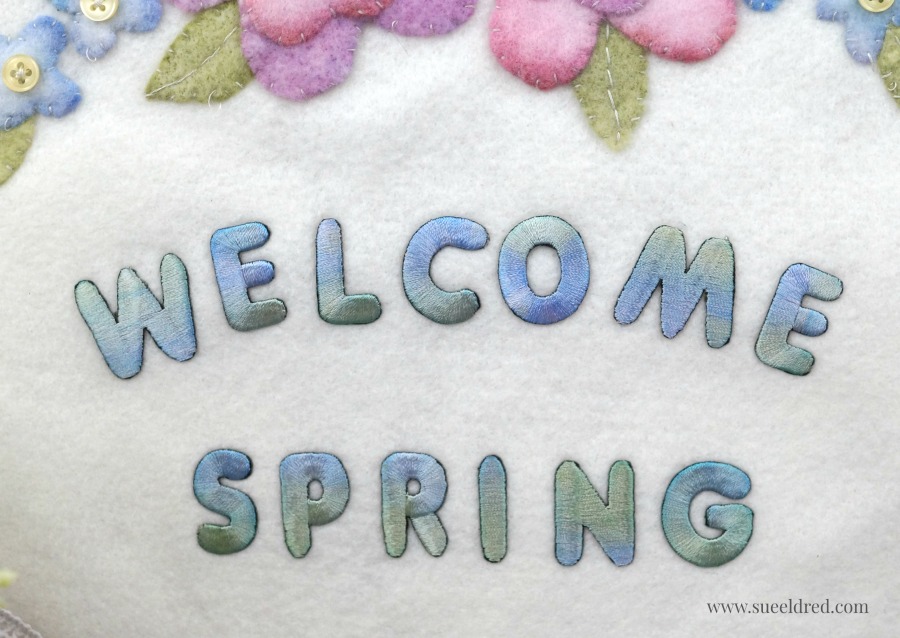
3. Spritz the letters with both blue and green ink for a variegated look. Allow the ink to soak into the letters then dab away excess ink and water with a paper towel.  Let dry. 

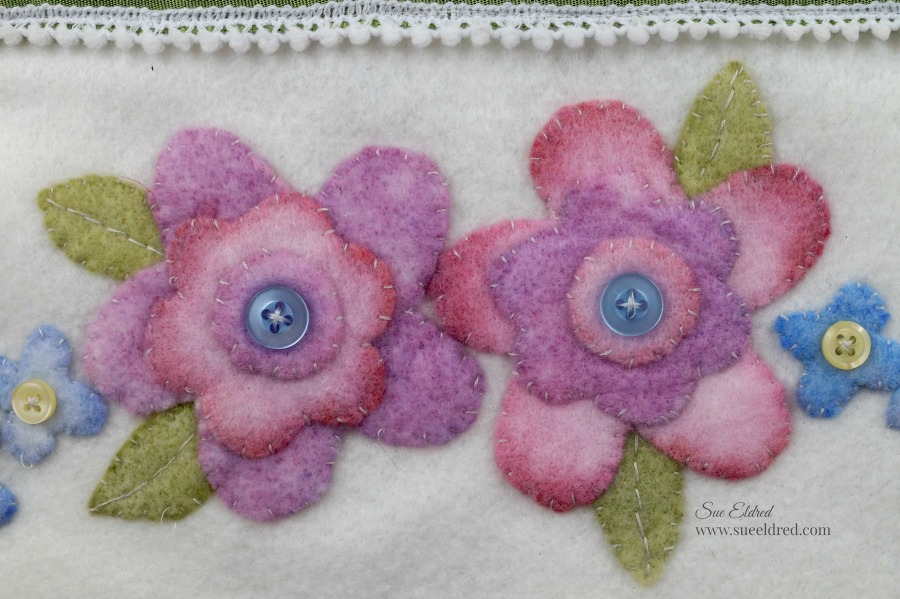
4.  Create simple, hand drawn flower (small and medium), circle and leaf patterns onto paper. Cut then trace around the patterns onto white felt. Cut out.

5.  Spray the leaves green; set aside then spray the flowers and circles one color at a time.  Let dry.


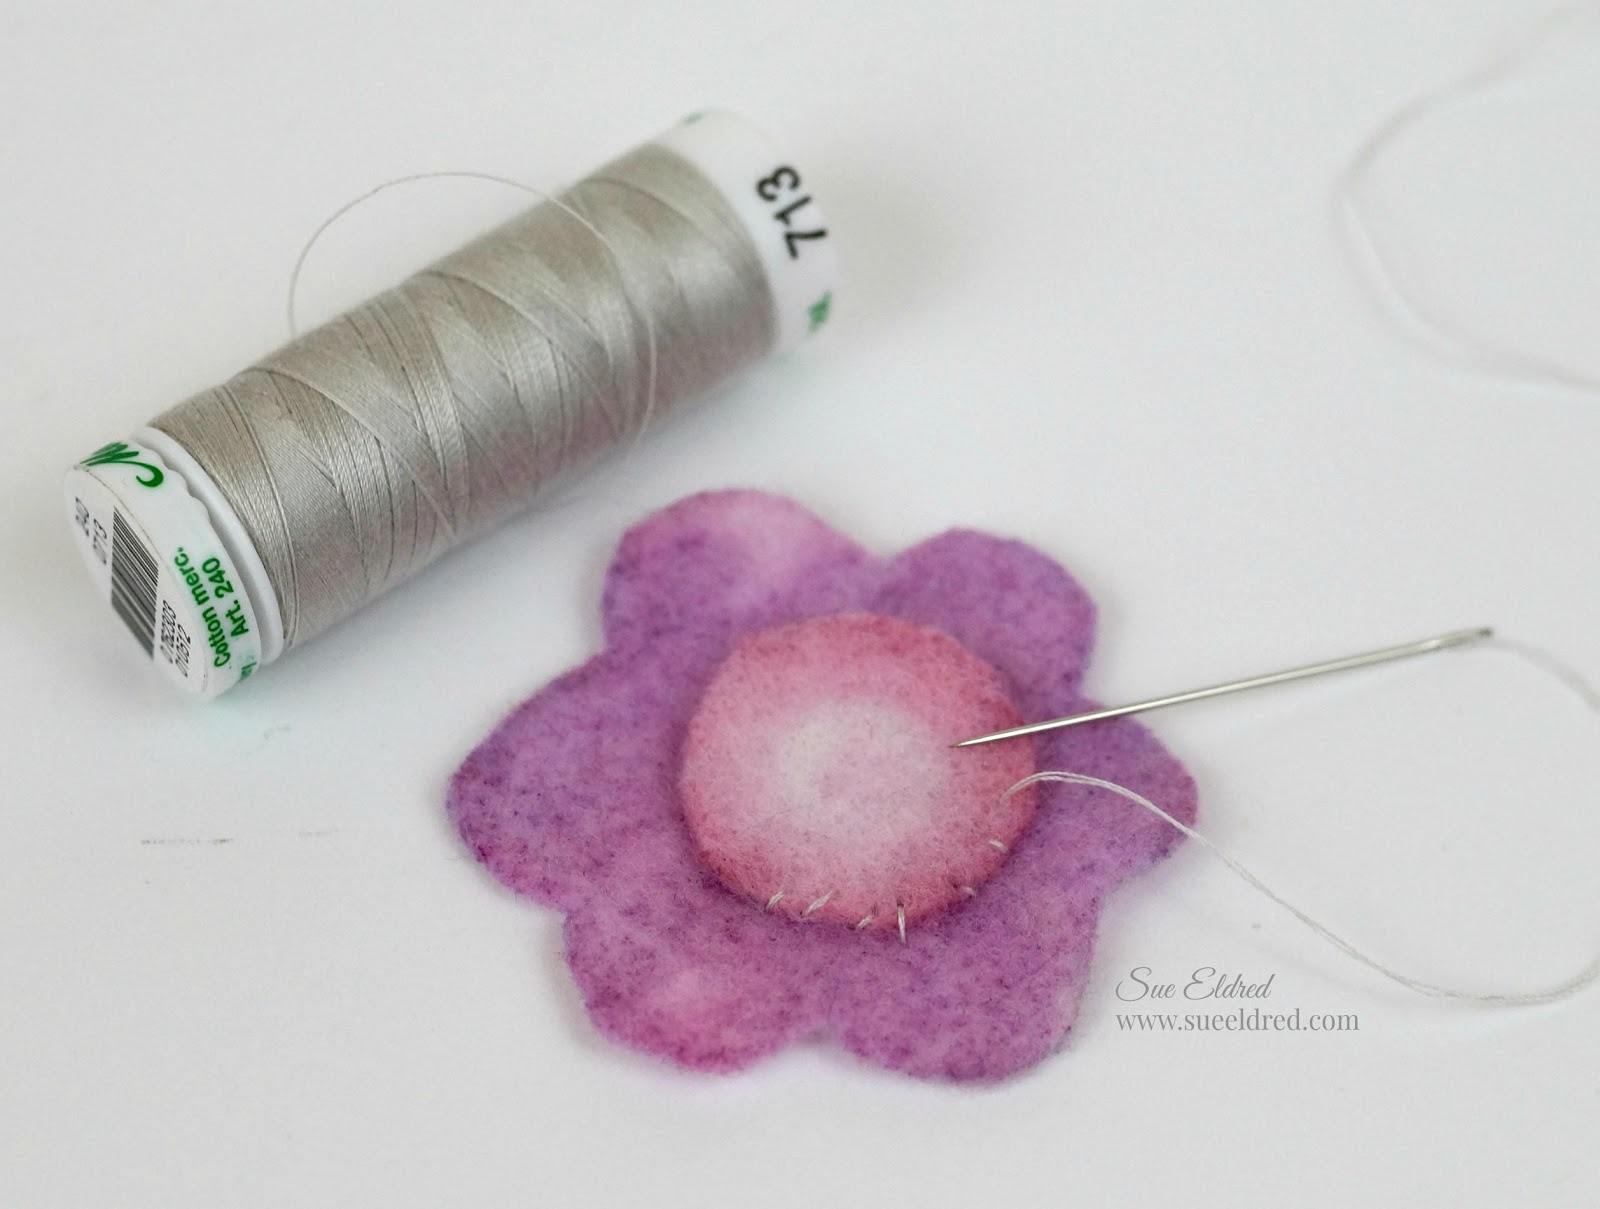
6.  Layer the circle, small flower and large flower on top of each other then stitch in place.  Use a small amount of glue to hold the pieces in place while you stitch.

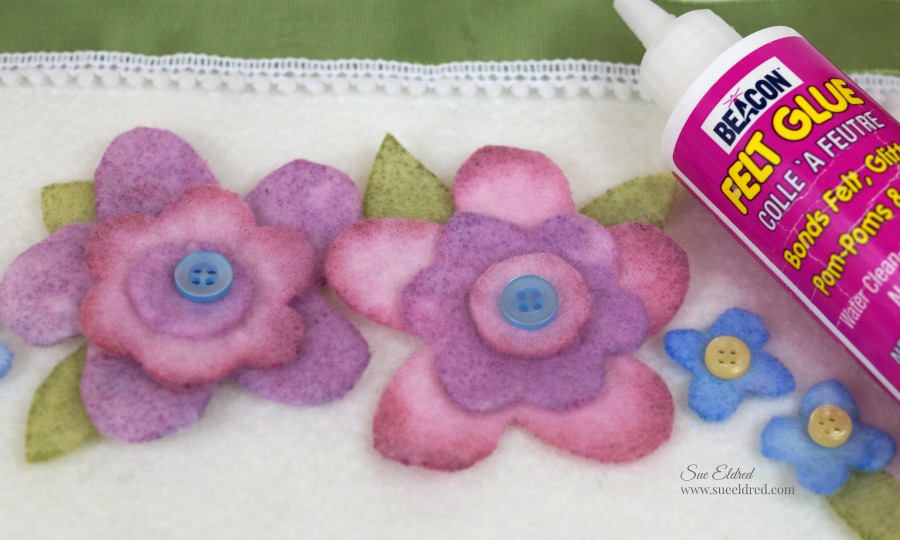
7.  To create the banner shape, fold the second piece of felt in half lengthways.  Cut diagonally across the bottom from the center fold to a point about 3" up from the bottom corner on the outer edges.  Stitch the flowers to the banner using a button at the center of each one.  Tuck leaves underneath the outer edges of the flowers then stitch in place.

8.  Position, then glue the letters in place as shown.  Use a sewing machine to stitch the banner to backing material, then stitch trim in place across the top and around the bottom edge if desired.

10.  Create a casing along the top edge. Insert a dowel then tie a length of jute or yarn at each end to create a hanger.

If you need to finish your banner in less time, glue the flowers, leaves and trim in place, then use a fusible interfacing to adhere the felt banner to a backing.

Look for Joy® iron-on embroidered alphabet letter sheets at your local craft store.

Leave a Reply

Your email address will not be published. Required fields are marked *

Recent Projects

Luck O' the Irish DIY Door Hanger

St. Patrick’s Day is just around the corner!  Celebrate the Luck O' the Irish with this colorful door décor that is a fun alternative to a traditional wreath.  You will need: Joy® Iron On Embroidered Letter sheet - Gold Script Kunin Classics™ Felt 9” x 12” Craft Cuts– Red, Orange, Yellow, Apple Green, Lagoon, Royal Blue, Orchid, Pirate Green, Neon Green, Gold and Goldenrod (one each) Kunin Premium™ Felt 9” x 12” Craft Cuts– White and Black (two each). Expo International – Claudia 2” Fan and Lattice Lace.  Ric Rac assorted Rayon – Red, Orange, Yellow, Green, Light Blue, Royal…

Rustic Happy Fall Y'all Pumpkin Sign

HAPPY FALL Y'ALL! I am always on the look out for cute items that can be upcycled to create one of a kind home decor pieces.  This rustic pallet pumpkin was just calling out to me from the Target dollar spot and with the addition of some Joy® iron-on embroidered letters, it quickly becomes a custom keepsake. Select a combination of white Joy® iron-on embroidered letters to spell out your message. To create the apostrophe, I carefully cut the leg from the capital letter Q with a pair of detail scissors. Place the embroidered letters on an old towel in a cardboard box…

Back to School Welcome Banner

Create a "Back to School" welcome banner for your favorite teacher's classroom! Materials: JOY® Embroidered Letters 9” x 12” sheets of Kunin Classicfelt -Black , Gray, Sandstone, Candy Pink and Gold Craft glue Glitter glue Cardstock Ruler, pencils, scissors 4-foot length of ribbon Instructions: Draw a simple pencil pattern (5 pieces as shown) on cardstock and cut out.   Trace and trim each pattern piece seven times on the appropriate color of felt. Glue the pencil pieces together, overlapping as shown and let dry. 4. Peel back liner paper from the JOY letters and attach to the center of each pencil, spelling…

Scrabble-Inspired Tote Bag

I am all about recycling, but most of the tote bags that the grocery stores sell are not very cute or crafty. So in honor of family game night, I created a Scrabble-inspired bag to tote around town! This project makes the perfect quick and easy handmade gift to create for Mom for Mother's Day! Decide what words you want to spell and how they'll connect, making sure the arrangement will fit on the front of your tote bag. Draw a grid of square tiles on graph paper to fit each of your letters. I selected the Joy 1.5" Cooper Style…

Happiness Pillow

Joy® Iron-on embroidered letters in white are great for creating any color you can imagine! You can use dye, markers and even acrylic paint! To Make this Happiness Pillow you'll need: Joy® Embroidered Iron-on Letters - Letter Shop White  Acrylic Paint and Paintbrush NEW Joy® Iron-on Embroidered Flower Appliqué    Canvas Pillow Blank Pillow Form or Polyfil Iron Instructions: 1. Paint each letter to create a rainbow of H-A-P-P-I-N-E-S-S.  Set aside and let dry. 2.  Insert cardboard into pillow blank then paint the pillow with white and light blue paint.  Let dry. 3. Set iron on cotton setting; approx. 350 degrees,…
closearrow-circle-o-downtagtagsminus-circlefacebook-squaretruckpinterest-squareinstagrammenu
0
    0
    Shopping Cart
    Your cart is emptyReturn to Shop