FREE Standard Shipping with $50 Order
|
Minimum Order is $15
10% Discount on $300 Order
|
25% Discount on $600 Order

Custom Labeled Craft Storage Buckets

Erin Reed
|
January 9, 2018

If organization is one of your goals for the New Year's, here's a fun idea for your craft room.

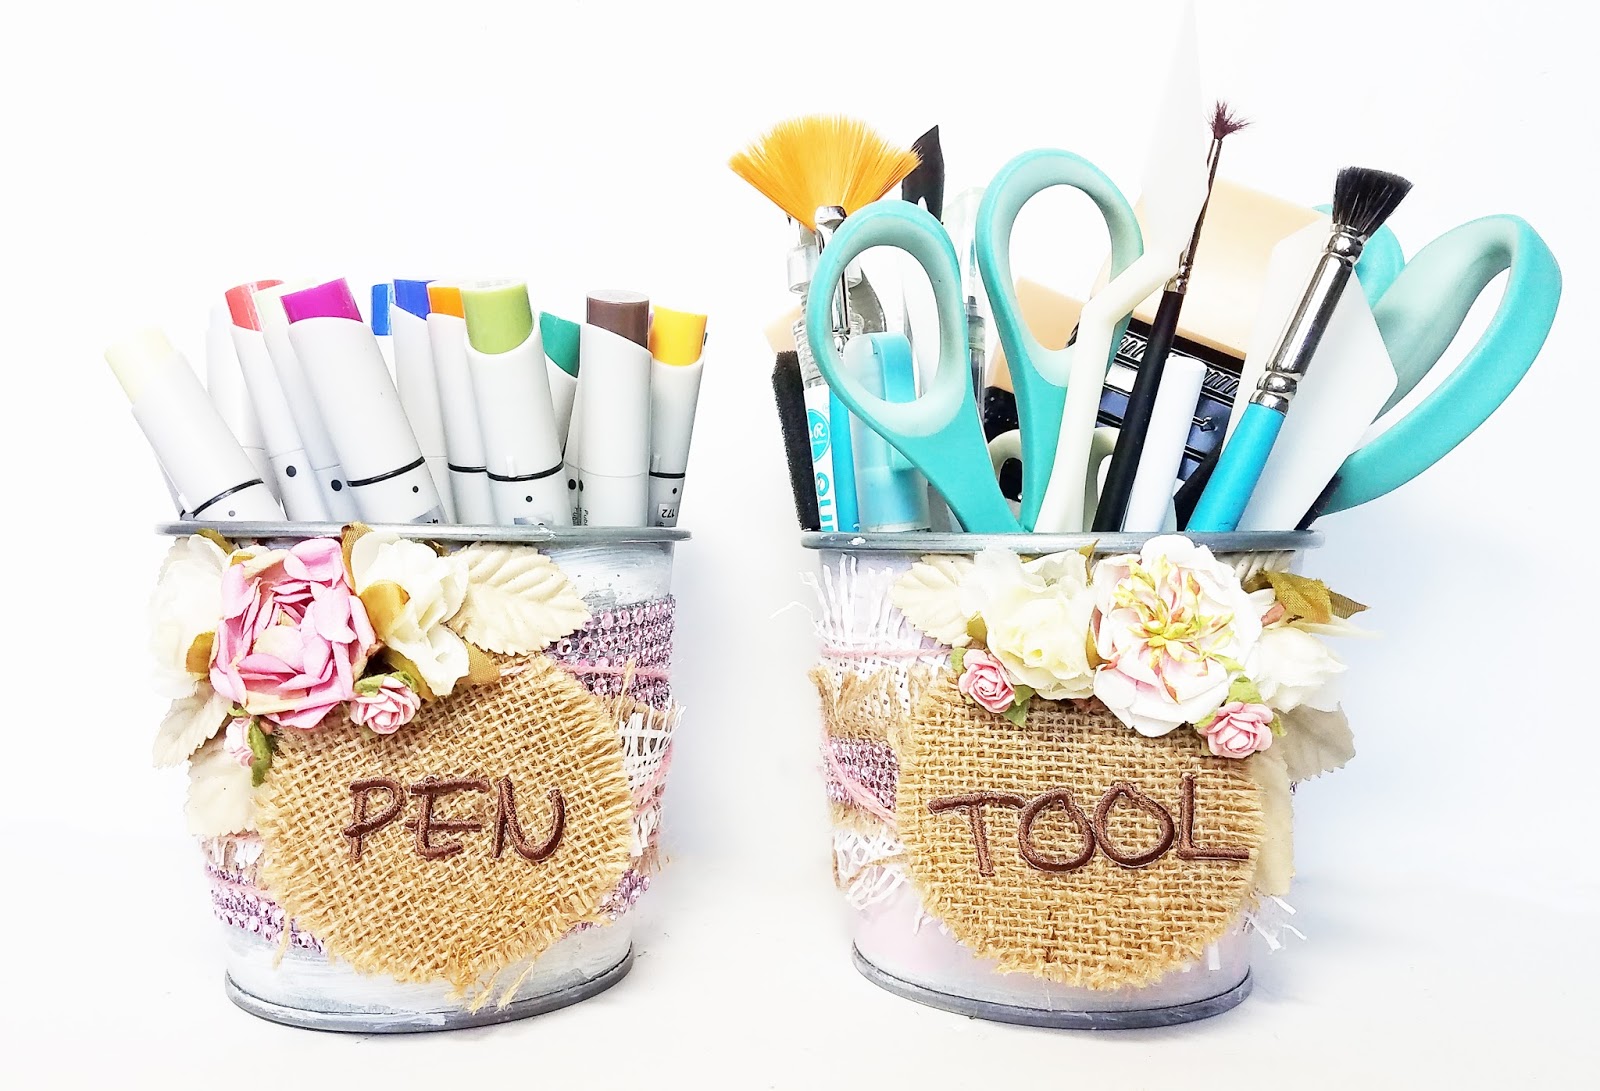
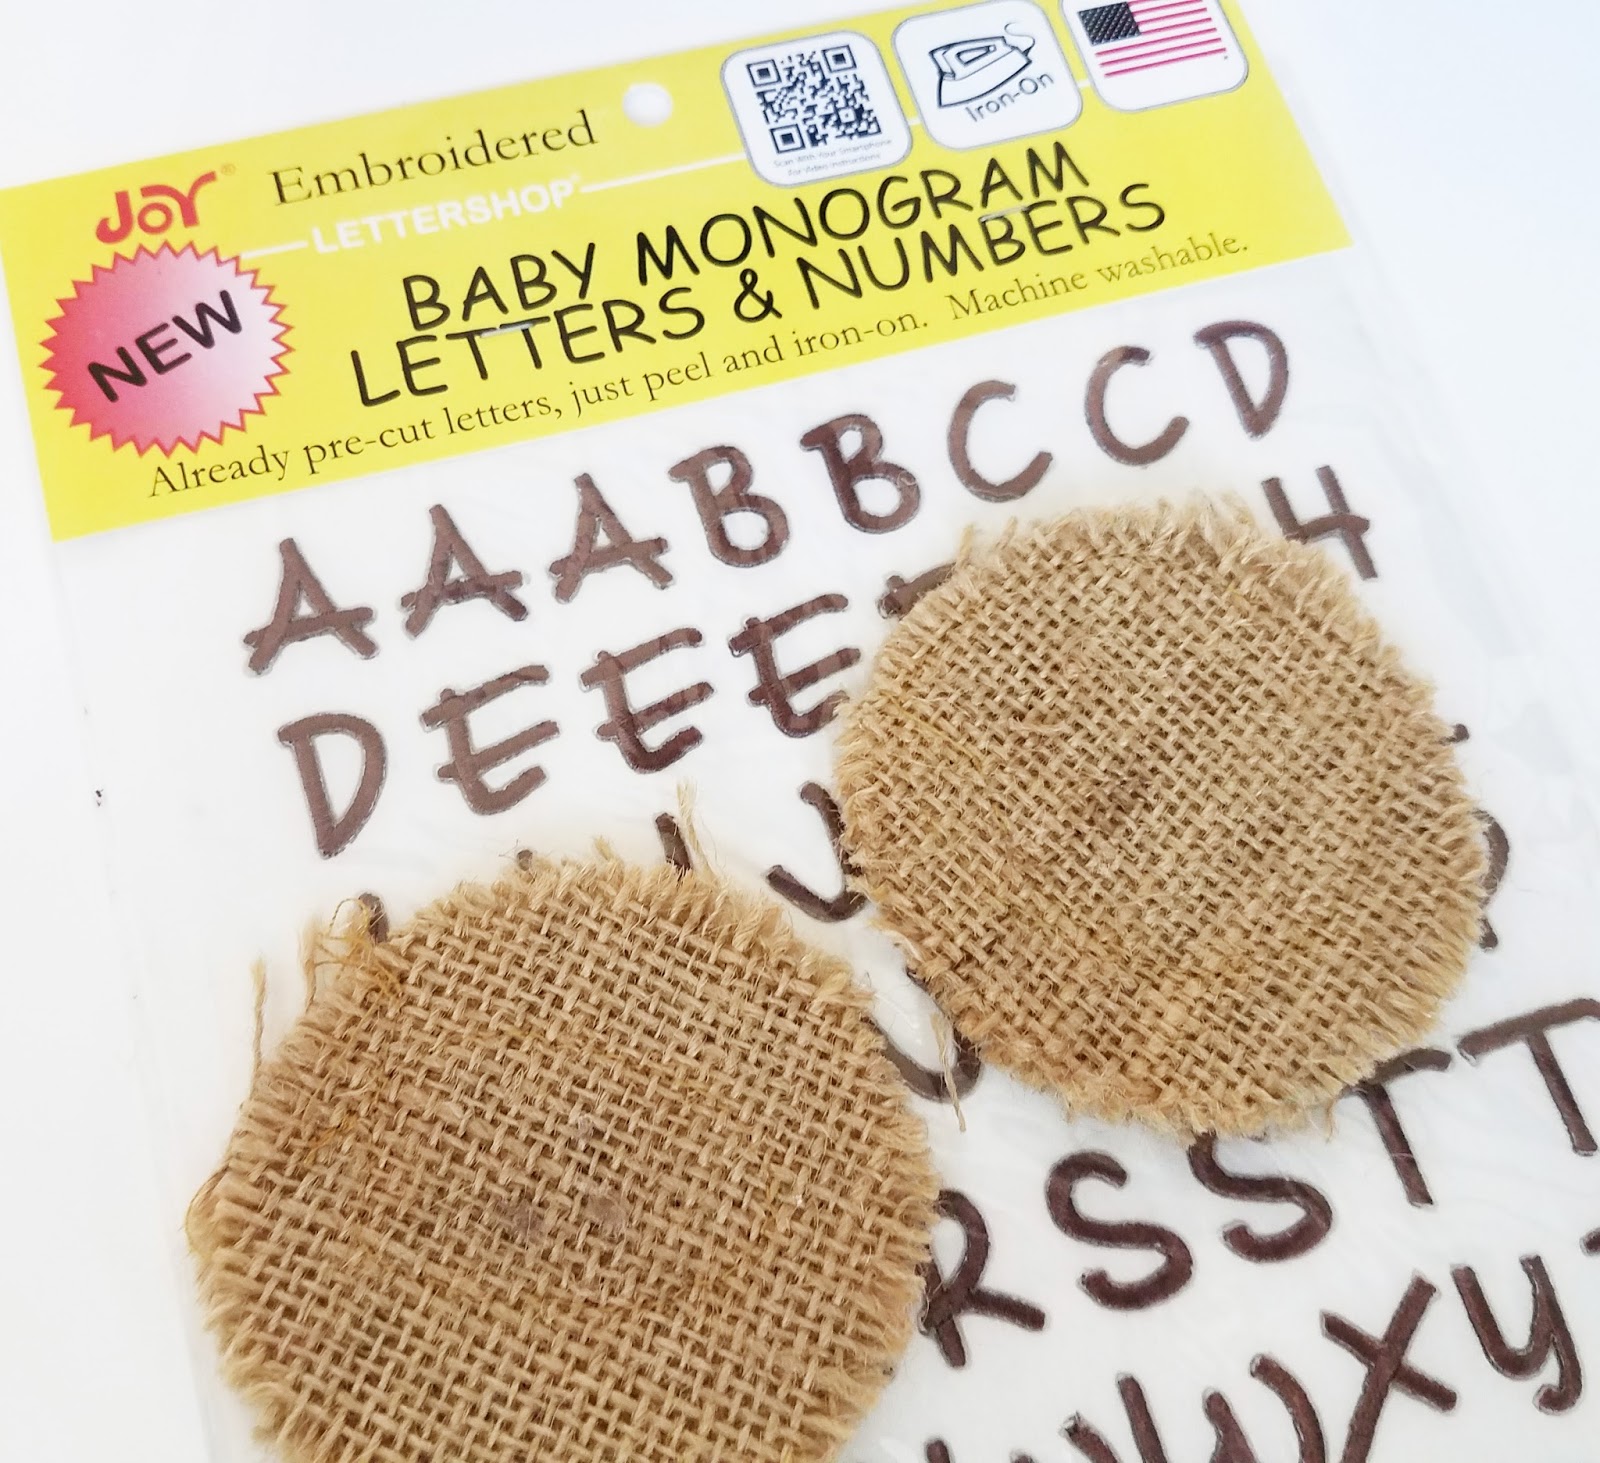
Small, metal buckets with burlap circles for labels will do the trick and they're easy to customize using Joy® iron-on letters.

You will need: Joy® Baby Monogrammed Letters & Numbers sheet - Brown Small metal buckets Gesso - white Craft paint - Baby Pink

Jute Twine - Pink Twine

Faux burlap trim - White 

Natural burlap fringe

Burlap mini shapes – round

Diamond mesh – Pink Large canvas flower

Ruffled roses

Silk leaves – Tan

Mini roses – Pink

Small roses – Cream

Xyron® 5” permanent  Adhesive Cartridge

Iron

Fabric glue

Tacky glue

Scissors

Paint brush

Large eye/tapestry needle

1. Paint the outside surface of both buckets with gesso. Add a small amount of pink paint for a hint of color for one bucket.

2. Cut texture trims into 12” lengths.

3. Cut a length of faux white burlap long enough to wrap around the bucket and wide enough to cover the sides from top and bottom.  Pull a few strands away from the edges to fray.

4. Trim the burlap fringe to fit on top of the white burlap.

5. Cut diamond mesh to 3 stands in width.

6. Run all three lengths of textured trim through the Xyron® 5” permanent adhesive cartridge to turn them into stickers.

7. Place the white burlap on top of the pink bucket. Layer the natural burlap on top then the diamond mesh. Repeat this step to cover the white bucket, reversing the order of texture trims and diamond mesh.

8. Position, then iron the letters needed to spell the words PEN and TOOL onto the burlap circles following directions on the packaging. Iron one word on each circle.

9. Using the needle, thread one yard of pink jute twine thru the top of a burlap circle.  Center the circle at the front of the bucket then wrap the twine around 4-6 times. Tie the ends together under the circle.  

10. Glue 5 flowers to the top of each of the burlap circles as shown then adhere the 2 large and 2 small leaves under each cluster of flowers.

11. Fill the buckets with pens, or tools to finish.

Enjoy this short video on how to make this simple and functional gift.

Look for Joy® iron-on embroidered letters and numbers at your favorite craft store. They're available in different sizes, colors and fonts, suitable for every occasion.

Leave a Reply

Your email address will not be published. Required fields are marked *

Recent Projects

Luck O' the Irish DIY Door Hanger

St. Patrick’s Day is just around the corner!  Celebrate the Luck O' the Irish with this colorful door décor that is a fun alternative to a traditional wreath.  You will need: Joy® Iron On Embroidered Letter sheet - Gold Script Kunin Classics™ Felt 9” x 12” Craft Cuts– Red, Orange, Yellow, Apple Green, Lagoon, Royal Blue, Orchid, Pirate Green, Neon Green, Gold and Goldenrod (one each) Kunin Premium™ Felt 9” x 12” Craft Cuts– White and Black (two each). Expo International – Claudia 2” Fan and Lattice Lace.  Ric Rac assorted Rayon – Red, Orange, Yellow, Green, Light Blue, Royal…

Rustic Happy Fall Y'all Pumpkin Sign

HAPPY FALL Y'ALL! I am always on the look out for cute items that can be upcycled to create one of a kind home decor pieces.  This rustic pallet pumpkin was just calling out to me from the Target dollar spot and with the addition of some Joy® iron-on embroidered letters, it quickly becomes a custom keepsake. Select a combination of white Joy® iron-on embroidered letters to spell out your message. To create the apostrophe, I carefully cut the leg from the capital letter Q with a pair of detail scissors. Place the embroidered letters on an old towel in a cardboard box…

Back to School Welcome Banner

Create a "Back to School" welcome banner for your favorite teacher's classroom! Materials: JOY® Embroidered Letters 9” x 12” sheets of Kunin Classicfelt -Black , Gray, Sandstone, Candy Pink and Gold Craft glue Glitter glue Cardstock Ruler, pencils, scissors 4-foot length of ribbon Instructions: Draw a simple pencil pattern (5 pieces as shown) on cardstock and cut out.   Trace and trim each pattern piece seven times on the appropriate color of felt. Glue the pencil pieces together, overlapping as shown and let dry. 4. Peel back liner paper from the JOY letters and attach to the center of each pencil, spelling…

Scrabble-Inspired Tote Bag

I am all about recycling, but most of the tote bags that the grocery stores sell are not very cute or crafty. So in honor of family game night, I created a Scrabble-inspired bag to tote around town! This project makes the perfect quick and easy handmade gift to create for Mom for Mother's Day! Decide what words you want to spell and how they'll connect, making sure the arrangement will fit on the front of your tote bag. Draw a grid of square tiles on graph paper to fit each of your letters. I selected the Joy 1.5" Cooper Style…

Happiness Pillow

Joy® Iron-on embroidered letters in white are great for creating any color you can imagine! You can use dye, markers and even acrylic paint! To Make this Happiness Pillow you'll need: Joy® Embroidered Iron-on Letters - Letter Shop White  Acrylic Paint and Paintbrush NEW Joy® Iron-on Embroidered Flower Appliqué    Canvas Pillow Blank Pillow Form or Polyfil Iron Instructions: 1. Paint each letter to create a rainbow of H-A-P-P-I-N-E-S-S.  Set aside and let dry. 2.  Insert cardboard into pillow blank then paint the pillow with white and light blue paint.  Let dry. 3. Set iron on cotton setting; approx. 350 degrees,…
closearrow-circle-o-downtagtagsminus-circlefacebook-squaretruckpinterest-squareinstagrammenu
0
    0
    Shopping Cart
    Your cart is emptyReturn to Shop