FREE Standard Shipping with $50 Order
|
Minimum Order is $15
10% Discount on $300 Order
|
25% Discount on $600 Order

Emoji rosette fans

PriMarilynLy Paper
|
July 9, 2017

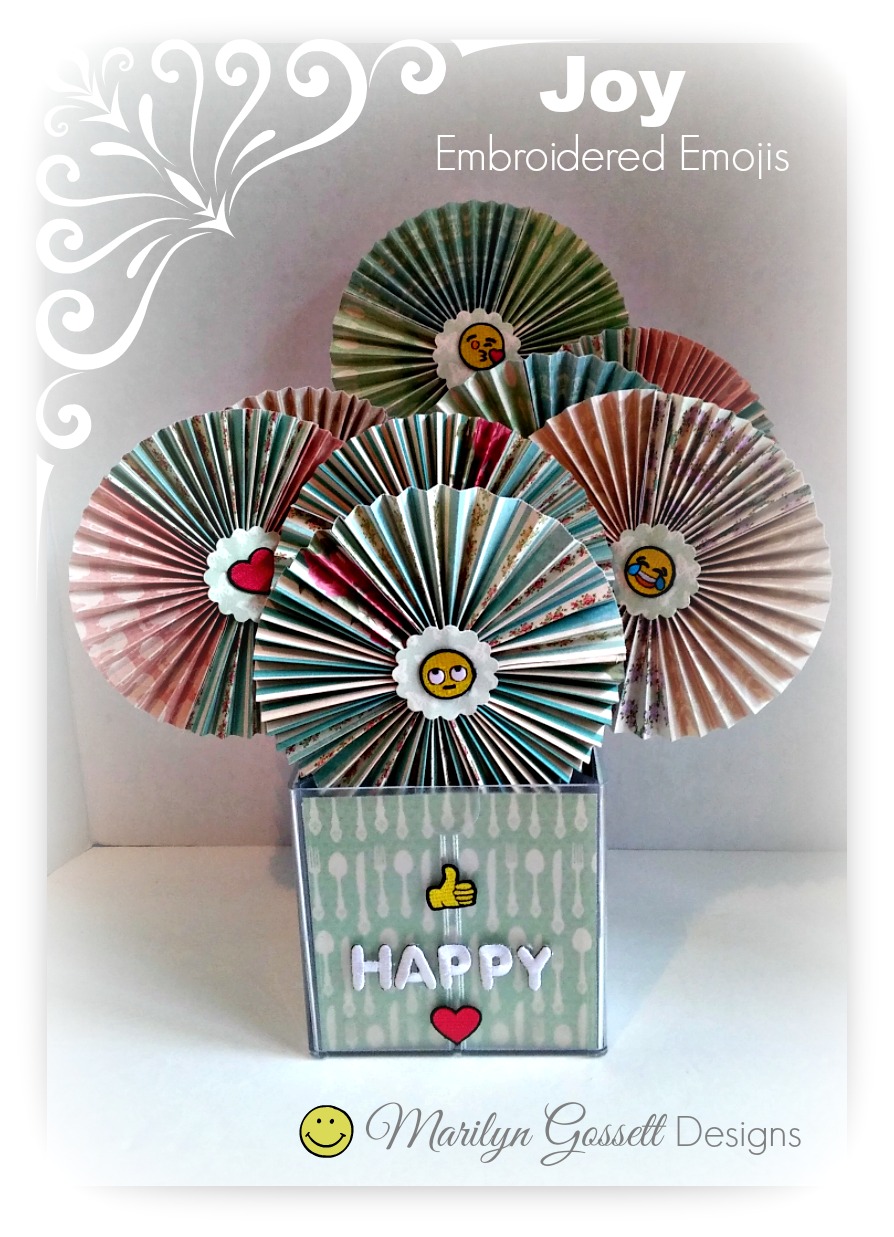
Are you planning on doing some entertaining during the coming summer months? I sure am! We have extended the living quarters from inside of the house to the backyard and deck. Anticipating hot sunny days, I have made up a bunch of emoji fans for guests who come to enjoy the dog days of summer with us.

You will need:

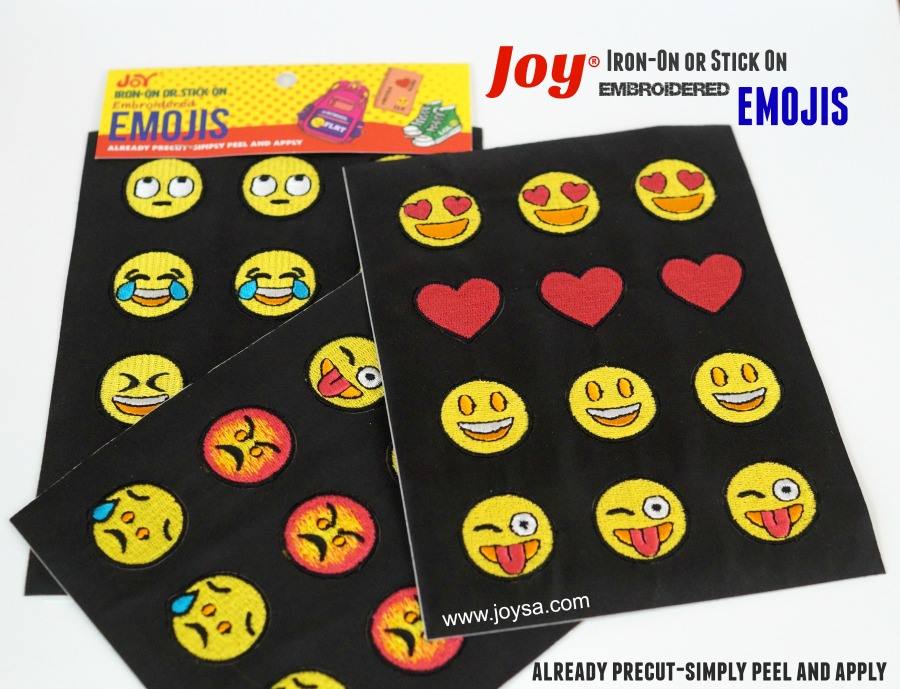
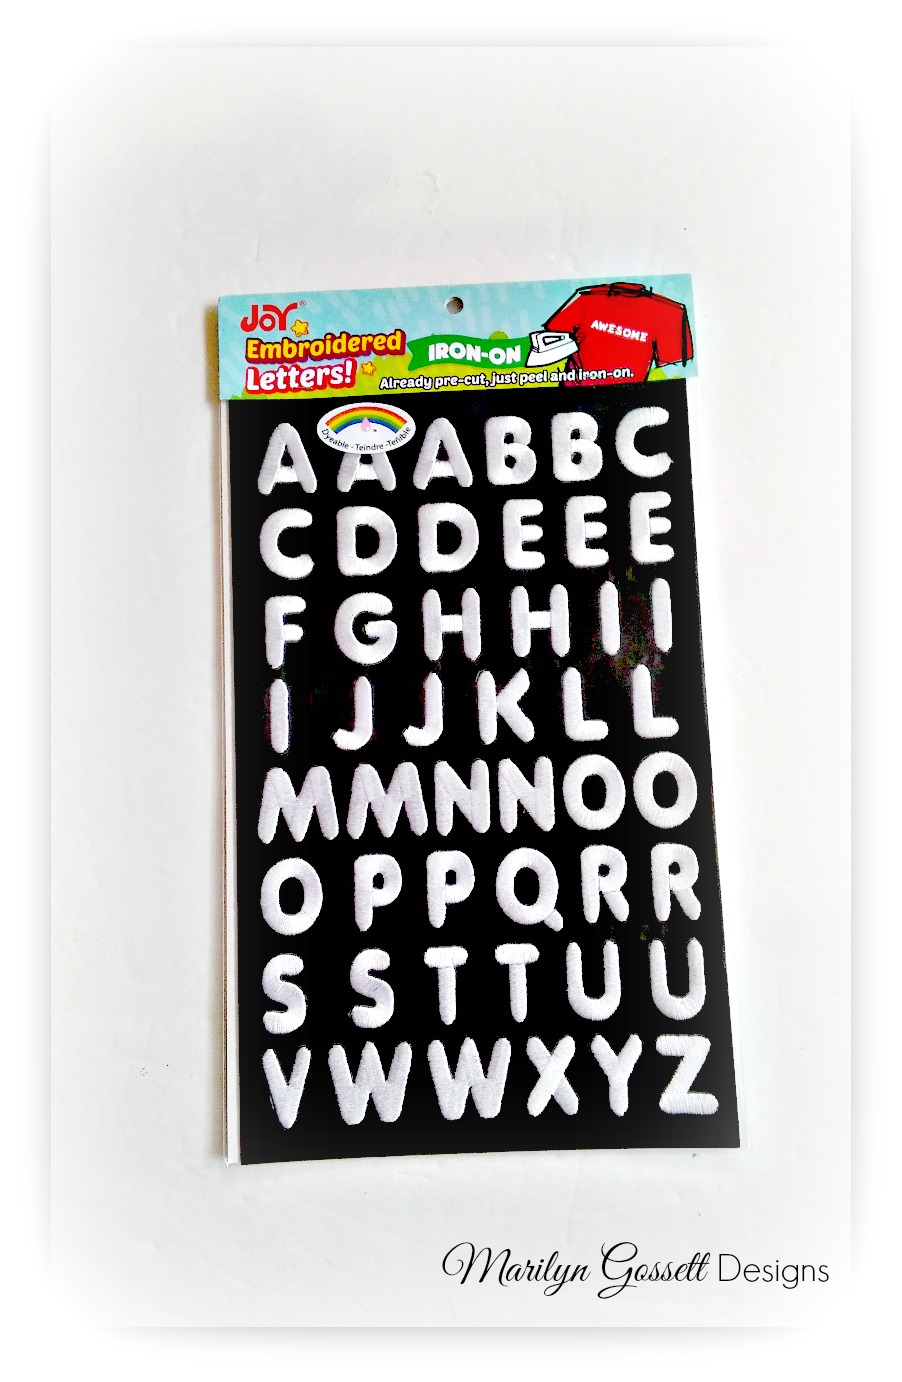
Joy embroidered emojis and letters

12x12" two-sided patterned scrapbook papers (1 sheet for each fan)

Self-adhesive craft sticks

Paper trimmer/scorer

Hot glue, craft adhesives

2" scalloped circles and 3" plain circles, punched/diecut from cardstock

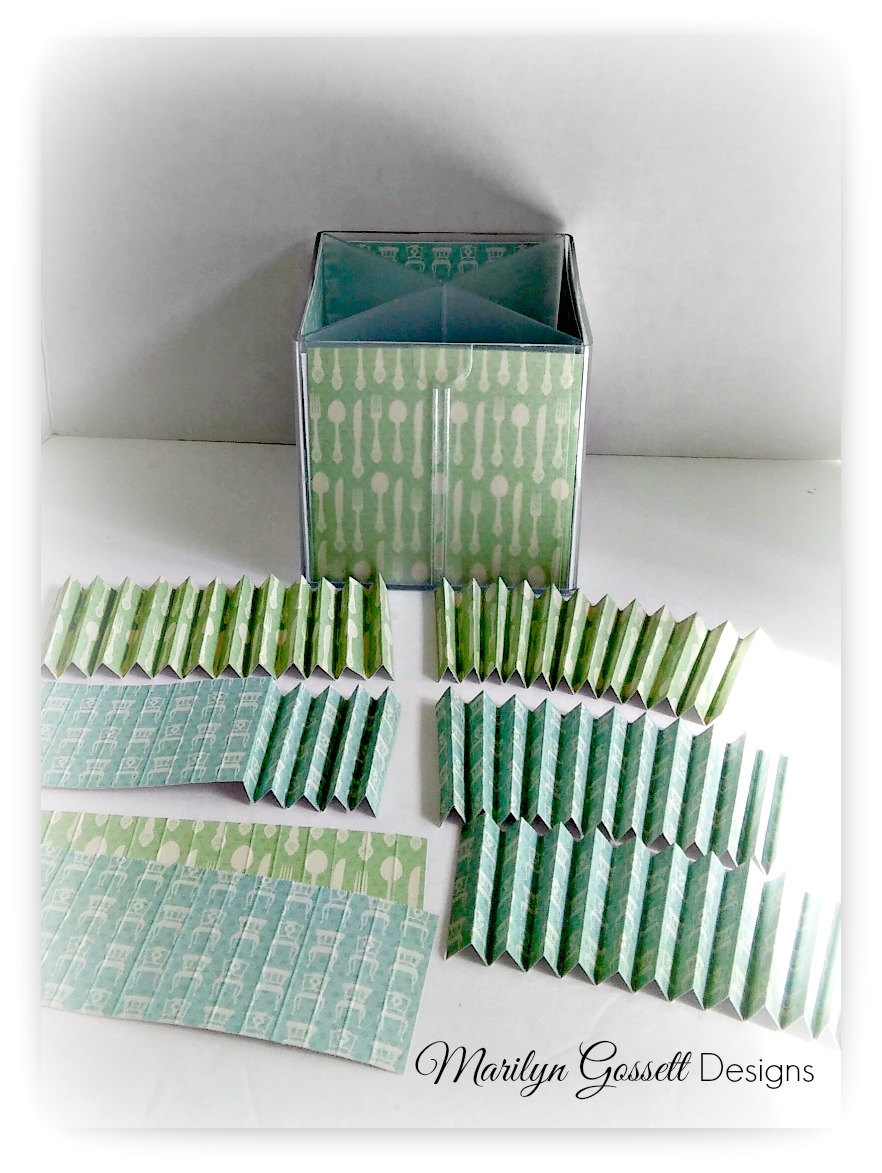
Acrylic display cube

Instructions:

1.  Cut scrapbook paper into squares to fit the sides of your display cube. Use clear adhesive and apply the papers inside the cube. Glue some Joy emojis and a word to the front of the display cube.

2.  To make a fan - measure and score one sheet of paper every 1/2" from the top to the bottom. Cut into four 3x12" strips. Apply glue to the end of one fan-folded strip, match up to a contrasting pattern and adhere. Repeat, gluing all four pieces into one long strip. Glue the remaining two edges together into a 'cylinder."

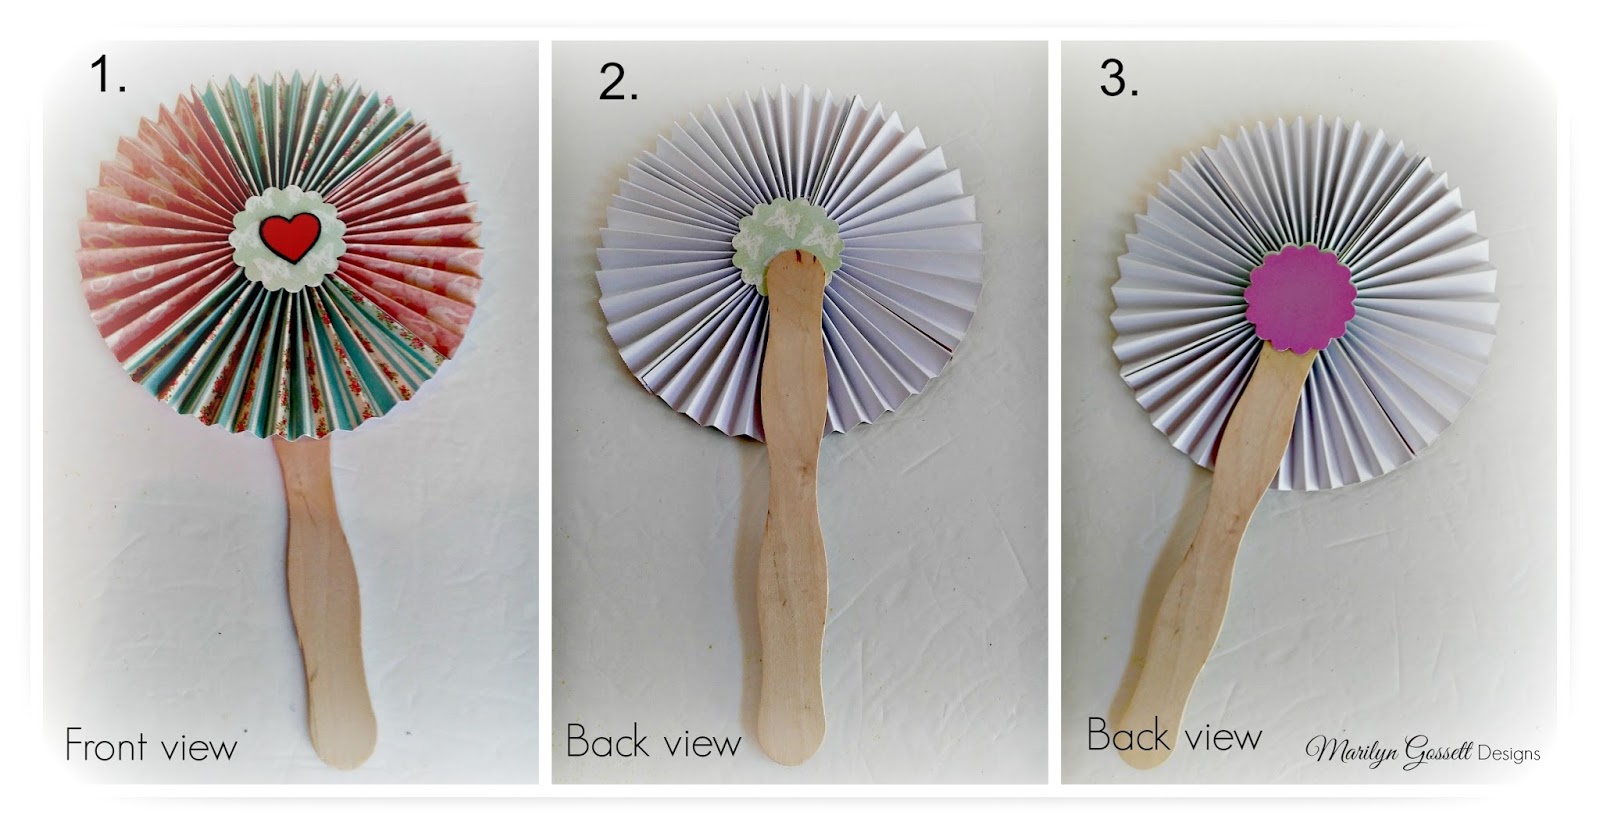
3.  Flatten the cylinder into a circle and push the edges together toward the center until there is a 1-1/4" hole in the center. Hold in place and apply glue around the punched circle and press it over the hole. This will hold the circle fan in place. Turn the fan over and repeat for back side. Glue an emoji to the middle of the front of the fan.

4.  Adhere the top of the self-adhesive craft stick to the middle of the back side of the fan. Glue a 3" circle to the center of the fan, covering the top of the handle.

Leave a Reply

Your email address will not be published. Required fields are marked *

Recent Projects

Luck O' the Irish DIY Door Hanger

St. Patrick’s Day is just around the corner!  Celebrate the Luck O' the Irish with this colorful door décor that is a fun alternative to a traditional wreath.  You will need: Joy® Iron On Embroidered Letter sheet - Gold Script Kunin Classics™ Felt 9” x 12” Craft Cuts– Red, Orange, Yellow, Apple Green, Lagoon, Royal Blue, Orchid, Pirate Green, Neon Green, Gold and Goldenrod (one each) Kunin Premium™ Felt 9” x 12” Craft Cuts– White and Black (two each). Expo International – Claudia 2” Fan and Lattice Lace.  Ric Rac assorted Rayon – Red, Orange, Yellow, Green, Light Blue, Royal…

Rustic Happy Fall Y'all Pumpkin Sign

HAPPY FALL Y'ALL! I am always on the look out for cute items that can be upcycled to create one of a kind home decor pieces.  This rustic pallet pumpkin was just calling out to me from the Target dollar spot and with the addition of some Joy® iron-on embroidered letters, it quickly becomes a custom keepsake. Select a combination of white Joy® iron-on embroidered letters to spell out your message. To create the apostrophe, I carefully cut the leg from the capital letter Q with a pair of detail scissors. Place the embroidered letters on an old towel in a cardboard box…

Back to School Welcome Banner

Create a "Back to School" welcome banner for your favorite teacher's classroom! Materials: JOY® Embroidered Letters 9” x 12” sheets of Kunin Classicfelt -Black , Gray, Sandstone, Candy Pink and Gold Craft glue Glitter glue Cardstock Ruler, pencils, scissors 4-foot length of ribbon Instructions: Draw a simple pencil pattern (5 pieces as shown) on cardstock and cut out.   Trace and trim each pattern piece seven times on the appropriate color of felt. Glue the pencil pieces together, overlapping as shown and let dry. 4. Peel back liner paper from the JOY letters and attach to the center of each pencil, spelling…

Scrabble-Inspired Tote Bag

I am all about recycling, but most of the tote bags that the grocery stores sell are not very cute or crafty. So in honor of family game night, I created a Scrabble-inspired bag to tote around town! This project makes the perfect quick and easy handmade gift to create for Mom for Mother's Day! Decide what words you want to spell and how they'll connect, making sure the arrangement will fit on the front of your tote bag. Draw a grid of square tiles on graph paper to fit each of your letters. I selected the Joy 1.5" Cooper Style…

Happiness Pillow

Joy® Iron-on embroidered letters in white are great for creating any color you can imagine! You can use dye, markers and even acrylic paint! To Make this Happiness Pillow you'll need: Joy® Embroidered Iron-on Letters - Letter Shop White  Acrylic Paint and Paintbrush NEW Joy® Iron-on Embroidered Flower Appliqué    Canvas Pillow Blank Pillow Form or Polyfil Iron Instructions: 1. Paint each letter to create a rainbow of H-A-P-P-I-N-E-S-S.  Set aside and let dry. 2.  Insert cardboard into pillow blank then paint the pillow with white and light blue paint.  Let dry. 3. Set iron on cotton setting; approx. 350 degrees,…
closearrow-circle-o-downtagtagsminus-circlefacebook-squaretruckpinterest-squareinstagrammenu
0
    0
    Shopping Cart
    Your cart is emptyReturn to Shop