FREE Standard Shipping with $50 Order
|
Minimum Order is $15
10% Discount on $300 Order
|
25% Discount on $600 Order

Emoji Bottlecap Jewelry

PriMarilynLy Paper
|
June 6, 2017

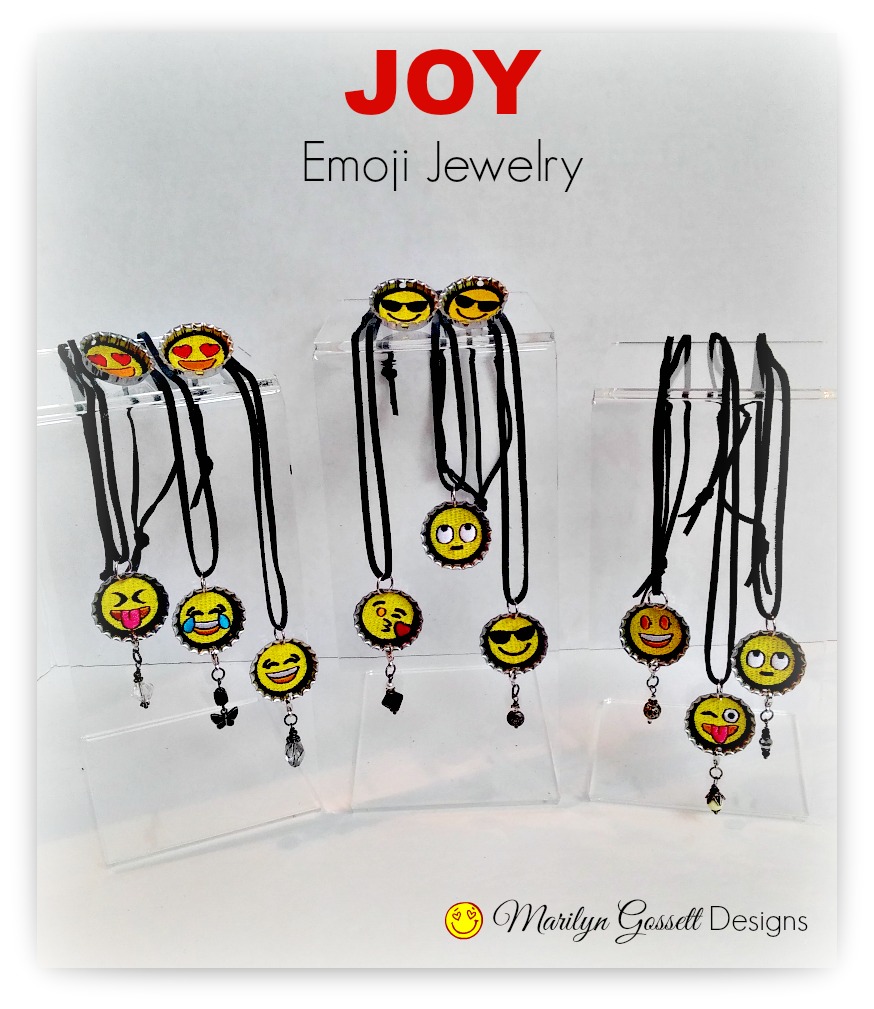
Emoji bottlecap jewelry is a quick and easy summer project for the kids, or you could even start your own little enterprise and make this jewelry to sell. This would be a perfect group project at a birthday party, too.  I am a grown -up (at least on most days...) and even I had fun making these quick and easy necklaces and earrings.

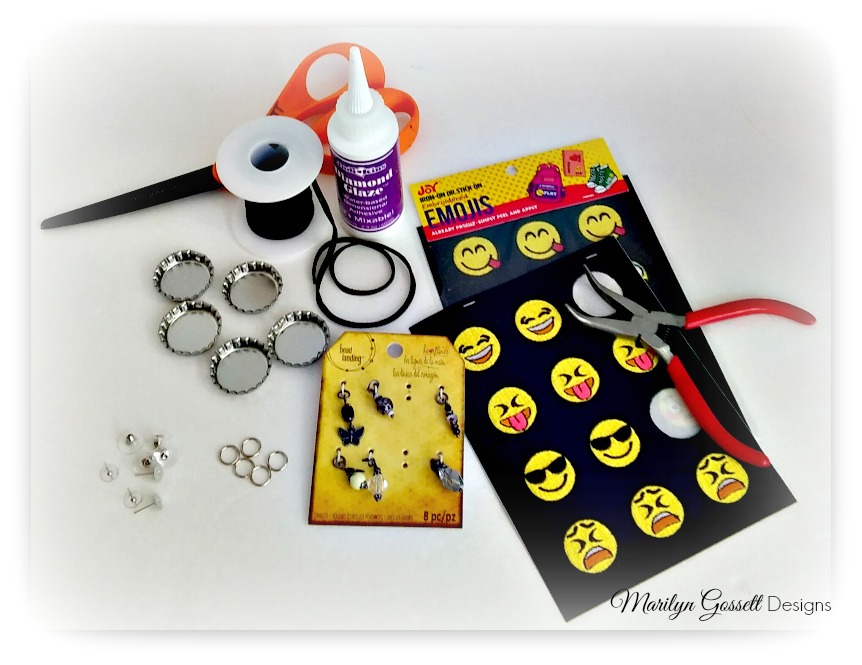
Here's what you will need:

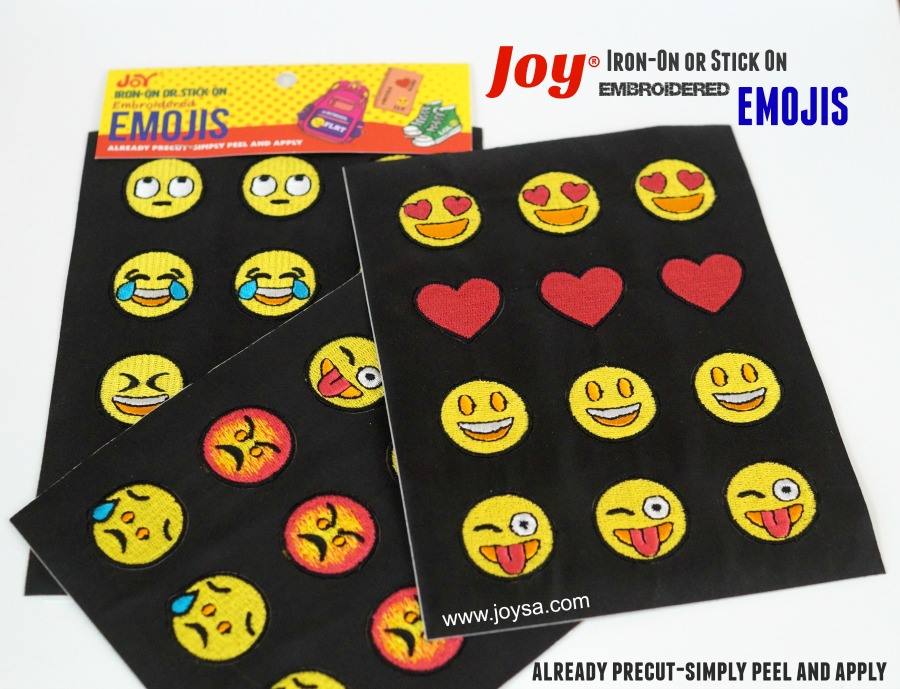
- Joy Embroidered Emojis

- Leather cord

- Bottle caps from the craft store  (These have holes drilled in top & bottom of the rim)

- Large jump rings

- Beaded dangles

- Earring findings

- Adhesive for jewelry-making

- Scissors

- Needlenose pliers

1.  For the necklace, choose an emoji; peel it from the release paper and push it into the bottle cap with a little adhesive to secure. Center the pre-drilled holes so the emoji face is upright. Use the pliers to open a large jump ring and attach it to the top of the bottle cap (emoji head). Close the jump ring. 2.  Use jump rings to attach a beaded dangle to the bottom hole in the bottle cap. I used beads that already had a jump ring attached. I used some lobster clasps to attach the beads to the bottle caps. 3.  Decide how long you want your necklace to be and cut a length of leather cord. Thread the cord through the jump ring at the top of the bottle cap.  Match the ends of the string and tie a knot to secure.

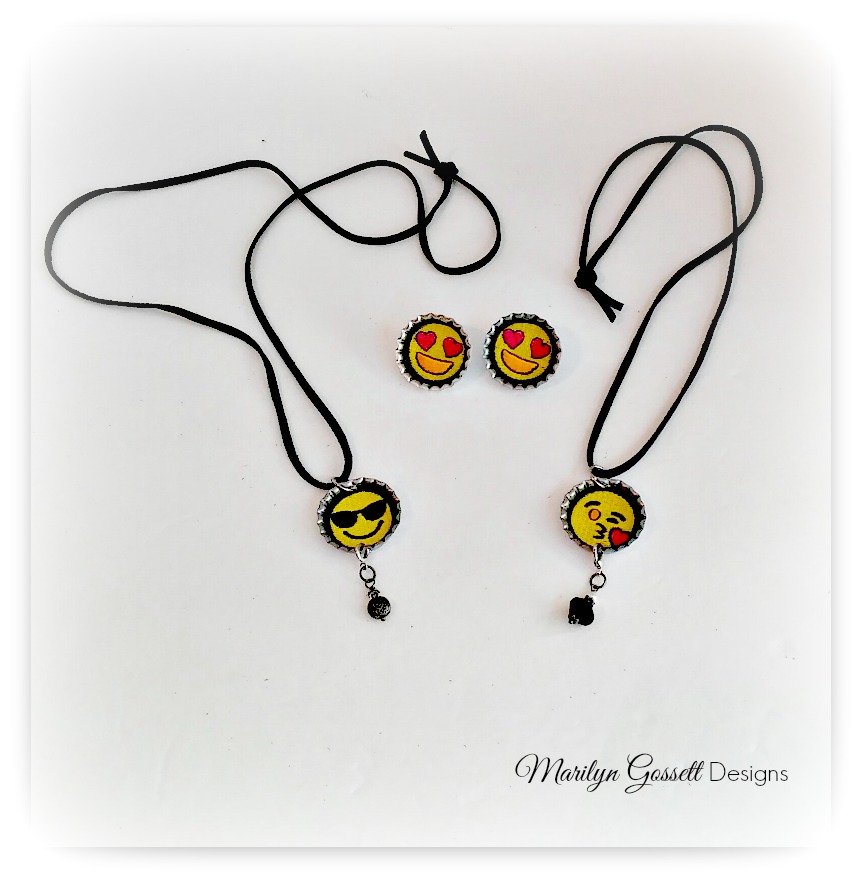
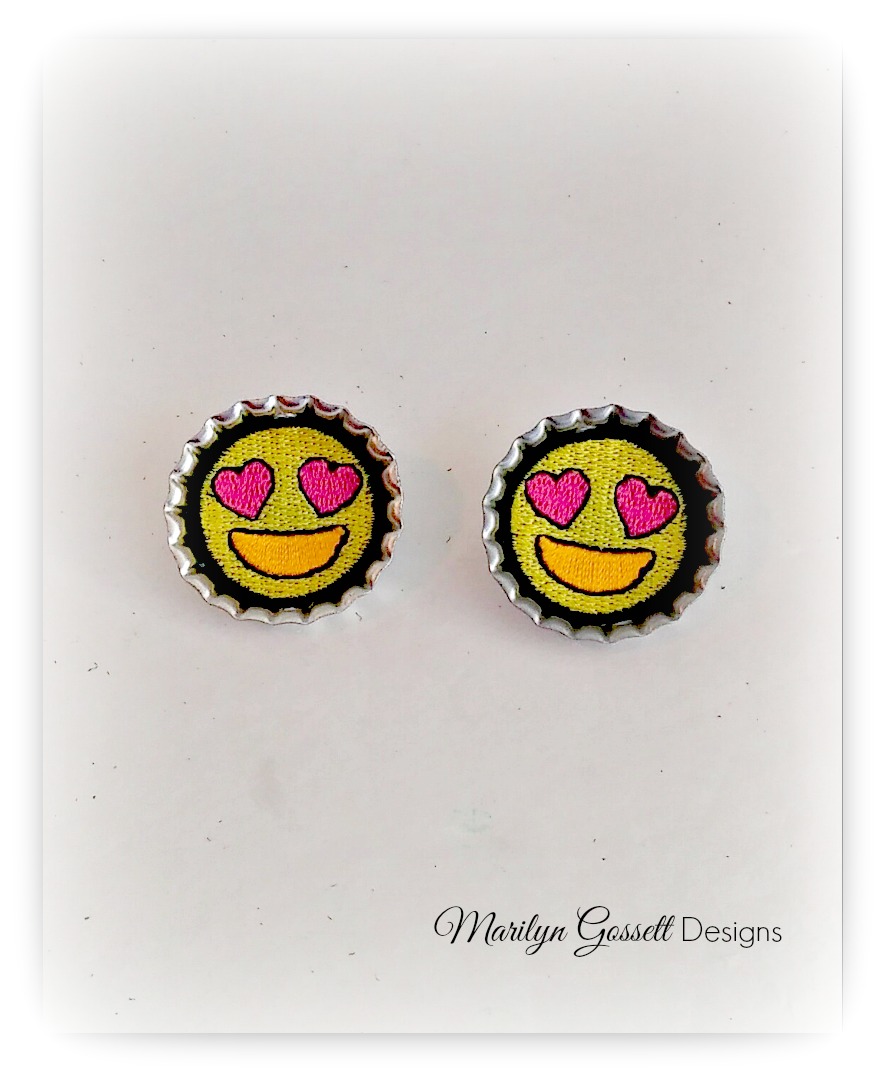
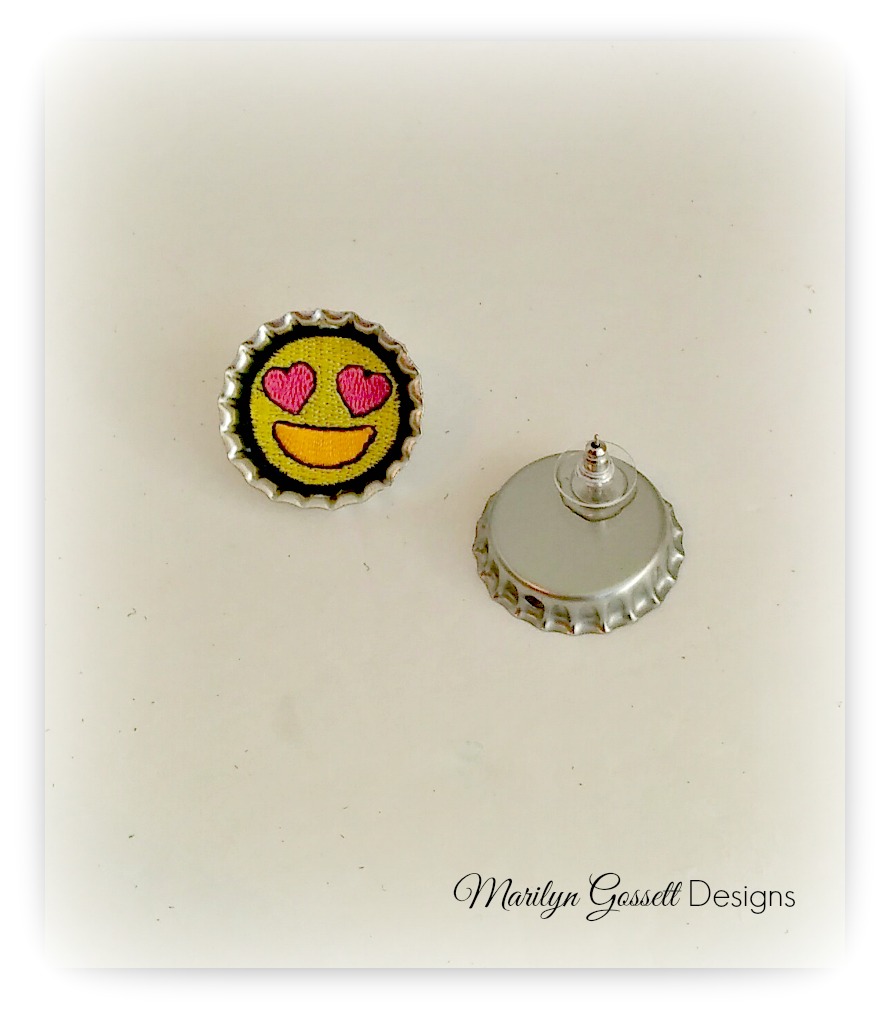
4.  For the earrings, adhere emojis inside a pair of bottlecaps. Glue an earring post to the back of the bottle cap. Allow the glue to dry thoroughly. Beads can be added to the earrings too - jazzing them up with some more embellishments makes for even more fun!

Leave a Reply

Your email address will not be published. Required fields are marked *

Recent Projects

Luck O' the Irish DIY Door Hanger

St. Patrick’s Day is just around the corner!  Celebrate the Luck O' the Irish with this colorful door décor that is a fun alternative to a traditional wreath.  You will need: Joy® Iron On Embroidered Letter sheet - Gold Script Kunin Classics™ Felt 9” x 12” Craft Cuts– Red, Orange, Yellow, Apple Green, Lagoon, Royal Blue, Orchid, Pirate Green, Neon Green, Gold and Goldenrod (one each) Kunin Premium™ Felt 9” x 12” Craft Cuts– White and Black (two each). Expo International – Claudia 2” Fan and Lattice Lace.  Ric Rac assorted Rayon – Red, Orange, Yellow, Green, Light Blue, Royal…

Rustic Happy Fall Y'all Pumpkin Sign

HAPPY FALL Y'ALL! I am always on the look out for cute items that can be upcycled to create one of a kind home decor pieces.  This rustic pallet pumpkin was just calling out to me from the Target dollar spot and with the addition of some Joy® iron-on embroidered letters, it quickly becomes a custom keepsake. Select a combination of white Joy® iron-on embroidered letters to spell out your message. To create the apostrophe, I carefully cut the leg from the capital letter Q with a pair of detail scissors. Place the embroidered letters on an old towel in a cardboard box…

Back to School Welcome Banner

Create a "Back to School" welcome banner for your favorite teacher's classroom! Materials: JOY® Embroidered Letters 9” x 12” sheets of Kunin Classicfelt -Black , Gray, Sandstone, Candy Pink and Gold Craft glue Glitter glue Cardstock Ruler, pencils, scissors 4-foot length of ribbon Instructions: Draw a simple pencil pattern (5 pieces as shown) on cardstock and cut out.   Trace and trim each pattern piece seven times on the appropriate color of felt. Glue the pencil pieces together, overlapping as shown and let dry. 4. Peel back liner paper from the JOY letters and attach to the center of each pencil, spelling…

Scrabble-Inspired Tote Bag

I am all about recycling, but most of the tote bags that the grocery stores sell are not very cute or crafty. So in honor of family game night, I created a Scrabble-inspired bag to tote around town! This project makes the perfect quick and easy handmade gift to create for Mom for Mother's Day! Decide what words you want to spell and how they'll connect, making sure the arrangement will fit on the front of your tote bag. Draw a grid of square tiles on graph paper to fit each of your letters. I selected the Joy 1.5" Cooper Style…

Happiness Pillow

Joy® Iron-on embroidered letters in white are great for creating any color you can imagine! You can use dye, markers and even acrylic paint! To Make this Happiness Pillow you'll need: Joy® Embroidered Iron-on Letters - Letter Shop White  Acrylic Paint and Paintbrush NEW Joy® Iron-on Embroidered Flower Appliqué    Canvas Pillow Blank Pillow Form or Polyfil Iron Instructions: 1. Paint each letter to create a rainbow of H-A-P-P-I-N-E-S-S.  Set aside and let dry. 2.  Insert cardboard into pillow blank then paint the pillow with white and light blue paint.  Let dry. 3. Set iron on cotton setting; approx. 350 degrees,…
closearrow-circle-o-downtagtagsminus-circlefacebook-squaretruckpinterest-squareinstagrammenu
0
    0
    Shopping Cart
    Your cart is emptyReturn to Shop