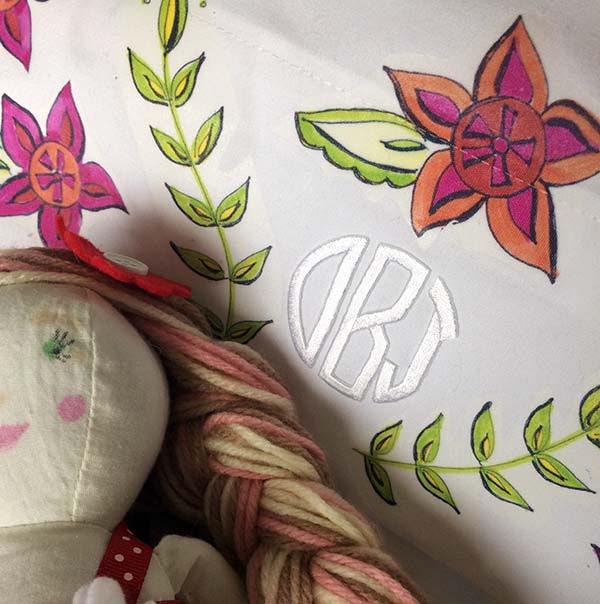
Make a Monogrammed Pillowcase
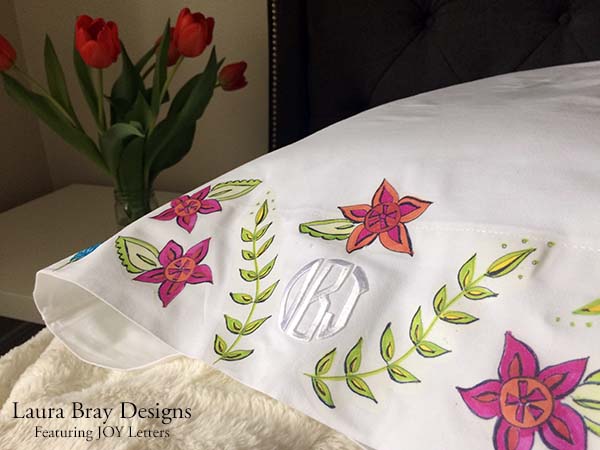
This project is a modern take on vintage-style pillowcases. You know the ones with embroidered monograms and flowers? Who has time to embroider all that? Just use Joy iron-on letters flowers and you'll have a beautiful, personalized pillowcase in minutes. Supplies for a Monogrammed Pillowcase
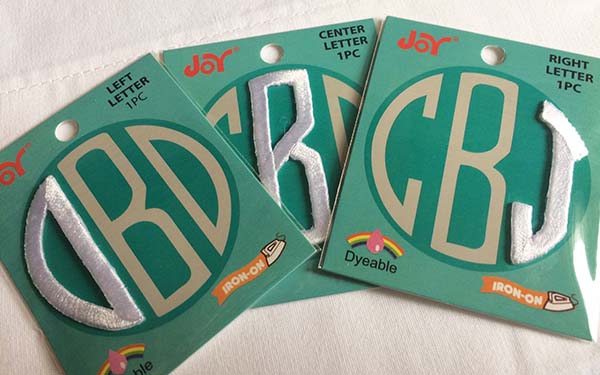
- JOY Letters - you can find these in your local craft store
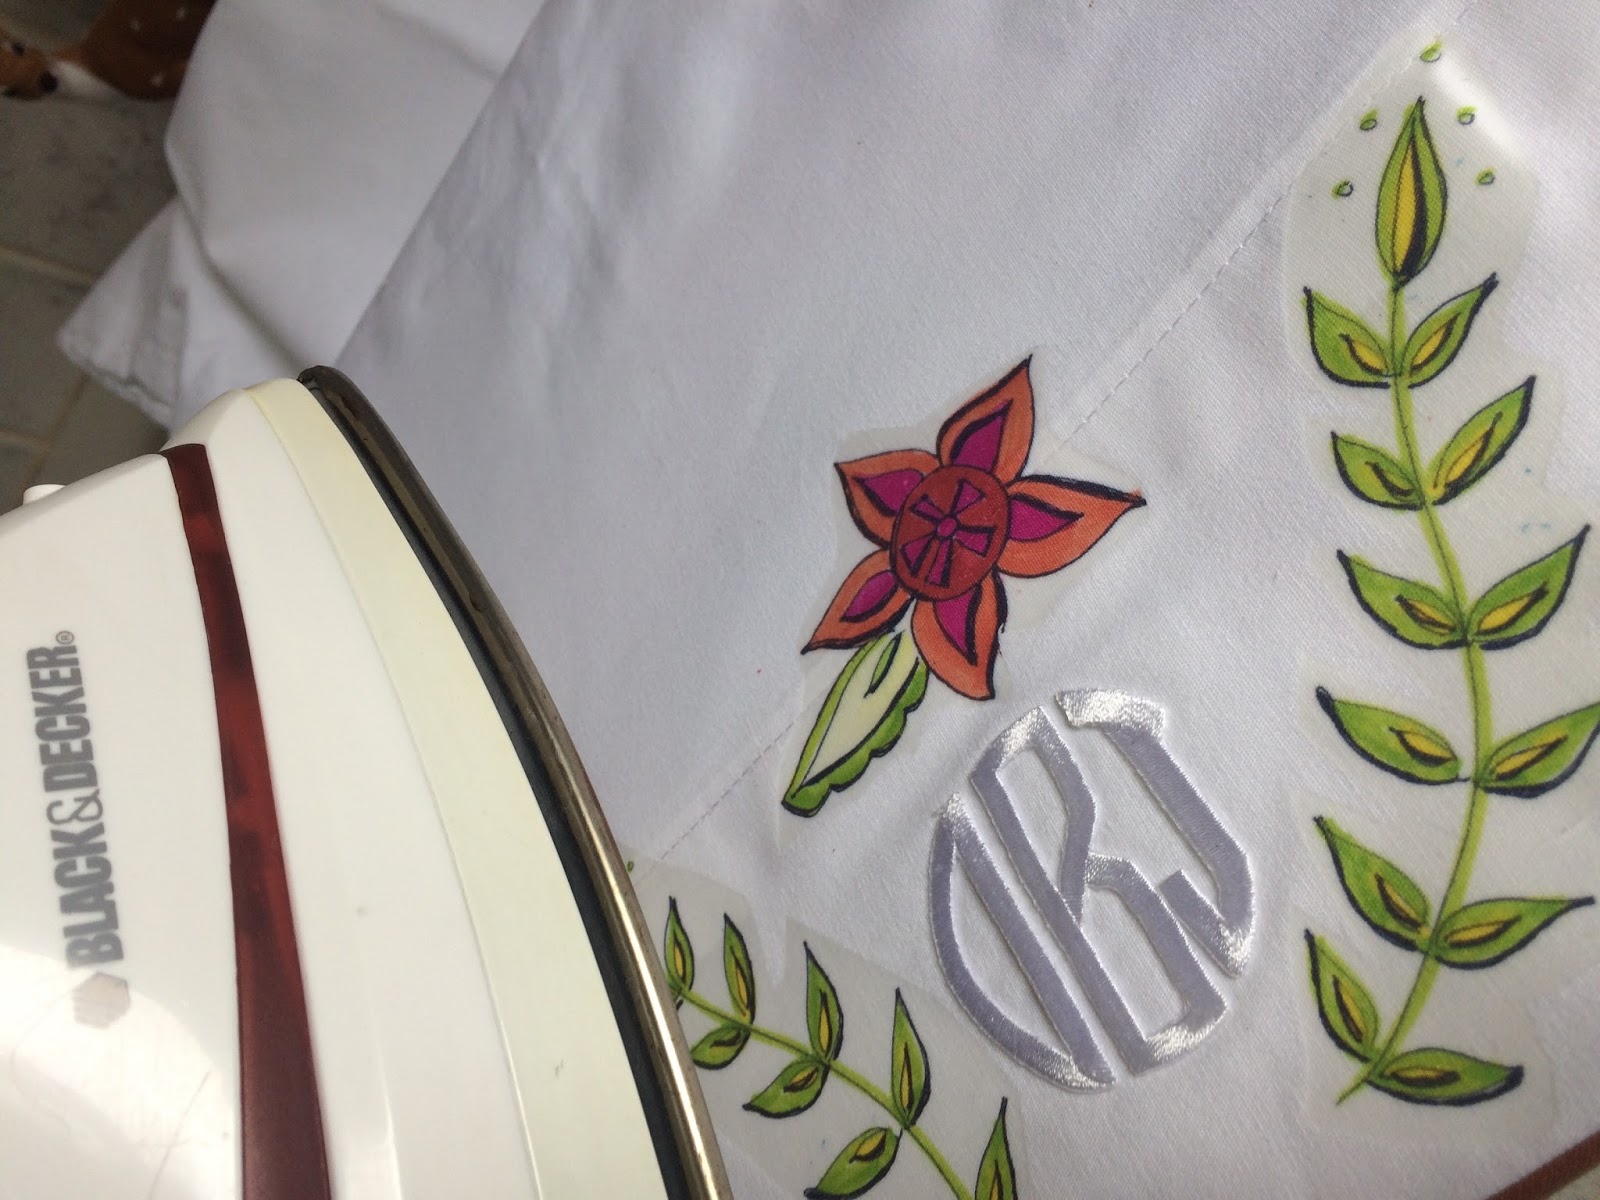
- Iron-on transfer paper
- Images of flowers (I used flower images that I scanned into my computer from my sketchbook. If you don't draw, you can use copyright-free clip art)
- White pillowcase
- Iron & ironing board
Instructions to Make a Monogrammed Pillowcase
Center the Joy letters onto the pillowcase edge, then follow the instructions on the packaging to iron them into place. When creating monograms, here's the order for the letters: First Name (left), Last Name (center), Middle Name (right). Designer Tip! I used the white monograms as is for a subtle look on my white pillowcase. If you want something that is bolder, you can dye the monograms any color you want!
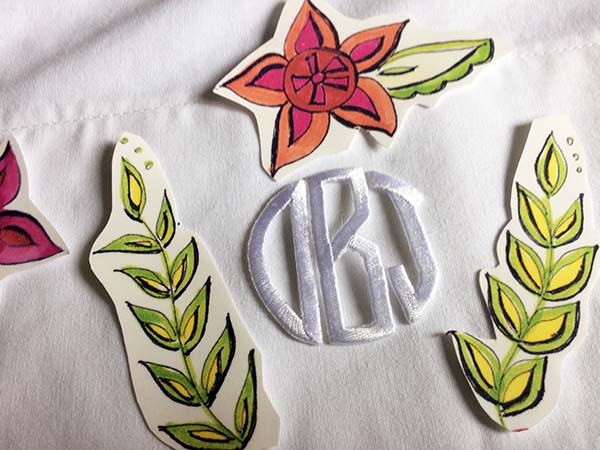
Arrange your iron-on flower images around the monogram. Follow the instructions on the transfer paper packaging carefully to ensure that your images transfer correctly.
And that's it! To care for your pillowcase, be sure to wash it inside out with the gentle cycle in cold water, then let it air dry. I hope you'll try this project out. Special pillowcases like this can become family heirlooms filled with meaning. To read about my memories of pillowcases and childhood summers, visit this blog post.