FREE Standard Shipping with $50 Order
|
Minimum Order is $15
10% Discount on $300 Order
|
25% Discount on $600 Order

Quick and easy St. Patricks Day banner

Beth Watson
|
March 9, 2017

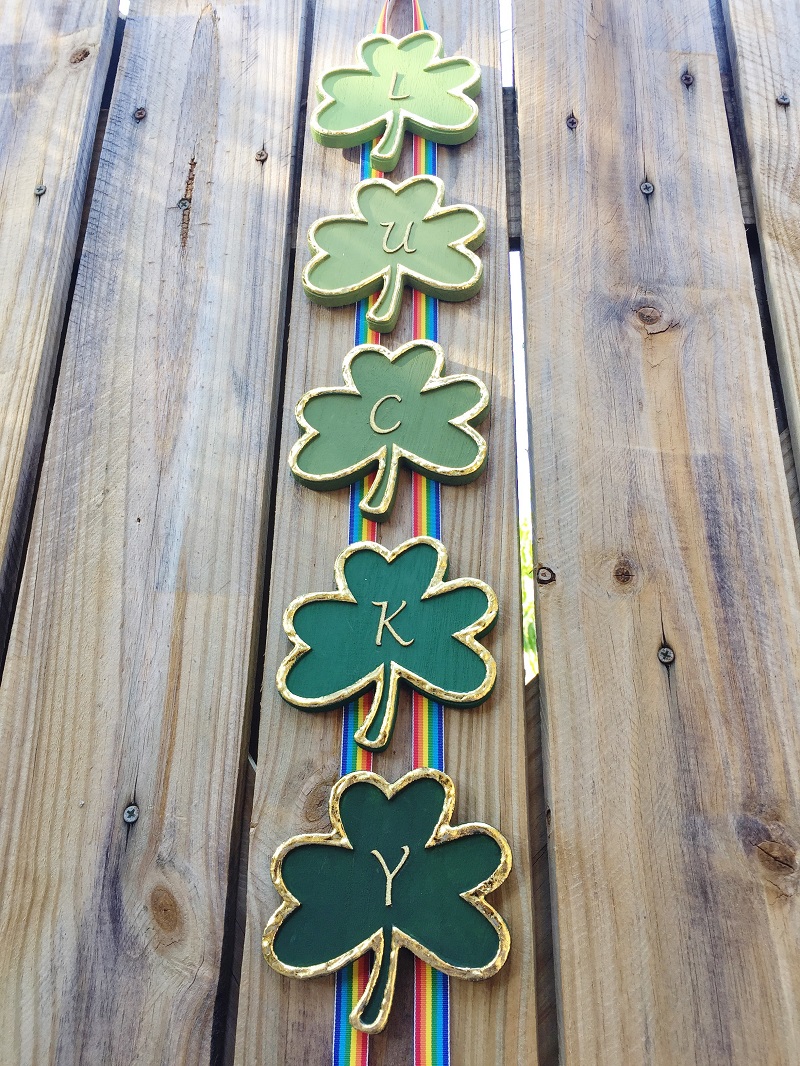
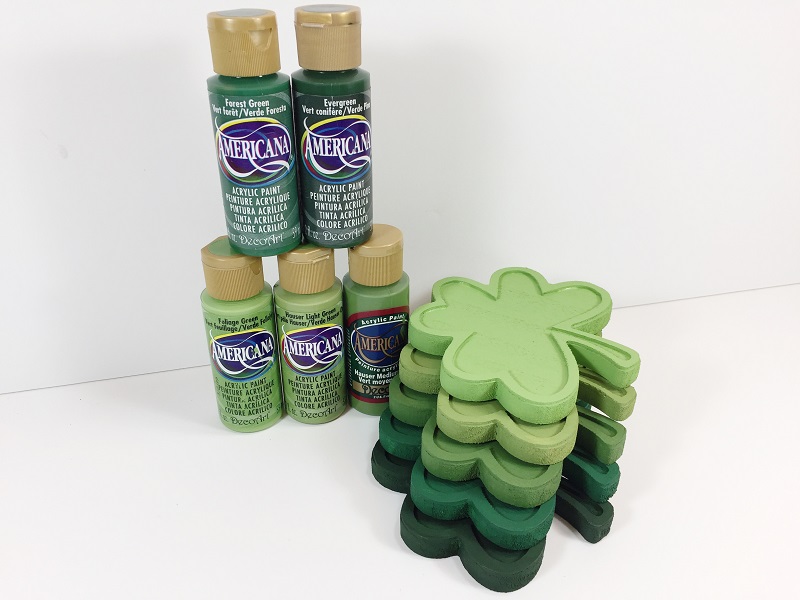
The day of the leprechaun is just around the corner and you can make this quick and easy banner for St. Patrick's Day in just under an hour. Maybe it will bring me some LUCK this year! I hope this lucky shamrock banner inspires you to create some St. Patrick's Day themed home decor items. Paint five wooden shamrock shapes in five different shades of green craft paint. Let dry, then apply a second coat, if necessary.

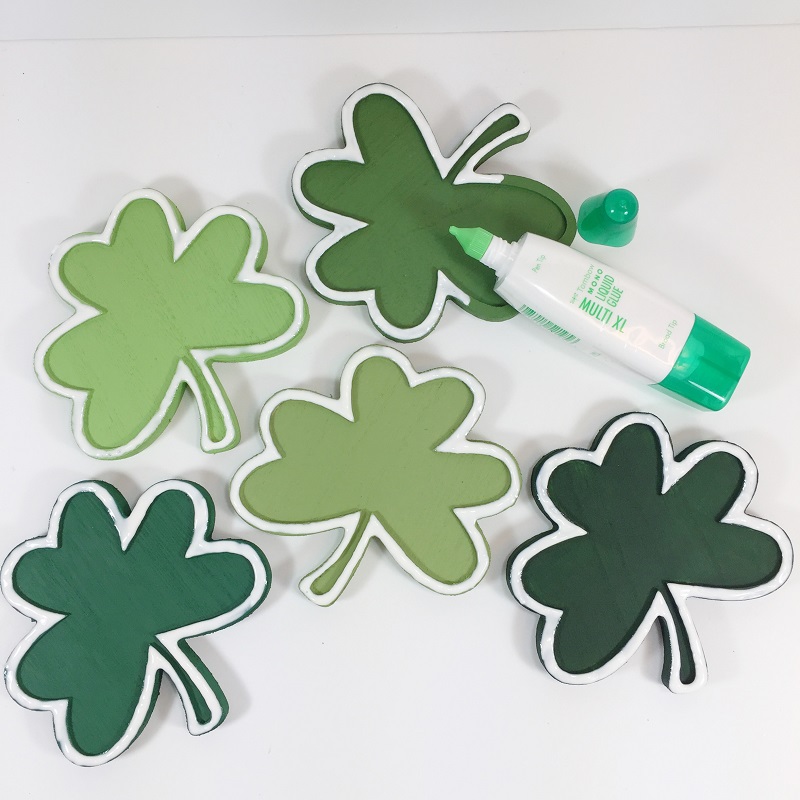
Apply liquid glue to the edges of each shamrock. This glue applies white, but dries clear and tacky. I always let it set up overnight.

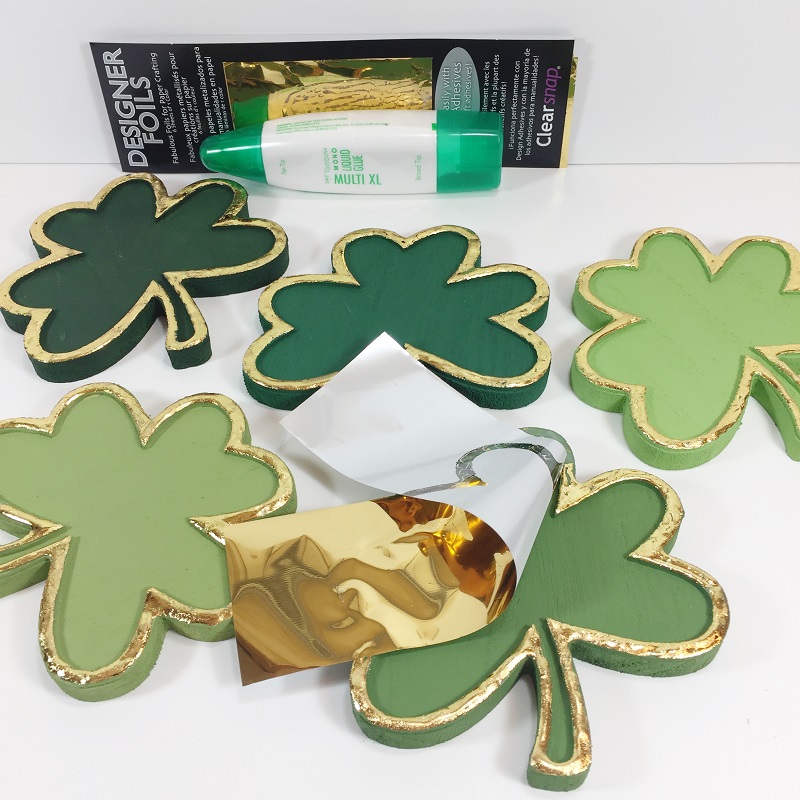
Once the glue is dry and clear, apply release-foil by pressing and burnishing gently with your fingers, then peel back. Repeat until all the edges are covered.

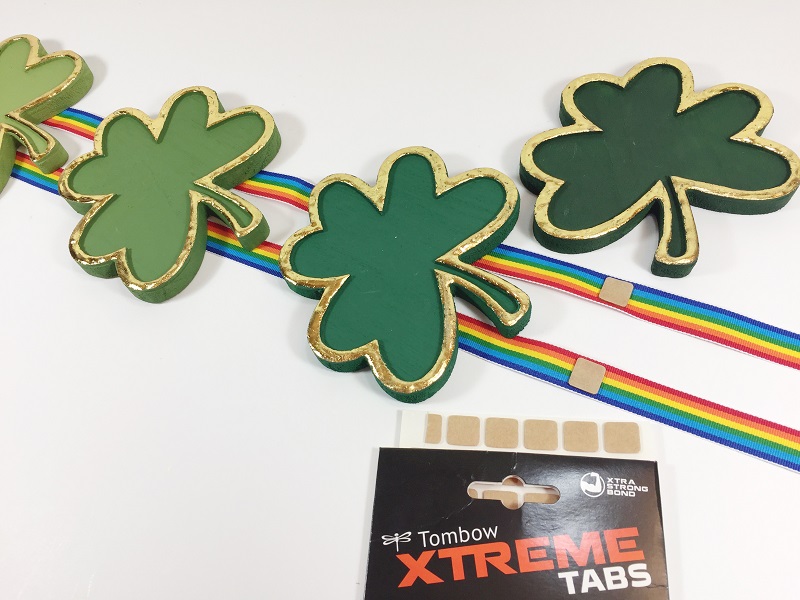
Attach shamrocks to rainbow ribbon with clear adhesive tabs. I chose to hang my shamrocks in an ombre fashion from lightest to darkest, but any combination of greens would work! Use an extra long, single length of ribbon with an arch at the top to resemble an actual rainbow.

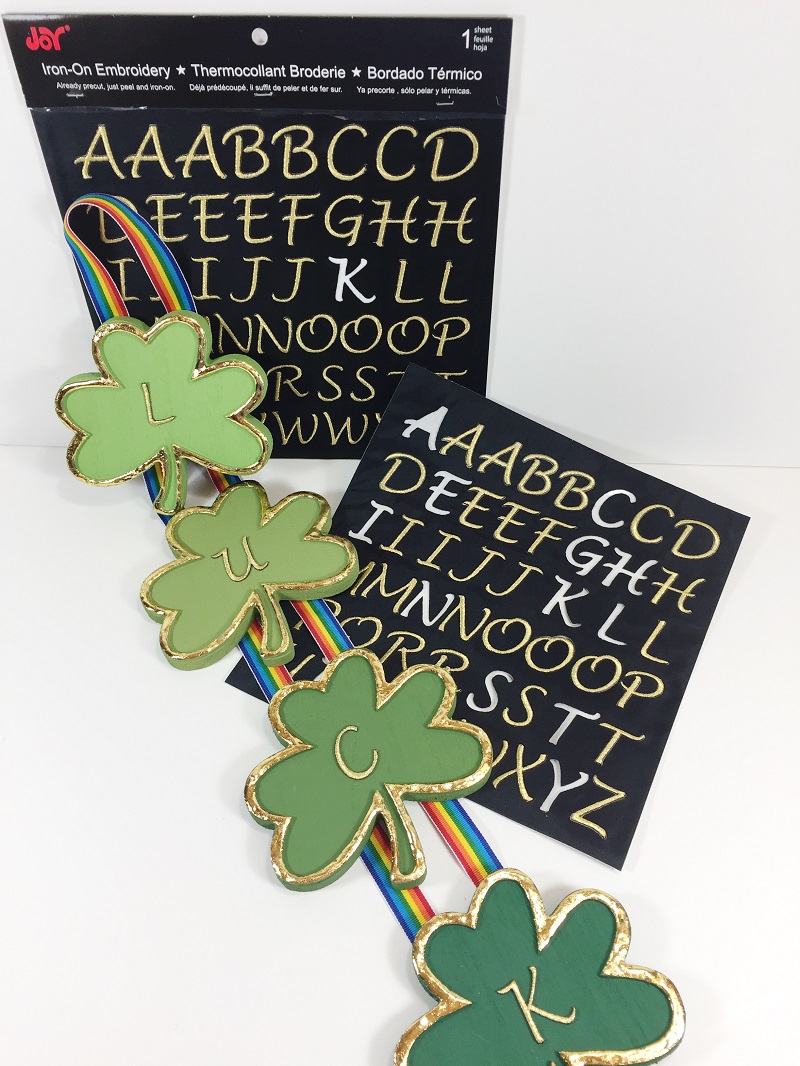
I love the shimmering gold thread that these JOY embroidered letters are made from. They really give any project extra sparkle and are perfect for this St. Patrick's Day wallhanging!  Select letters to spell LUCKY and position on shamrocks.  The letters just pop right off the sheets that they come packaged on and the iron-on adhesive is already on the back, which makes any kind of personalized project quick and easy!

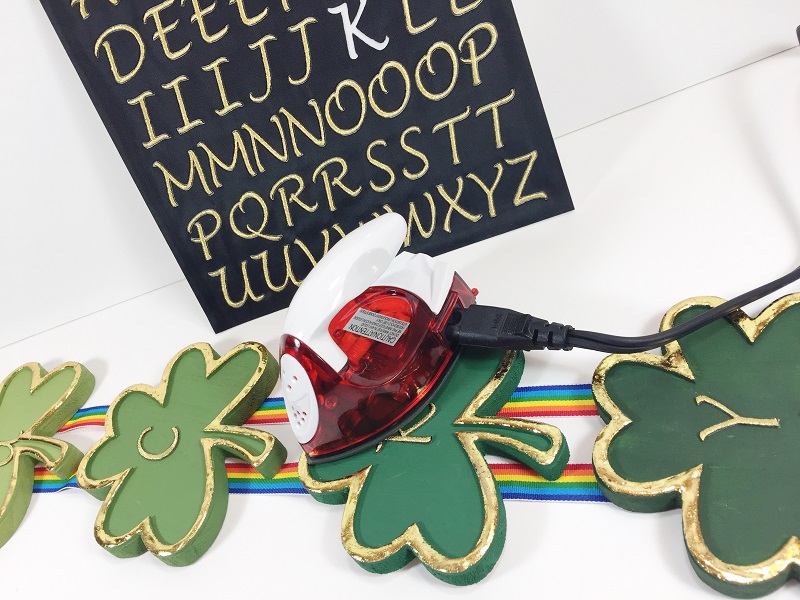
Iron on the letters following the directions on the back of the package.  I use a small craft iron because it allows me to get into small areas and doesn't have any steam holes, which can sometimes cause an uneven application of the embroidered letters.

Once cool, just hang and enjoy! Thanks for stopping by!  -Beth

Leave a Reply

Your email address will not be published. Required fields are marked *

Recent Projects

Luck O' the Irish DIY Door Hanger

St. Patrick’s Day is just around the corner!  Celebrate the Luck O' the Irish with this colorful door décor that is a fun alternative to a traditional wreath.  You will need: Joy® Iron On Embroidered Letter sheet - Gold Script Kunin Classics™ Felt 9” x 12” Craft Cuts– Red, Orange, Yellow, Apple Green, Lagoon, Royal Blue, Orchid, Pirate Green, Neon Green, Gold and Goldenrod (one each) Kunin Premium™ Felt 9” x 12” Craft Cuts– White and Black (two each). Expo International – Claudia 2” Fan and Lattice Lace.  Ric Rac assorted Rayon – Red, Orange, Yellow, Green, Light Blue, Royal…

Rustic Happy Fall Y'all Pumpkin Sign

HAPPY FALL Y'ALL! I am always on the look out for cute items that can be upcycled to create one of a kind home decor pieces.  This rustic pallet pumpkin was just calling out to me from the Target dollar spot and with the addition of some Joy® iron-on embroidered letters, it quickly becomes a custom keepsake. Select a combination of white Joy® iron-on embroidered letters to spell out your message. To create the apostrophe, I carefully cut the leg from the capital letter Q with a pair of detail scissors. Place the embroidered letters on an old towel in a cardboard box…

Back to School Welcome Banner

Create a "Back to School" welcome banner for your favorite teacher's classroom! Materials: JOY® Embroidered Letters 9” x 12” sheets of Kunin Classicfelt -Black , Gray, Sandstone, Candy Pink and Gold Craft glue Glitter glue Cardstock Ruler, pencils, scissors 4-foot length of ribbon Instructions: Draw a simple pencil pattern (5 pieces as shown) on cardstock and cut out.   Trace and trim each pattern piece seven times on the appropriate color of felt. Glue the pencil pieces together, overlapping as shown and let dry. 4. Peel back liner paper from the JOY letters and attach to the center of each pencil, spelling…

Scrabble-Inspired Tote Bag

I am all about recycling, but most of the tote bags that the grocery stores sell are not very cute or crafty. So in honor of family game night, I created a Scrabble-inspired bag to tote around town! This project makes the perfect quick and easy handmade gift to create for Mom for Mother's Day! Decide what words you want to spell and how they'll connect, making sure the arrangement will fit on the front of your tote bag. Draw a grid of square tiles on graph paper to fit each of your letters. I selected the Joy 1.5" Cooper Style…

Happiness Pillow

Joy® Iron-on embroidered letters in white are great for creating any color you can imagine! You can use dye, markers and even acrylic paint! To Make this Happiness Pillow you'll need: Joy® Embroidered Iron-on Letters - Letter Shop White  Acrylic Paint and Paintbrush NEW Joy® Iron-on Embroidered Flower Appliqué    Canvas Pillow Blank Pillow Form or Polyfil Iron Instructions: 1. Paint each letter to create a rainbow of H-A-P-P-I-N-E-S-S.  Set aside and let dry. 2.  Insert cardboard into pillow blank then paint the pillow with white and light blue paint.  Let dry. 3. Set iron on cotton setting; approx. 350 degrees,…
closearrow-circle-o-downtagtagsminus-circlefacebook-squaretruckpinterest-squareinstagrammenu
0
    0
    Shopping Cart
    Your cart is emptyReturn to Shop