FREE Standard Shipping with $50 Order
|
Minimum Order is $15
10% Discount on $300 Order
|
25% Discount on $600 Order

Monogrammed Neck Roll Pillow

Michelle Frae Cummings
|
March 18, 2017

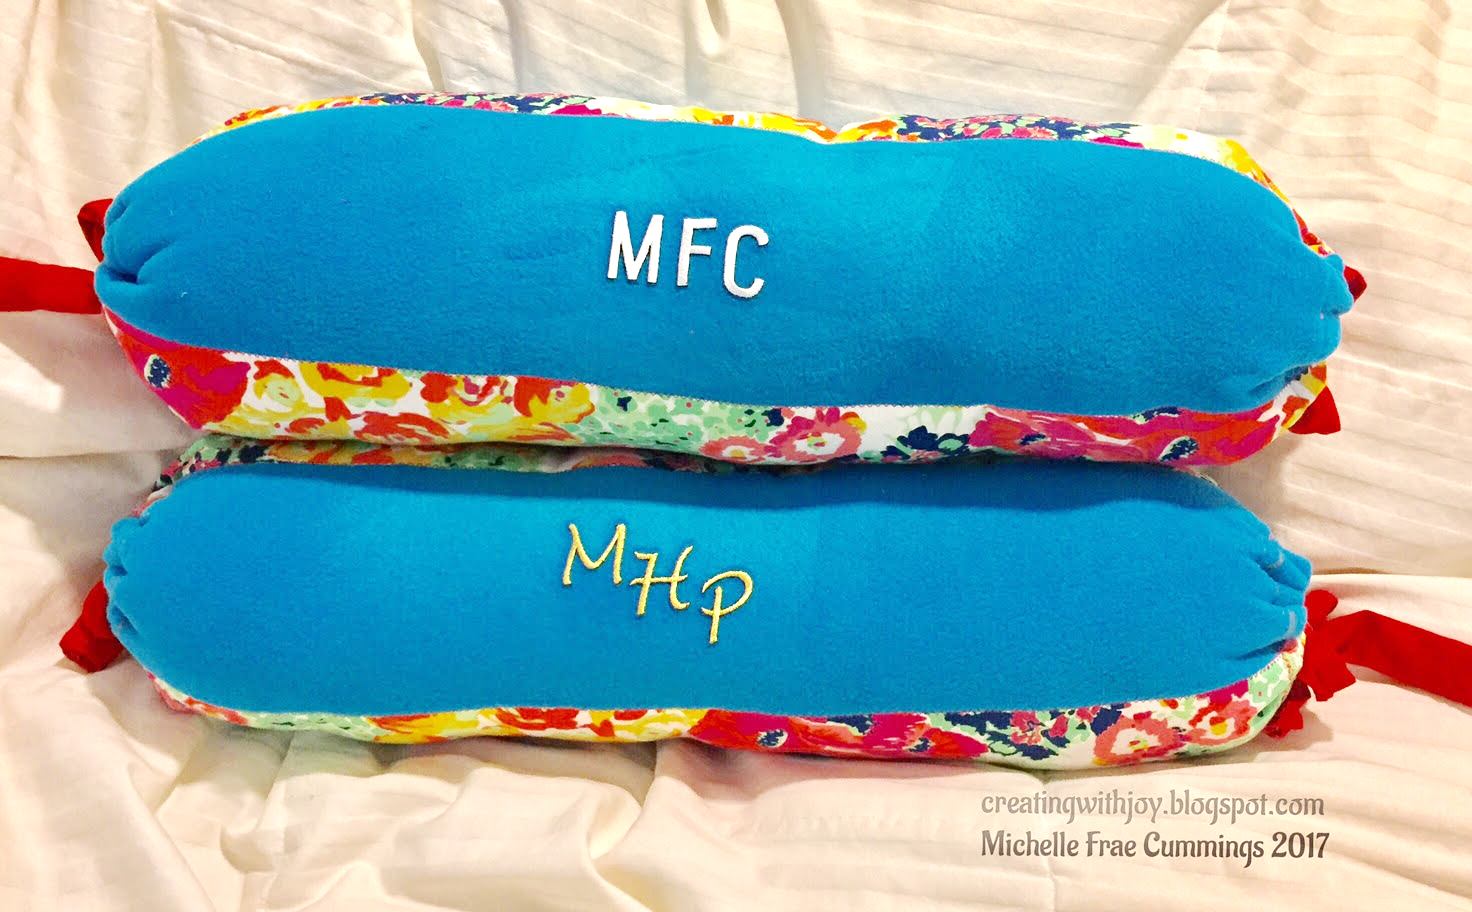
My mother recently requested a new neck roll pillow in bright cheery colors. While I was at it, I made one for myself as well. You can use them in the home or while traveling. Supplies needed:

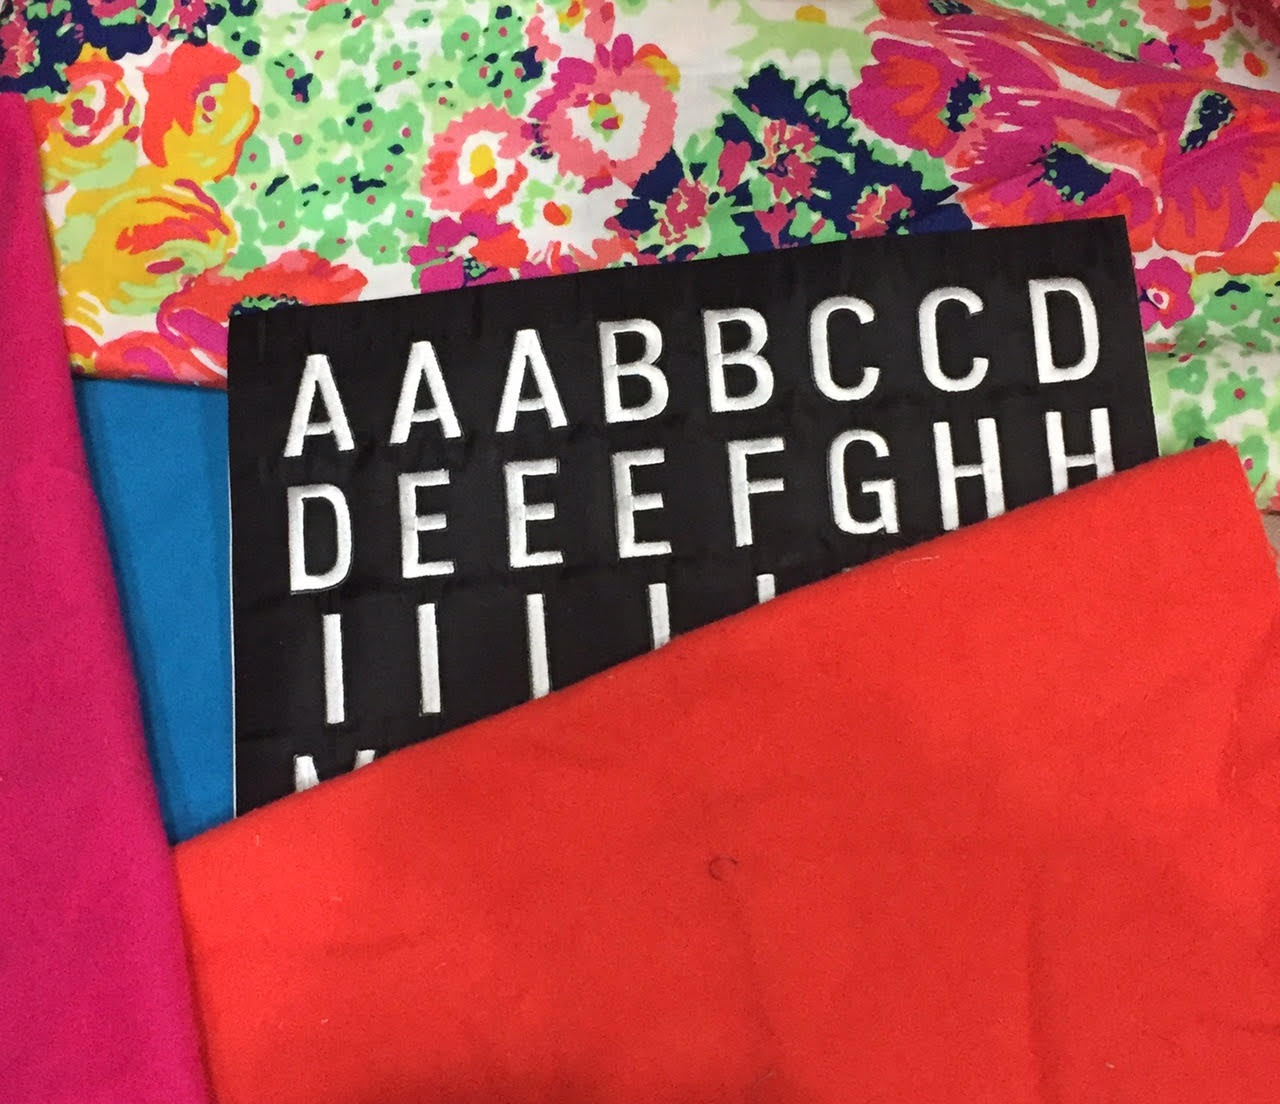
  • Joy iron-on embroidered letters 
  • Fabric of choice,  16 ½" x 25 ½"
  • 1" x 20" ribbon
  • Two 5" fabric circles
  • 1 large safety pin
  • Scissors, pins
  • Sewing machine and thread
  • Hot iron/ cotton setting and parchment paper
  • Stuffing

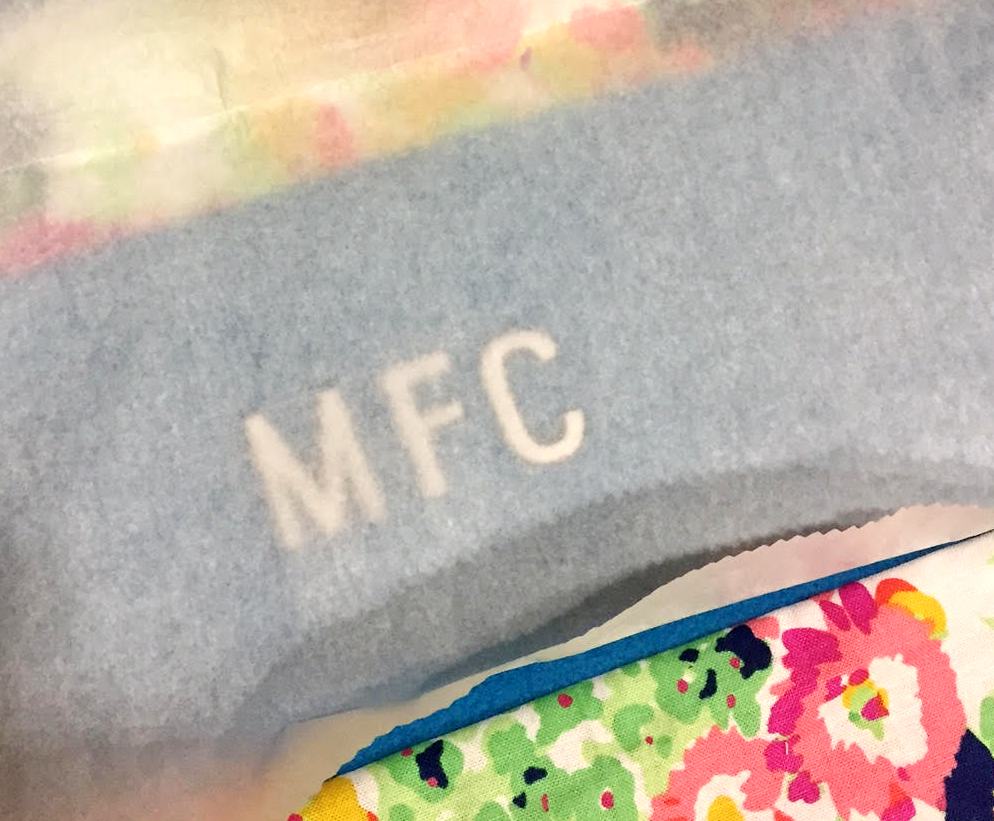
Instructions: 1.  Place your Joy letters face-up on your prepared fabric. Place the parchment paper over the letters and press down with the iron twice in 5 second intervals. Let cool, then repeat the process without the parchment paper.

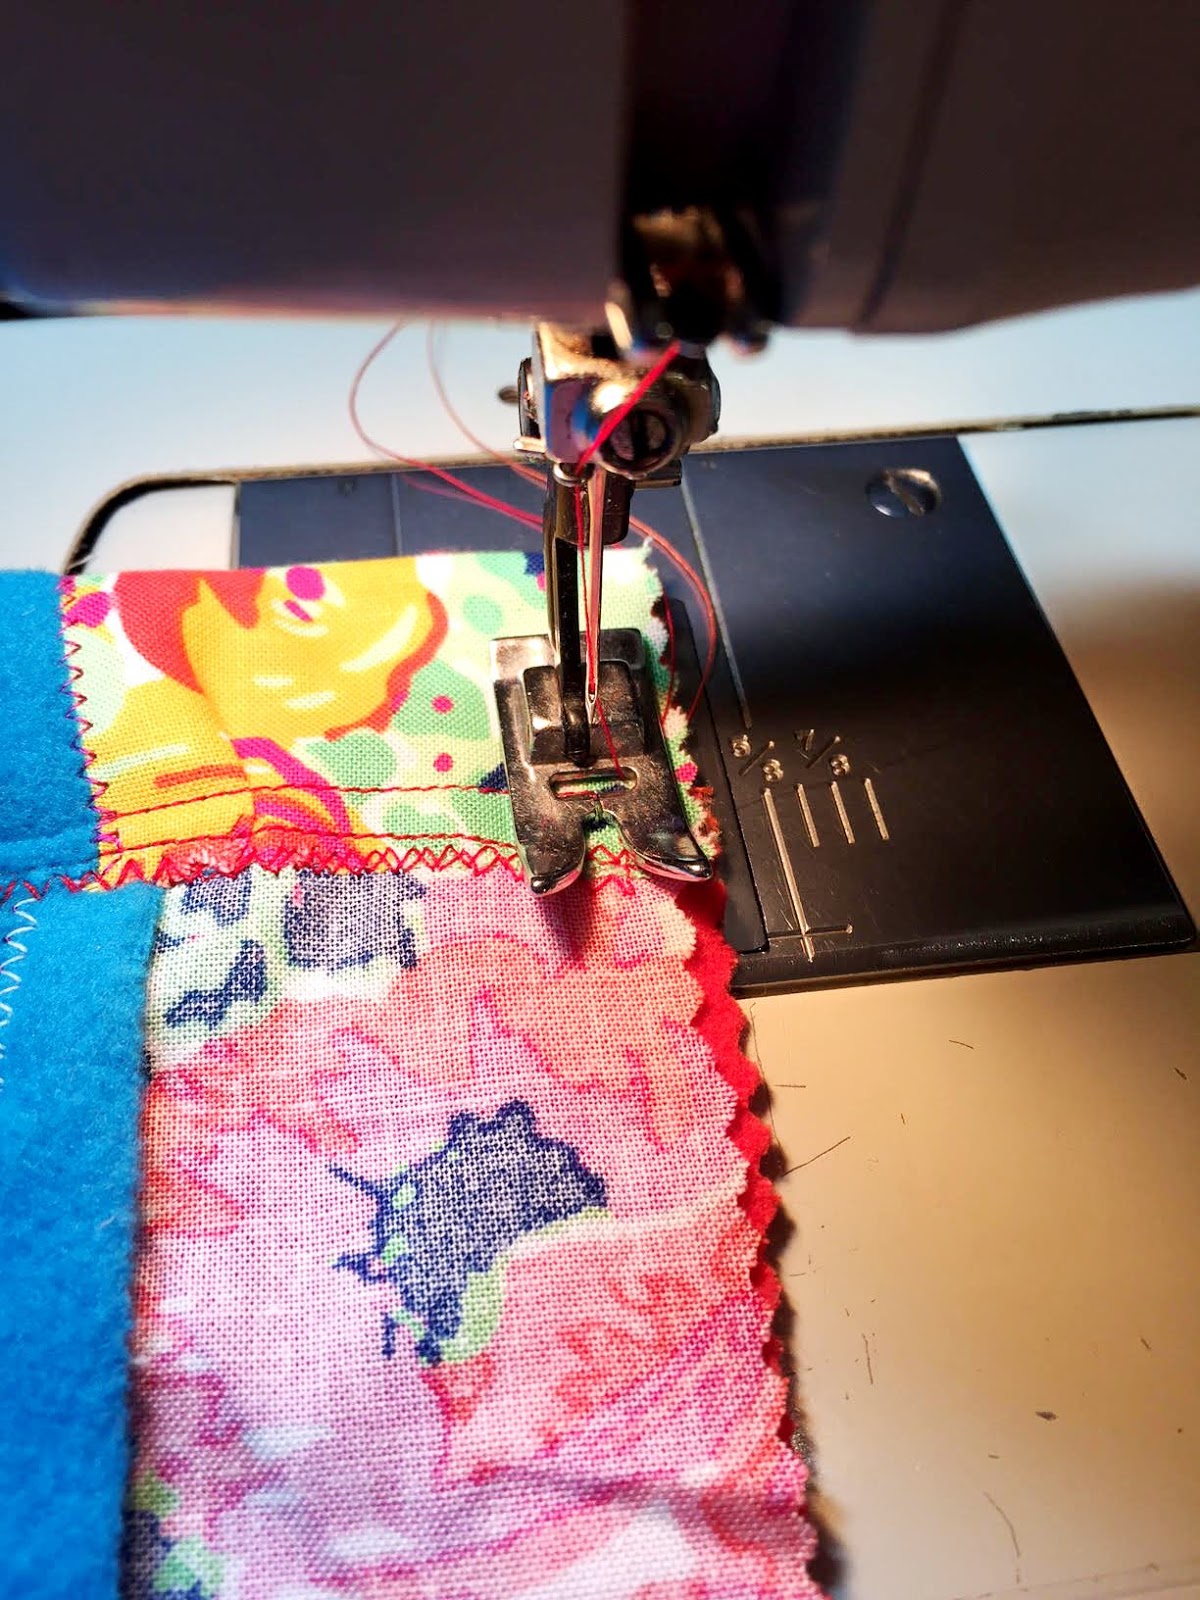
2. With the fabric wrong-side up and horizontal, fold the sides over by 1/2" and sew in place with the machine. This will make the channel for the ribbon ties.

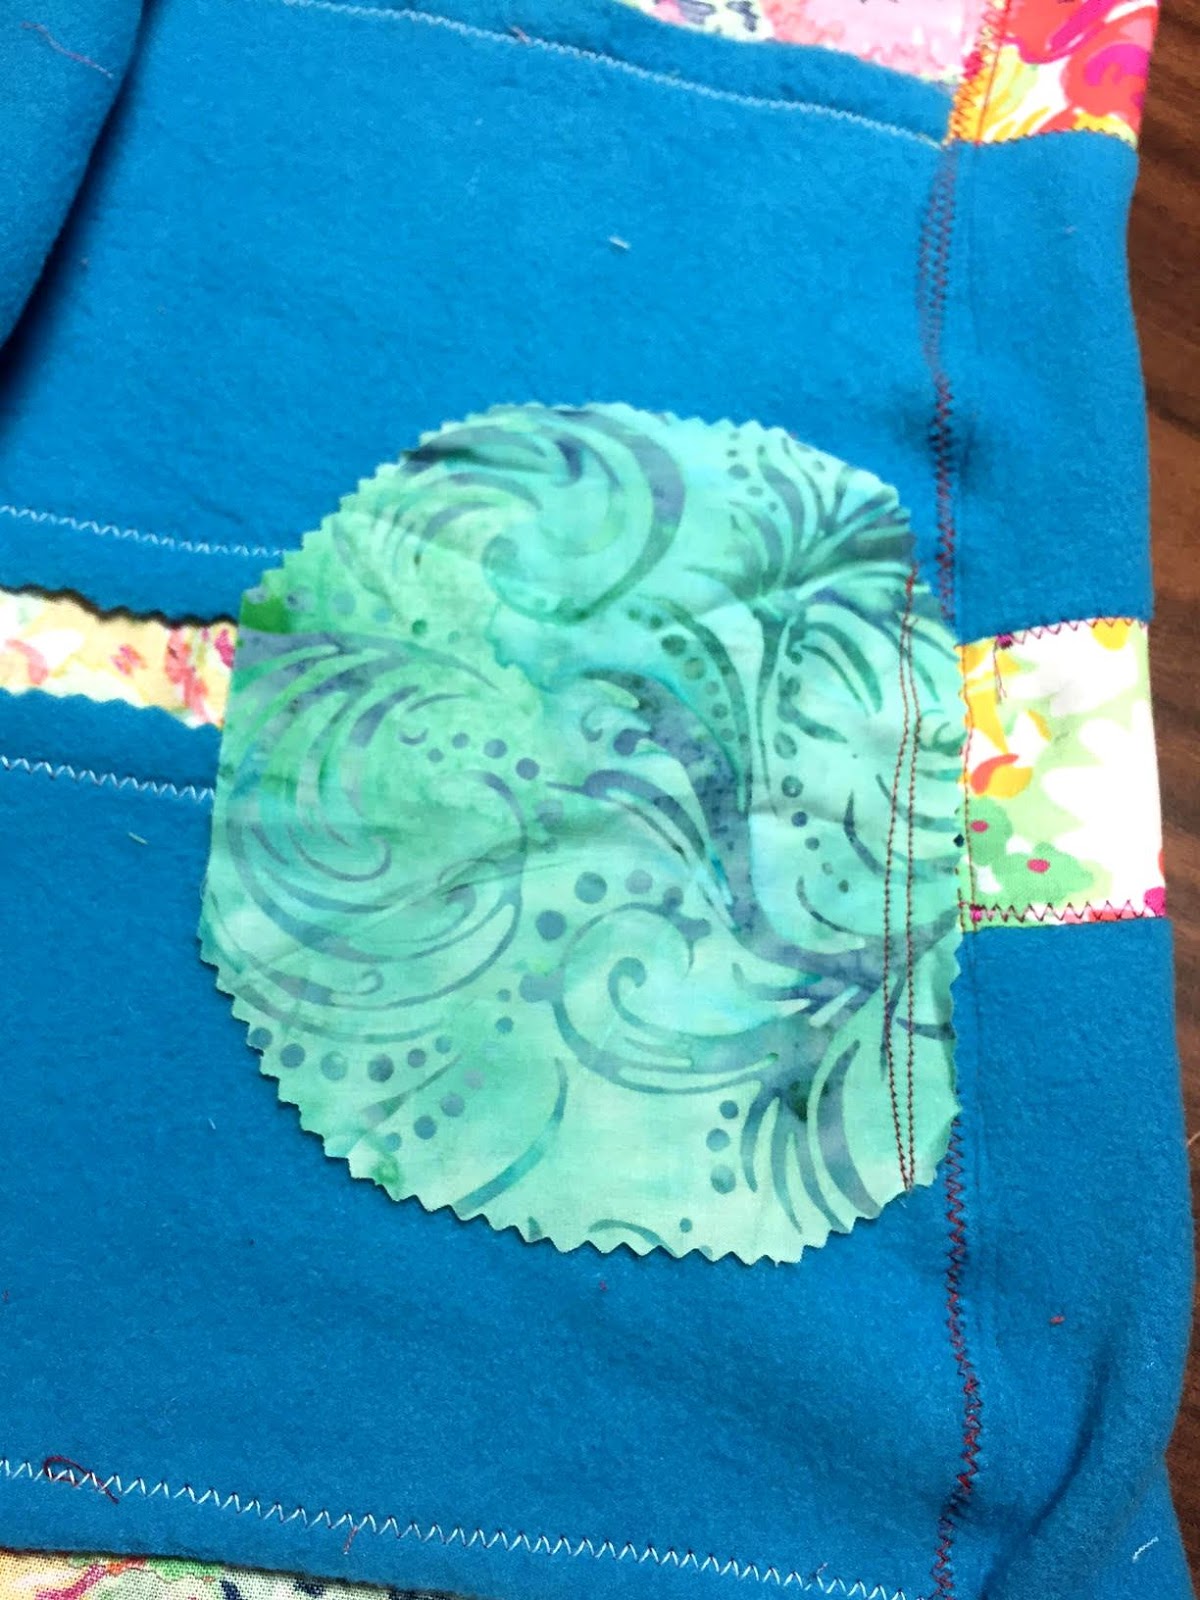
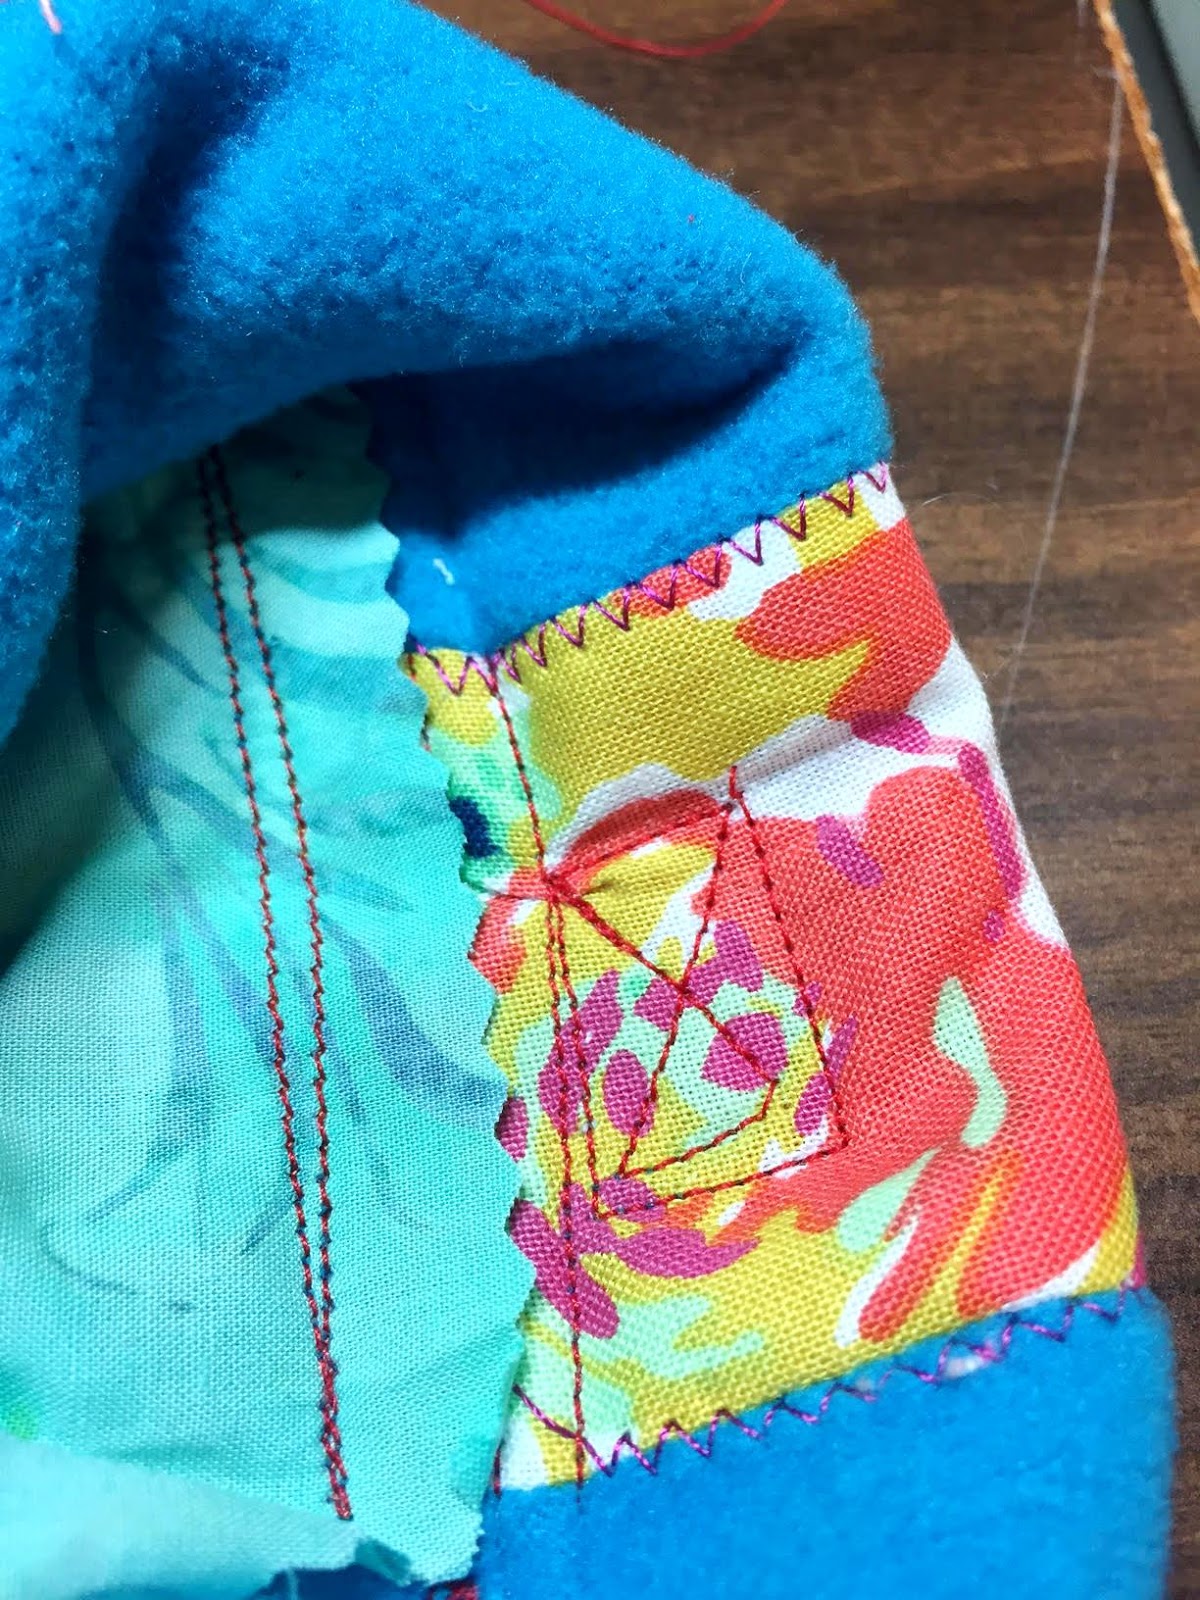
3.  Place one of the circles in the center of the fabric along the stitched edge and sew in place as shown. 4.  Fold your fabric with right sides touching. Pin in place if needed and begin sewing - careful not to close up the ribbon openings.

5. Attach the safety pin to the top of your ribbon.

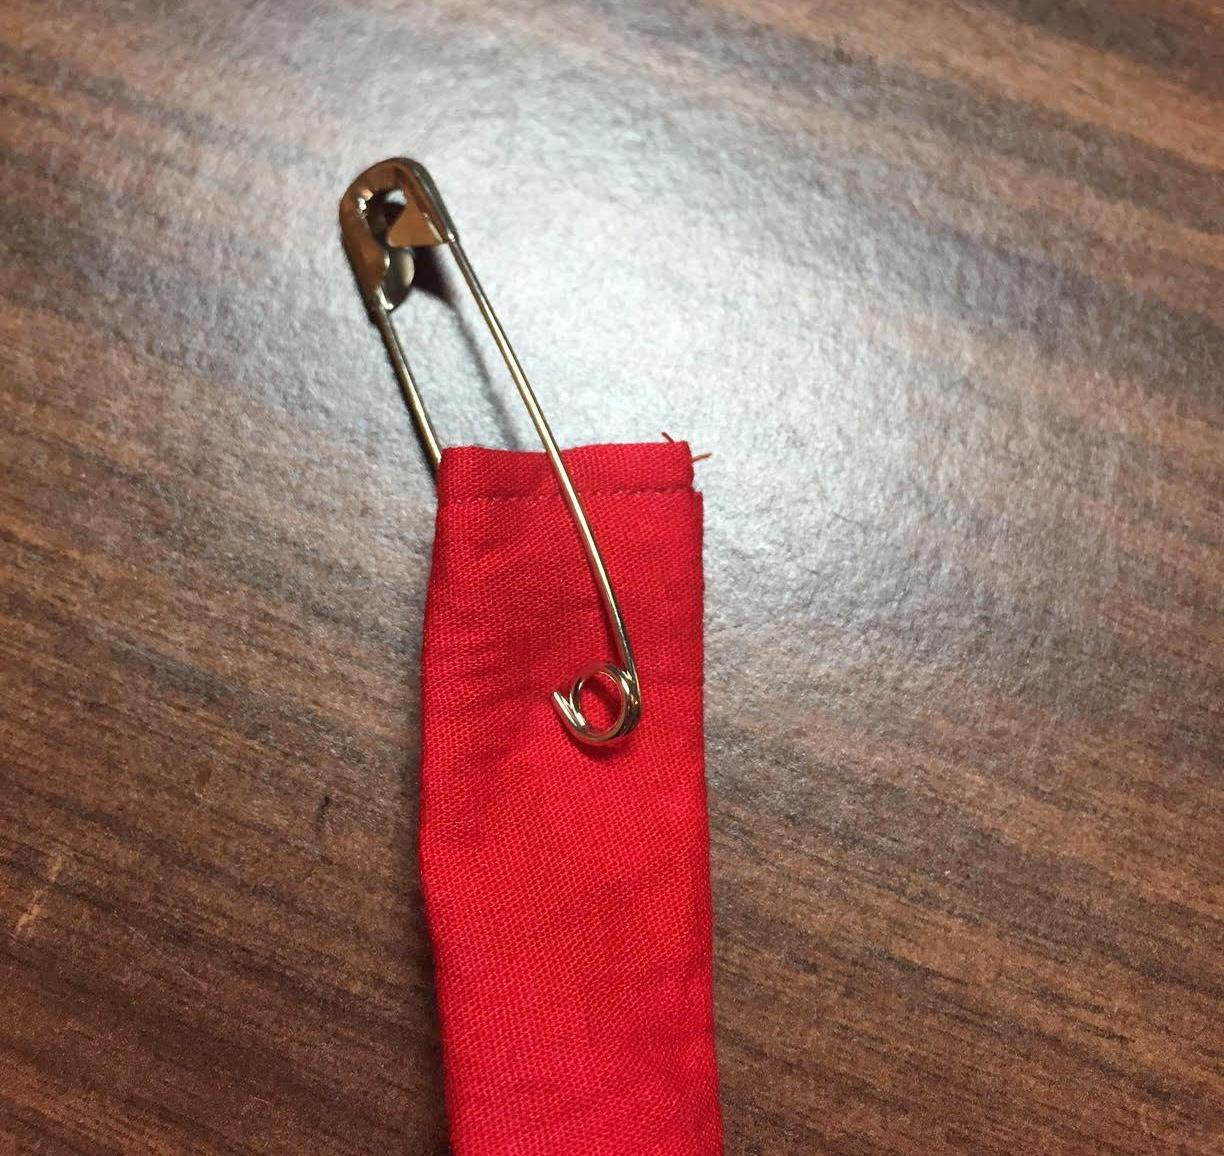
6.  Push the safety pin with the ribbon attached through one of the openings as far as you can go. Feel through the fabric from here on in. Pinch the back end of the safety pin and push more fabric over it from the front. Then, push another length of fabric over the safety pin, and so on. Until the safety pin emerges through the other side. Repeat process with 2nd ribbon on the other opening.

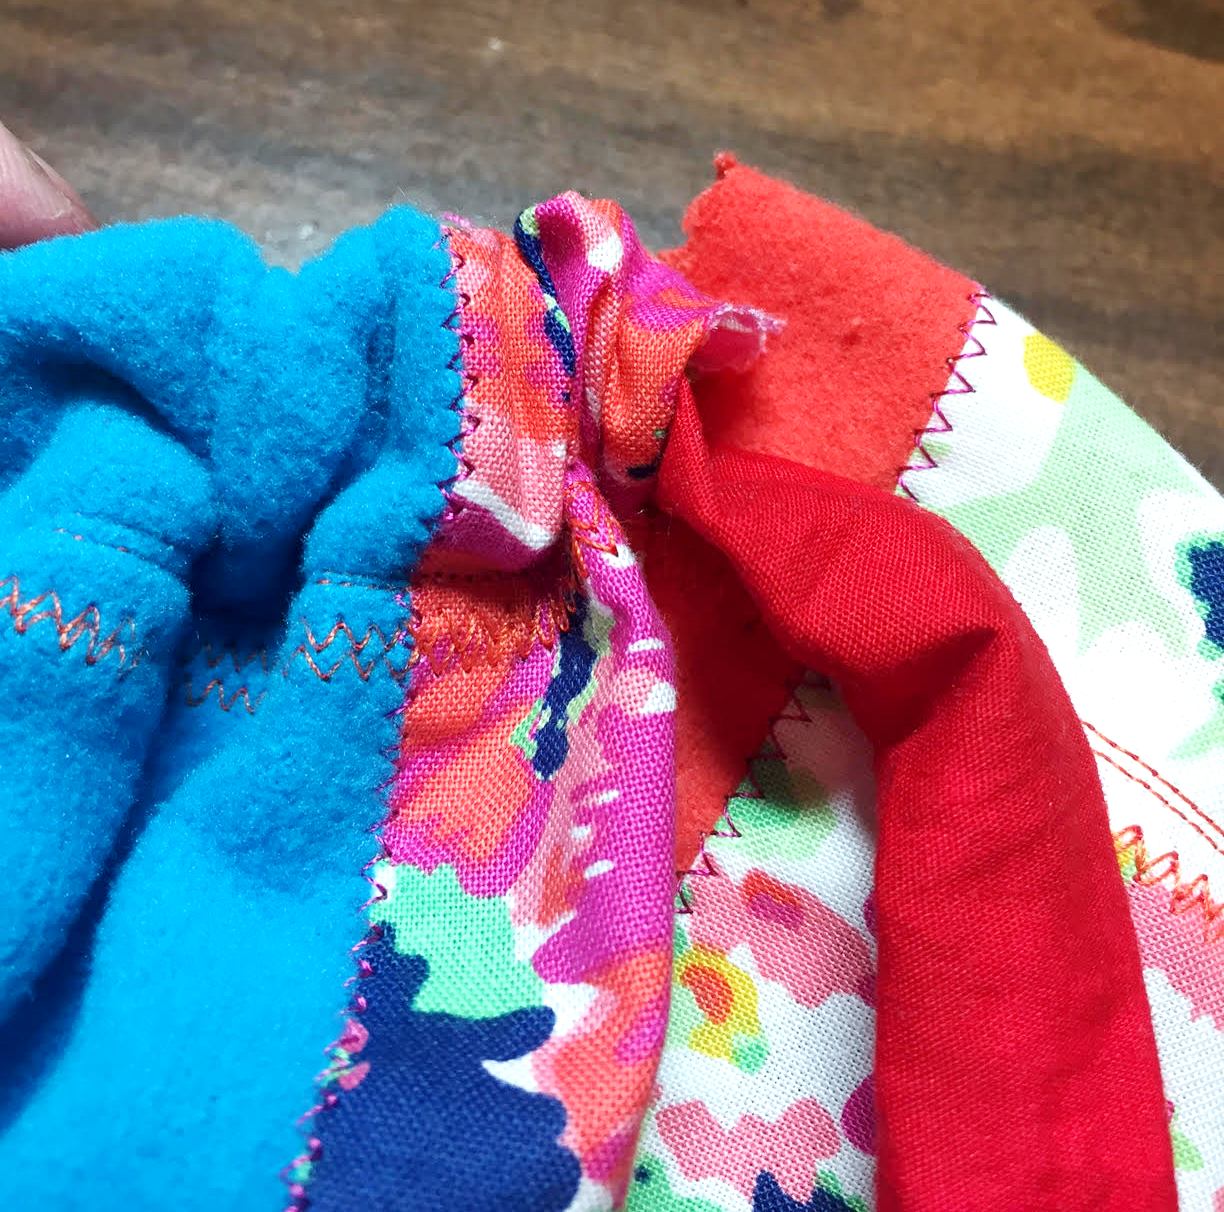
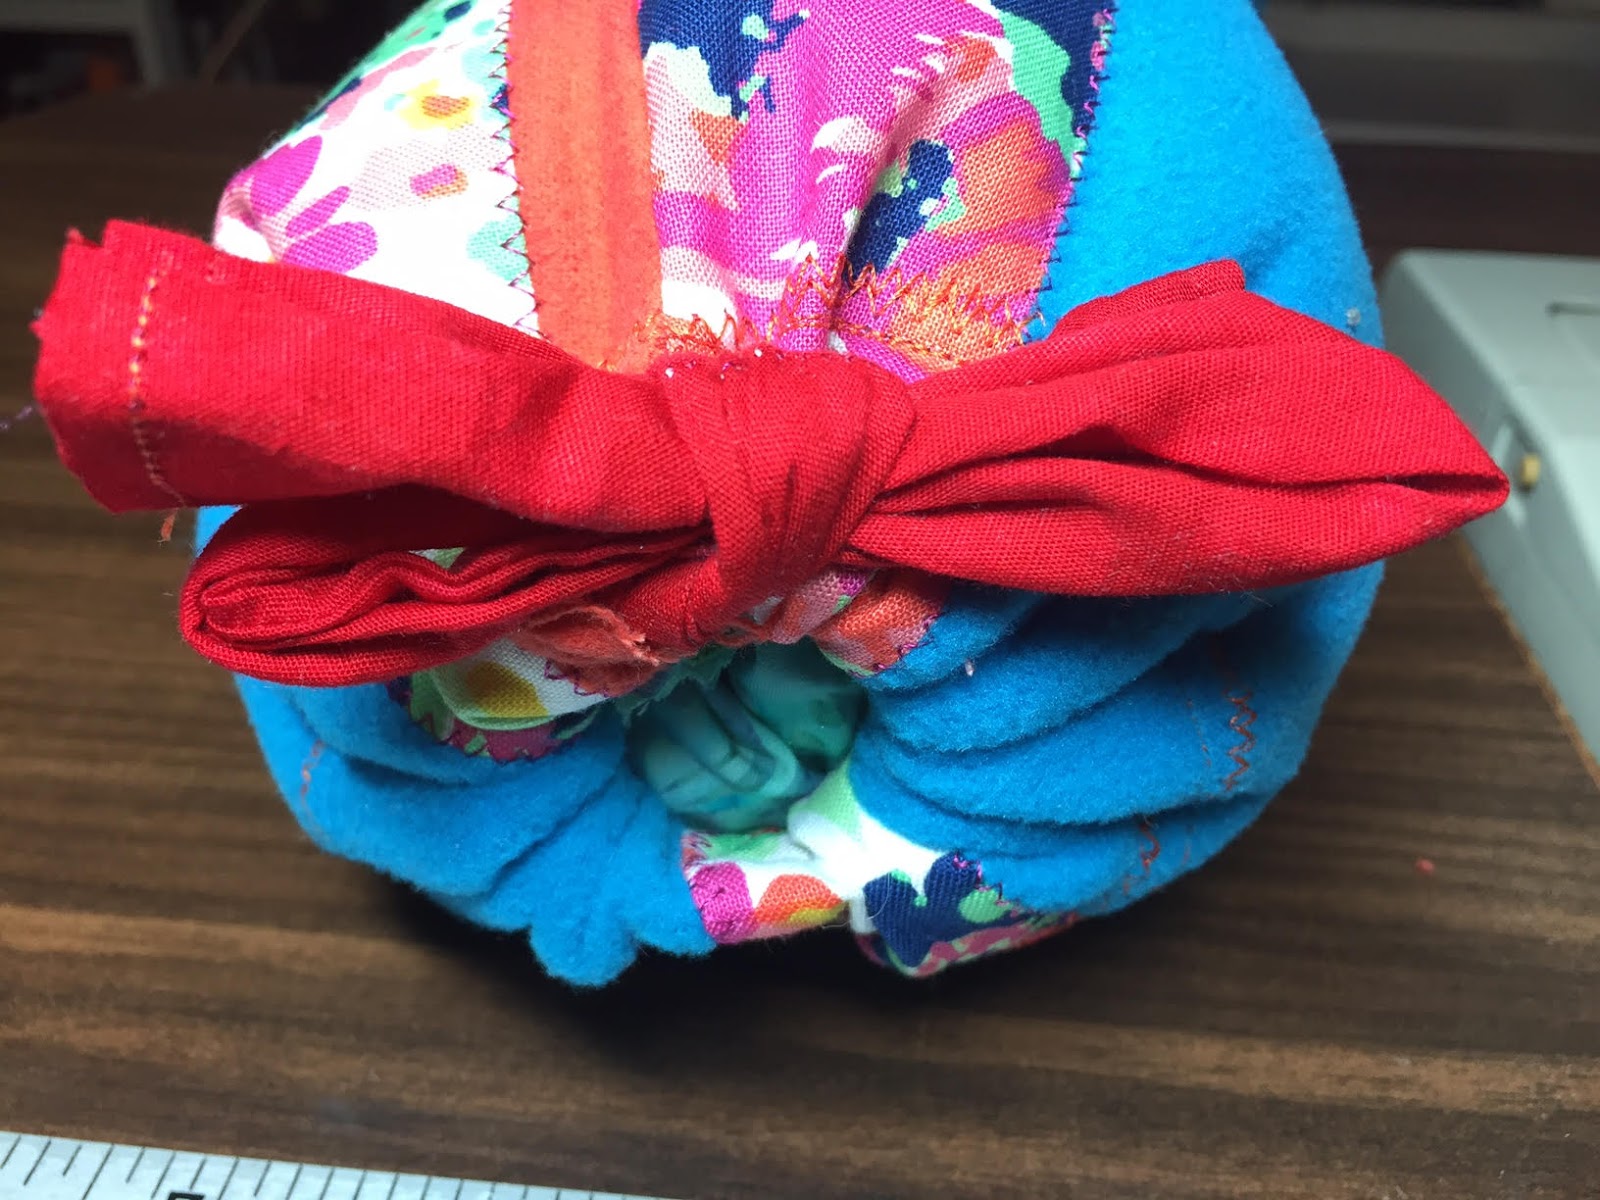
7.  Fold your pillow, aligning the ribbon openings and make sure the ribbon ends are the same length.

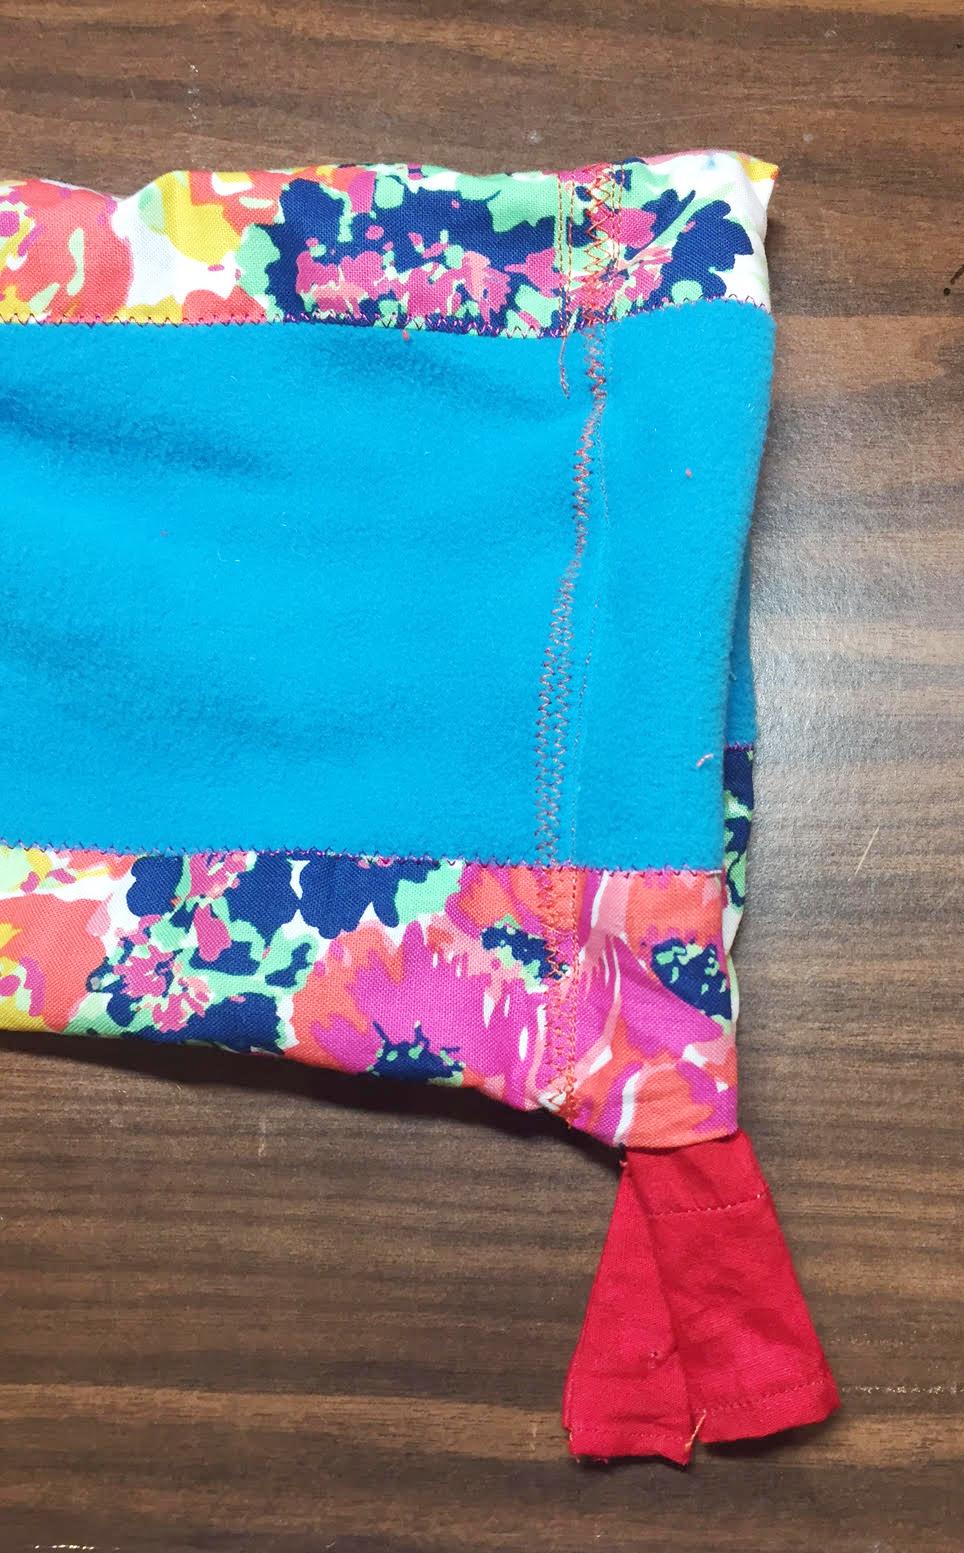
8. The center crease at the opposite of the ribbon openings is where you will need to add a box-stitch, on the inside of the pillow to hold in place the ribbon so it does not come loose when tying shut.

9. Fill pillow with desired amount of fluff.

10. Then push circle flap in and pull the ribbon tight before tying into a bow.

Lay back and enjoy your pillow!

JOY Embroidered letters can be found at your local craft stores in a variety of sizes, colors, simple and decorative fonts. Visit our Facebook page for more inspiration!

Leave a Reply

Your email address will not be published. Required fields are marked *

Recent Projects

Luck O' the Irish DIY Door Hanger

St. Patrick’s Day is just around the corner!  Celebrate the Luck O' the Irish with this colorful door décor that is a fun alternative to a traditional wreath.  You will need: Joy® Iron On Embroidered Letter sheet - Gold Script Kunin Classics™ Felt 9” x 12” Craft Cuts– Red, Orange, Yellow, Apple Green, Lagoon, Royal Blue, Orchid, Pirate Green, Neon Green, Gold and Goldenrod (one each) Kunin Premium™ Felt 9” x 12” Craft Cuts– White and Black (two each). Expo International – Claudia 2” Fan and Lattice Lace.  Ric Rac assorted Rayon – Red, Orange, Yellow, Green, Light Blue, Royal…

Rustic Happy Fall Y'all Pumpkin Sign

HAPPY FALL Y'ALL! I am always on the look out for cute items that can be upcycled to create one of a kind home decor pieces.  This rustic pallet pumpkin was just calling out to me from the Target dollar spot and with the addition of some Joy® iron-on embroidered letters, it quickly becomes a custom keepsake. Select a combination of white Joy® iron-on embroidered letters to spell out your message. To create the apostrophe, I carefully cut the leg from the capital letter Q with a pair of detail scissors. Place the embroidered letters on an old towel in a cardboard box…

Back to School Welcome Banner

Create a "Back to School" welcome banner for your favorite teacher's classroom! Materials: JOY® Embroidered Letters 9” x 12” sheets of Kunin Classicfelt -Black , Gray, Sandstone, Candy Pink and Gold Craft glue Glitter glue Cardstock Ruler, pencils, scissors 4-foot length of ribbon Instructions: Draw a simple pencil pattern (5 pieces as shown) on cardstock and cut out.   Trace and trim each pattern piece seven times on the appropriate color of felt. Glue the pencil pieces together, overlapping as shown and let dry. 4. Peel back liner paper from the JOY letters and attach to the center of each pencil, spelling…

Scrabble-Inspired Tote Bag

I am all about recycling, but most of the tote bags that the grocery stores sell are not very cute or crafty. So in honor of family game night, I created a Scrabble-inspired bag to tote around town! This project makes the perfect quick and easy handmade gift to create for Mom for Mother's Day! Decide what words you want to spell and how they'll connect, making sure the arrangement will fit on the front of your tote bag. Draw a grid of square tiles on graph paper to fit each of your letters. I selected the Joy 1.5" Cooper Style…

Happiness Pillow

Joy® Iron-on embroidered letters in white are great for creating any color you can imagine! You can use dye, markers and even acrylic paint! To Make this Happiness Pillow you'll need: Joy® Embroidered Iron-on Letters - Letter Shop White  Acrylic Paint and Paintbrush NEW Joy® Iron-on Embroidered Flower Appliqué    Canvas Pillow Blank Pillow Form or Polyfil Iron Instructions: 1. Paint each letter to create a rainbow of H-A-P-P-I-N-E-S-S.  Set aside and let dry. 2.  Insert cardboard into pillow blank then paint the pillow with white and light blue paint.  Let dry. 3. Set iron on cotton setting; approx. 350 degrees,…
closearrow-circle-o-downtagtagsminus-circlefacebook-squaretruckpinterest-squareinstagrammenu
0
    0
    Shopping Cart
    Your cart is emptyReturn to Shop