FREE Standard Shipping with $50 Order
|
Minimum Order is $15
10% Discount on $300 Order
|
25% Discount on $600 Order

Spring Banner

Julie McGuffee
|
March 10, 2016

spring banner Joy embroidered letters

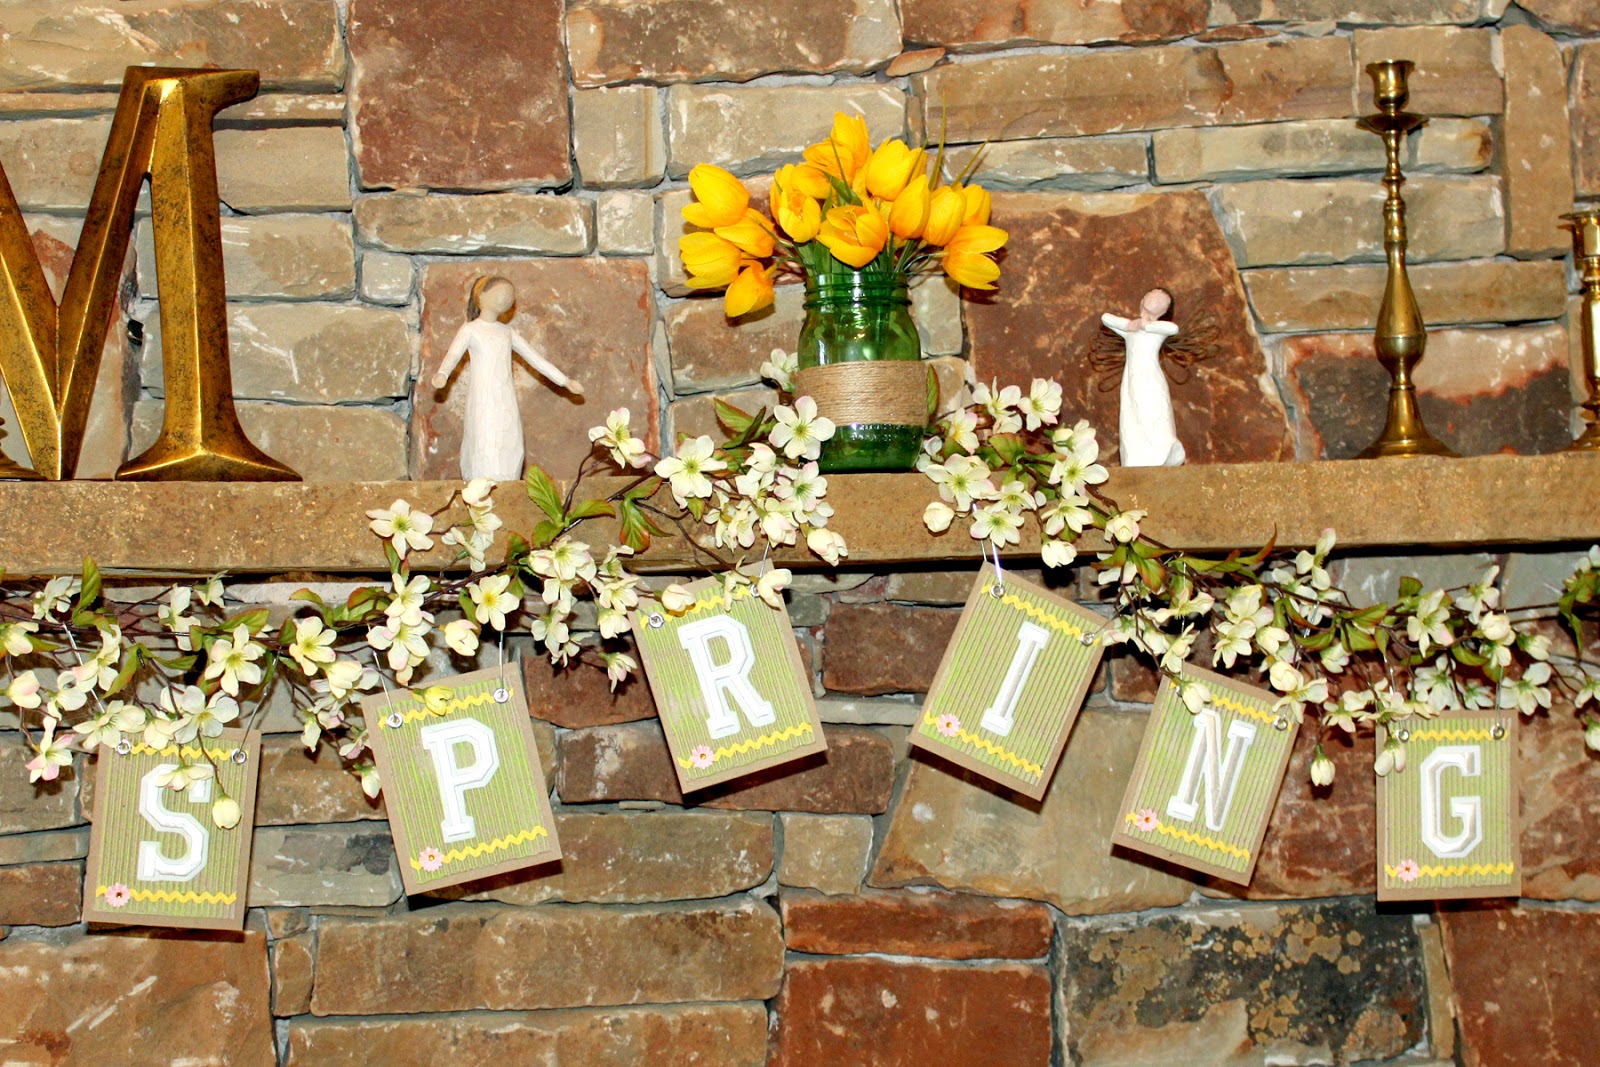
"Spring is sprung, the grass is ris, I wonder where the boidie is... "

There's still time to make a spring banner to brighten your home! Even though meteorological spring started at the first of March... Spring doesn't officially begin until March 20th. This spring banner will also work as an Easter decoration - just add eggs!

To make the banner, you'll need the following supplies:

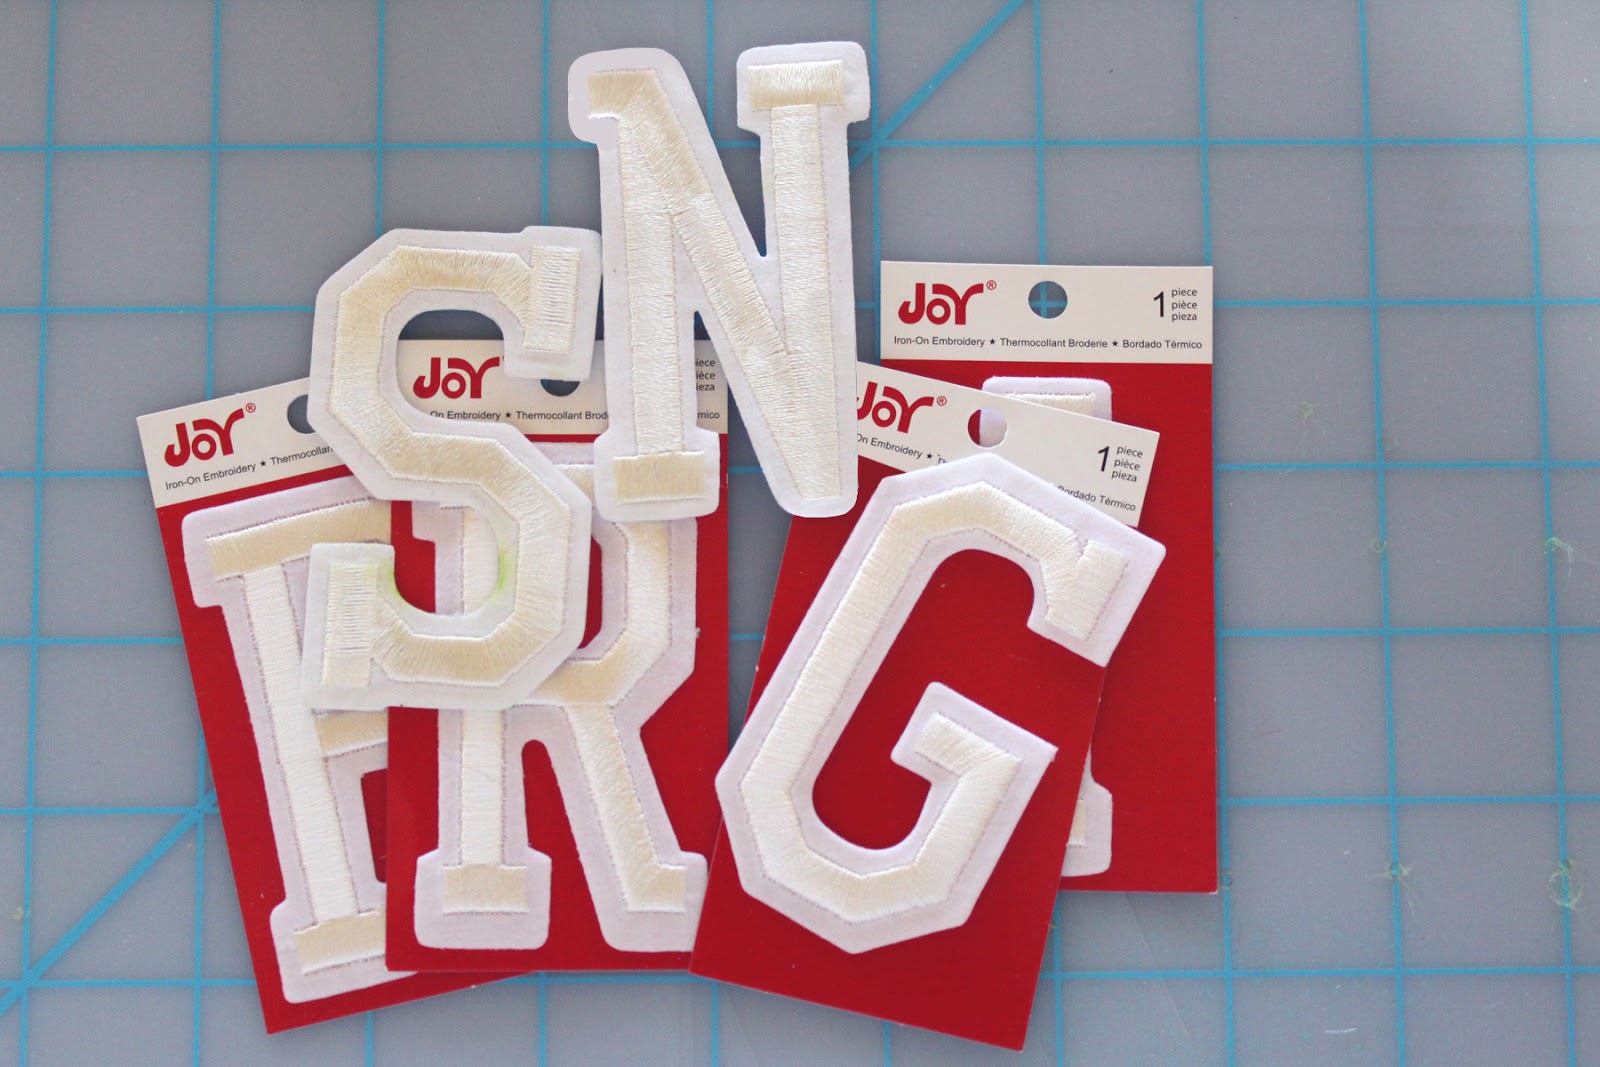
  • Joy® Iron-on embroidered letters - S P R I N G
  • 12" x 12" chipboard
  • Corrugated cardboard (roll)
  • Piece of light green chalk (or pastel)
  • 24"  yellow ric-rac
  • 6 small flower embellishments (or make your own with a flower punch)
  • Adhesive embellishments - silver rings and pink or yellow jewels
  • Glue, scissors

NOTE:  I had most of these in my stash of craft supplies, so always improvise and use what you have before heading to the store.

Joy embroidered iron-on letters


how to make a spring banner

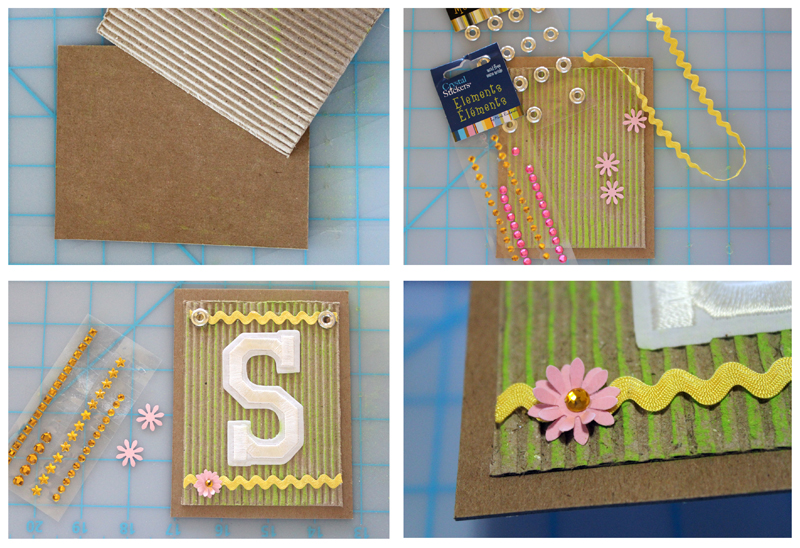
1.  Cut six 4" x 5" pieces of chipboard and six 3-1/2" x 4-1/2" pieces of corrugated cardboard.

2.  Adhere a corrugated piece to the center of each cardboard rectangle.

3.  Lightly swipe chalk across the top of the corrugated cardboard to color.  Remove the backing from each letter then press in place at the center of each rectangle.  NOTE: Chalk is very dusty, so wash your hands thoroughly before handling the letters.

4.  Cut and glue a piece of ric-rac to the top and bottom of each piece.

5.  Place an adhesive silver ring at each end of the ric-rac at the top and a small flower at the bottom. You can make your own flower by layering 2 punched flower shapes then adding a sparkly jewel (pink or yellow) at the center. Gently fold up the top layer of petals to create dimension.

6.  Using the point of small, sharp scissors, poke a hole through the center of each ring at the top.

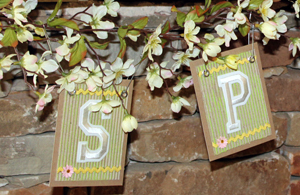
I usually thread baker's twine, yarn or jute through the holes at the top of each piece to create a banner, but this time I used paper clip hooks. Unbend one paper clip for each hole, then hook the large end through the hole at the top of each rectangle. Hook the opposite end of the paper clip to a garland.

Joy iron-on letters can be found at your local craft store. Enjoy!

Leave a Reply

Your email address will not be published. Required fields are marked *

Recent Projects

Luck O' the Irish DIY Door Hanger

St. Patrick’s Day is just around the corner!  Celebrate the Luck O' the Irish with this colorful door décor that is a fun alternative to a traditional wreath.  You will need: Joy® Iron On Embroidered Letter sheet - Gold Script Kunin Classics™ Felt 9” x 12” Craft Cuts– Red, Orange, Yellow, Apple Green, Lagoon, Royal Blue, Orchid, Pirate Green, Neon Green, Gold and Goldenrod (one each) Kunin Premium™ Felt 9” x 12” Craft Cuts– White and Black (two each). Expo International – Claudia 2” Fan and Lattice Lace.  Ric Rac assorted Rayon – Red, Orange, Yellow, Green, Light Blue, Royal…

Rustic Happy Fall Y'all Pumpkin Sign

HAPPY FALL Y'ALL! I am always on the look out for cute items that can be upcycled to create one of a kind home decor pieces.  This rustic pallet pumpkin was just calling out to me from the Target dollar spot and with the addition of some Joy® iron-on embroidered letters, it quickly becomes a custom keepsake. Select a combination of white Joy® iron-on embroidered letters to spell out your message. To create the apostrophe, I carefully cut the leg from the capital letter Q with a pair of detail scissors. Place the embroidered letters on an old towel in a cardboard box…

Back to School Welcome Banner

Create a "Back to School" welcome banner for your favorite teacher's classroom! Materials: JOY® Embroidered Letters 9” x 12” sheets of Kunin Classicfelt -Black , Gray, Sandstone, Candy Pink and Gold Craft glue Glitter glue Cardstock Ruler, pencils, scissors 4-foot length of ribbon Instructions: Draw a simple pencil pattern (5 pieces as shown) on cardstock and cut out.   Trace and trim each pattern piece seven times on the appropriate color of felt. Glue the pencil pieces together, overlapping as shown and let dry. 4. Peel back liner paper from the JOY letters and attach to the center of each pencil, spelling…

Scrabble-Inspired Tote Bag

I am all about recycling, but most of the tote bags that the grocery stores sell are not very cute or crafty. So in honor of family game night, I created a Scrabble-inspired bag to tote around town! This project makes the perfect quick and easy handmade gift to create for Mom for Mother's Day! Decide what words you want to spell and how they'll connect, making sure the arrangement will fit on the front of your tote bag. Draw a grid of square tiles on graph paper to fit each of your letters. I selected the Joy 1.5" Cooper Style…

Happiness Pillow

Joy® Iron-on embroidered letters in white are great for creating any color you can imagine! You can use dye, markers and even acrylic paint! To Make this Happiness Pillow you'll need: Joy® Embroidered Iron-on Letters - Letter Shop White  Acrylic Paint and Paintbrush NEW Joy® Iron-on Embroidered Flower Appliqué    Canvas Pillow Blank Pillow Form or Polyfil Iron Instructions: 1. Paint each letter to create a rainbow of H-A-P-P-I-N-E-S-S.  Set aside and let dry. 2.  Insert cardboard into pillow blank then paint the pillow with white and light blue paint.  Let dry. 3. Set iron on cotton setting; approx. 350 degrees,…
closearrow-circle-o-downtagtagsminus-circlefacebook-squaretruckpinterest-squareinstagrammenu
0
    0
    Shopping Cart
    Your cart is emptyReturn to Shop