A Wedding full of Joy!
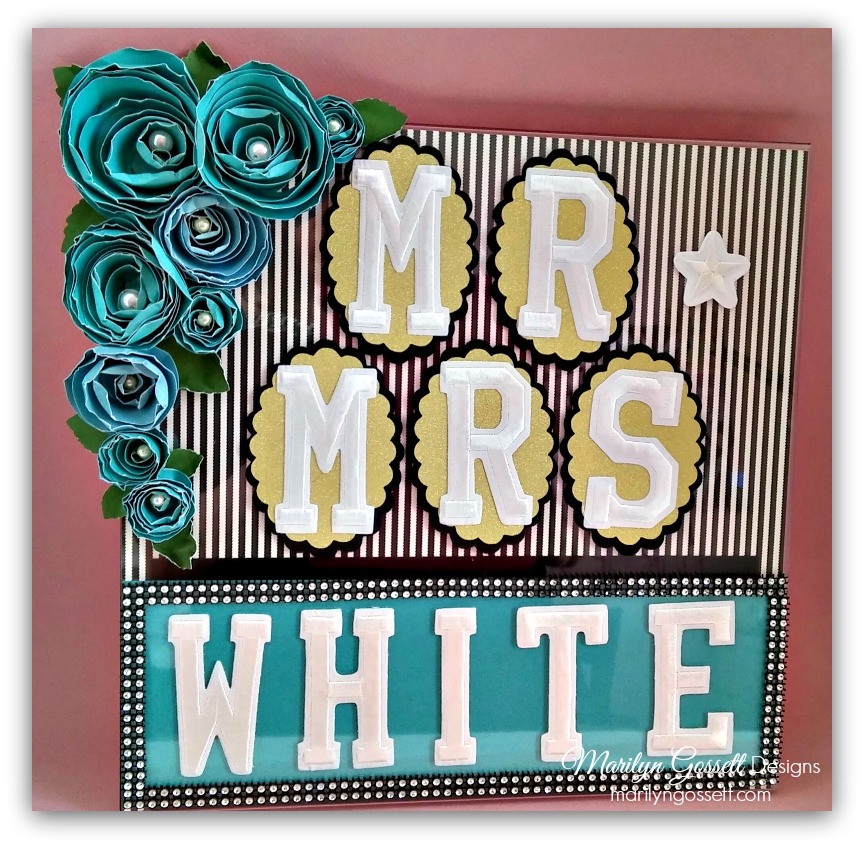
Weddings are a joyous occasion! We have a wedding coming up this summer and I am busy helping with DIY projects to decorate the venue. Last month I blogged about the table markers that I createdwith the Joy embroidered letters. I have completed the table marker project with this beauty that will sit at the head table with the bride and groom. To create this sign you will need the following:
- Joy embroidered letters, spelling Mr. and Mrs. with the last name
- 12" acrylic sign holder (by Deflecto)
- Cardstock - black/white stripe, plus solid black, teal, green
- Gold glitter cardstock
- Pearl beads, star embellishment
- Paper trimmer, scissors, adhesive
- Self-adhesive faux rhinestone trim
- Die-cutting machine with die-cut for scalloped ovals
- Paper flowers
Instructions: To make hand-rolled paper flowers, cut cardstock into various sized circles 2" - 4" in diameter - they don't have to be perfect. Cut each circle into a 3/8" spiral. Leave a little circle in the middle. Roll the spiral into the form of a rose. Use a hot glue gun to secure the rolled spiral at the bottom. I use my fingers and thumbnail to distress the edges of the rose. 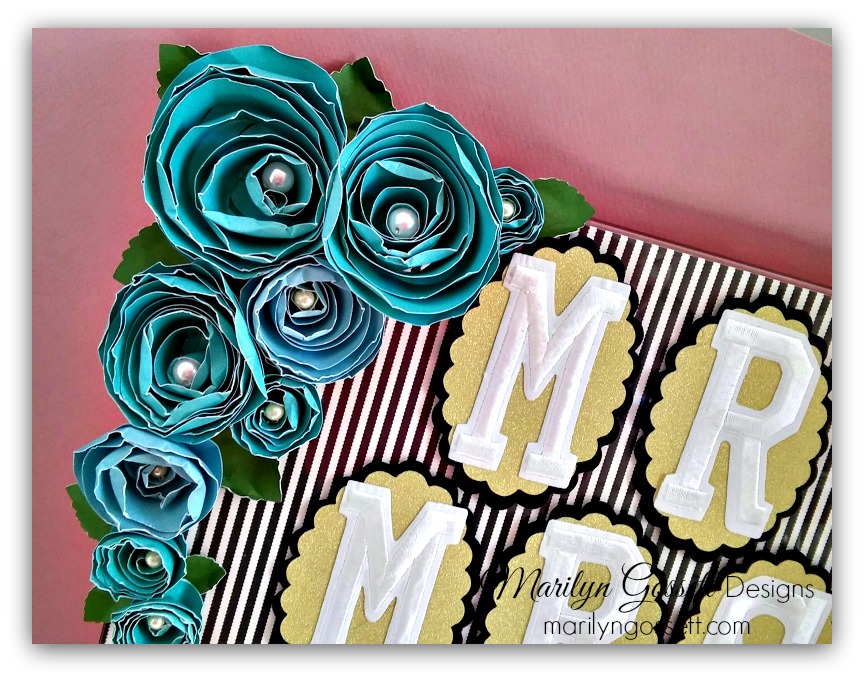 Cut out leaves by hand or with a die-cutting machine. If you cut out a heart from a folded sheet, then cut the heart in half along the fold, you can more easily shape each half into a leaf. Cut the striped cardstock to fit the size of the acrylic sign holder, then trim black and teal sheets to fit behind the couple's last name. Layer and adhere these background papers together and slide into the sign holder. Die-cut a pair of scalloped ovals from cardstock (larger black and smaller gold glitter) for each letter. Glue to the outside of the sign holder, then center and adhere each letter on top as shown. Embellish your table marker with the flowers, leaves and rhinestone trim. Glue a pearl into the center of each flower. Spell your name in Joy letters, available at your local craft store!