FREE Standard Shipping with $50 Order
|
Minimum Order is $15
10% Discount on $300 Order
|
25% Discount on $600 Order

Halloween Glow-in-the-Dark Mummy Pillow

Julie McGuffee
|
October 14, 2015

boo mummy pillow halloween decoration

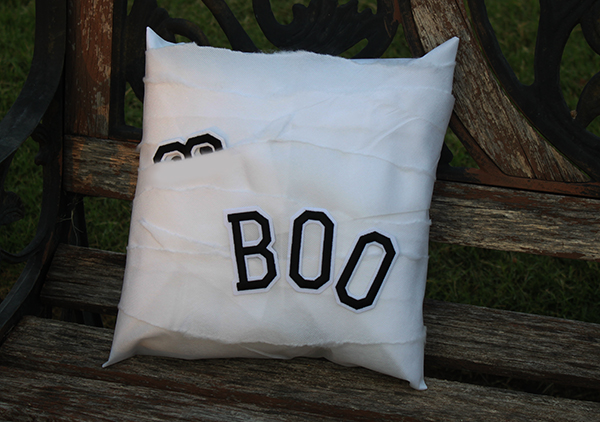
This pillow is a quick and easy no-sew Halloween decoration - add a touch of mummified fun to your porch, patio or family room. You'll need:

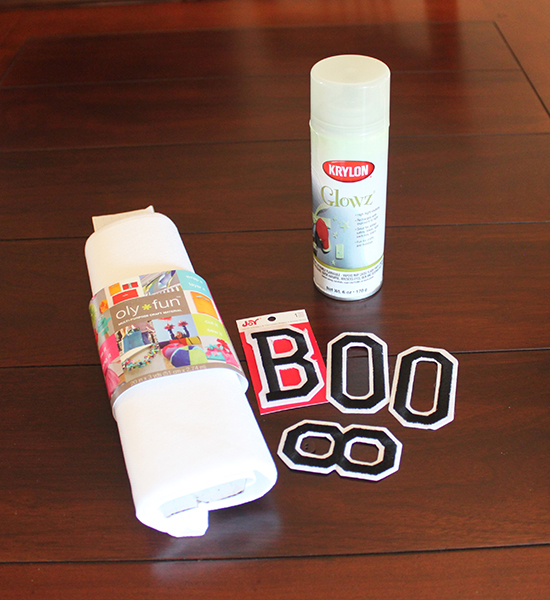
  • 12" x 12" pillow form
  • White Oly*Fun material
  • Joy embroidered 3D letters: B O O
  • Joy embroidered 3D number:  8
  • Krylon Glowz spray paint (optional)
  • Tacky tape and/or low-temp hot glue gun
  • 2 small black buttons

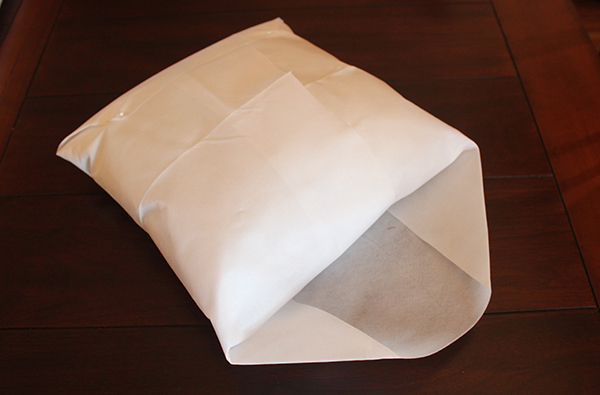
1.  Place the pillow at the center of a 20" x 28" piece of Oly*Fun material. Wrap it  as if you were wrapping a gift and glue the ends in place at the back.


2.  Tear 3" wide strips from another sheet of Oly*Fun. Wrap the strips around the pillow in layers then overlap and glue the ends together at the back.  


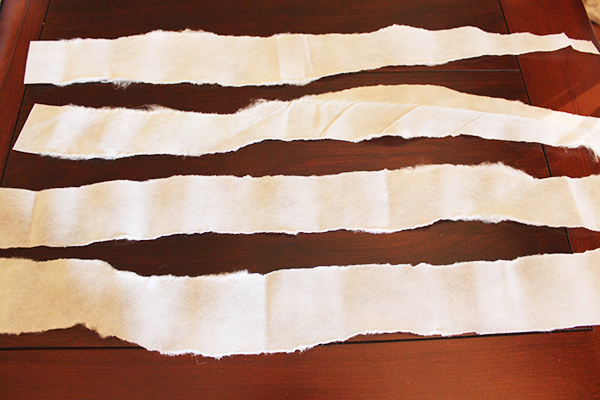
Note: Oly*Fun is a tear-resistant and material, so make a snip with scissors to start, then tear it slowly. It won't fray and it withstands the outdoor elements, so it's a great alternative to fabric for this project.

3.   If you're using your pillow as an outdoor decoration, spray it with glow-in-the-dark paint and let dry. 4.  Remove the backing from each letter to expose the adhesive then attach to the pillow. It isn't necessary to iron in place, since this project is for decorative purposes only (plus Oly*Fun will melt under the high temp of an iron). 5.  Place a small, black button behind each opening in the number 8, then place horizontally behind one of the layers to look like a pair of eyes. Place your finished pillow either indoors or outdoors and enjoy!

Look for JOY Iron-On letters and numbers at your local craft store!

Leave a Reply

Your email address will not be published. Required fields are marked *

Recent Projects

Luck O' the Irish DIY Door Hanger

St. Patrick’s Day is just around the corner!  Celebrate the Luck O' the Irish with this colorful door décor that is a fun alternative to a traditional wreath.  You will need: Joy® Iron On Embroidered Letter sheet - Gold Script Kunin Classics™ Felt 9” x 12” Craft Cuts– Red, Orange, Yellow, Apple Green, Lagoon, Royal Blue, Orchid, Pirate Green, Neon Green, Gold and Goldenrod (one each) Kunin Premium™ Felt 9” x 12” Craft Cuts– White and Black (two each). Expo International – Claudia 2” Fan and Lattice Lace.  Ric Rac assorted Rayon – Red, Orange, Yellow, Green, Light Blue, Royal…

Rustic Happy Fall Y'all Pumpkin Sign

HAPPY FALL Y'ALL! I am always on the look out for cute items that can be upcycled to create one of a kind home decor pieces.  This rustic pallet pumpkin was just calling out to me from the Target dollar spot and with the addition of some Joy® iron-on embroidered letters, it quickly becomes a custom keepsake. Select a combination of white Joy® iron-on embroidered letters to spell out your message. To create the apostrophe, I carefully cut the leg from the capital letter Q with a pair of detail scissors. Place the embroidered letters on an old towel in a cardboard box…

Back to School Welcome Banner

Create a "Back to School" welcome banner for your favorite teacher's classroom! Materials: JOY® Embroidered Letters 9” x 12” sheets of Kunin Classicfelt -Black , Gray, Sandstone, Candy Pink and Gold Craft glue Glitter glue Cardstock Ruler, pencils, scissors 4-foot length of ribbon Instructions: Draw a simple pencil pattern (5 pieces as shown) on cardstock and cut out.   Trace and trim each pattern piece seven times on the appropriate color of felt. Glue the pencil pieces together, overlapping as shown and let dry. 4. Peel back liner paper from the JOY letters and attach to the center of each pencil, spelling…

Scrabble-Inspired Tote Bag

I am all about recycling, but most of the tote bags that the grocery stores sell are not very cute or crafty. So in honor of family game night, I created a Scrabble-inspired bag to tote around town! This project makes the perfect quick and easy handmade gift to create for Mom for Mother's Day! Decide what words you want to spell and how they'll connect, making sure the arrangement will fit on the front of your tote bag. Draw a grid of square tiles on graph paper to fit each of your letters. I selected the Joy 1.5" Cooper Style…

Happiness Pillow

Joy® Iron-on embroidered letters in white are great for creating any color you can imagine! You can use dye, markers and even acrylic paint! To Make this Happiness Pillow you'll need: Joy® Embroidered Iron-on Letters - Letter Shop White  Acrylic Paint and Paintbrush NEW Joy® Iron-on Embroidered Flower Appliqué    Canvas Pillow Blank Pillow Form or Polyfil Iron Instructions: 1. Paint each letter to create a rainbow of H-A-P-P-I-N-E-S-S.  Set aside and let dry. 2.  Insert cardboard into pillow blank then paint the pillow with white and light blue paint.  Let dry. 3. Set iron on cotton setting; approx. 350 degrees,…
closearrow-circle-o-downtagtagsminus-circlefacebook-squaretruckpinterest-squareinstagrammenu
0
    0
    Shopping Cart
    Your cart is emptyReturn to Shop