FREE Standard Shipping with $50 Order
|
Minimum Order is $15
10% Discount on $300 Order
|
25% Discount on $600 Order

Add style to your vanity storage

PriMarilynLy Paper
|
January 27, 2017

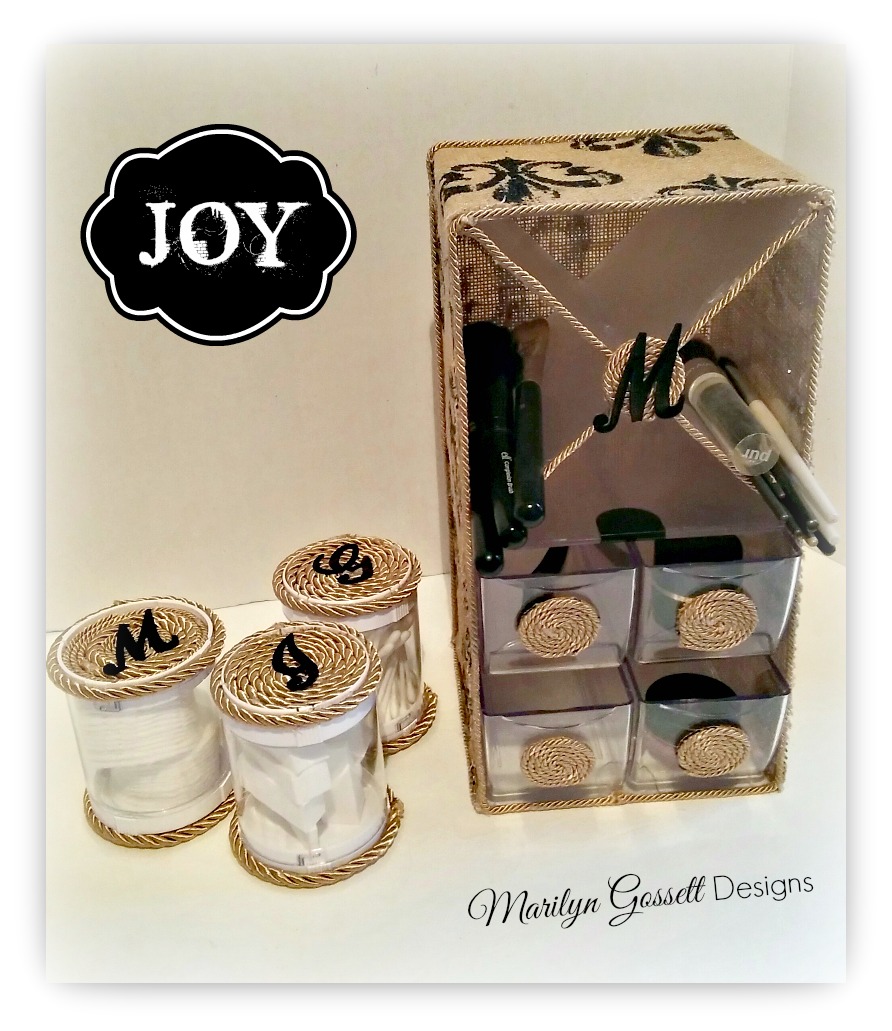
Office and craft caddies are wonderful for organizing all sorts of things at home. I am giving my vanity an update, so I chose several products that I love for this project! Burlap and cording give a timeless look, and they both come in a variety of patterns and colors for embellishing clear plastic storage containers. I've embellished two cubes (one with dividers and one with drawers) for cosmetics, plus a trio of cylindrical jars for cotton balls, cotton swabs and wedge sponges. 
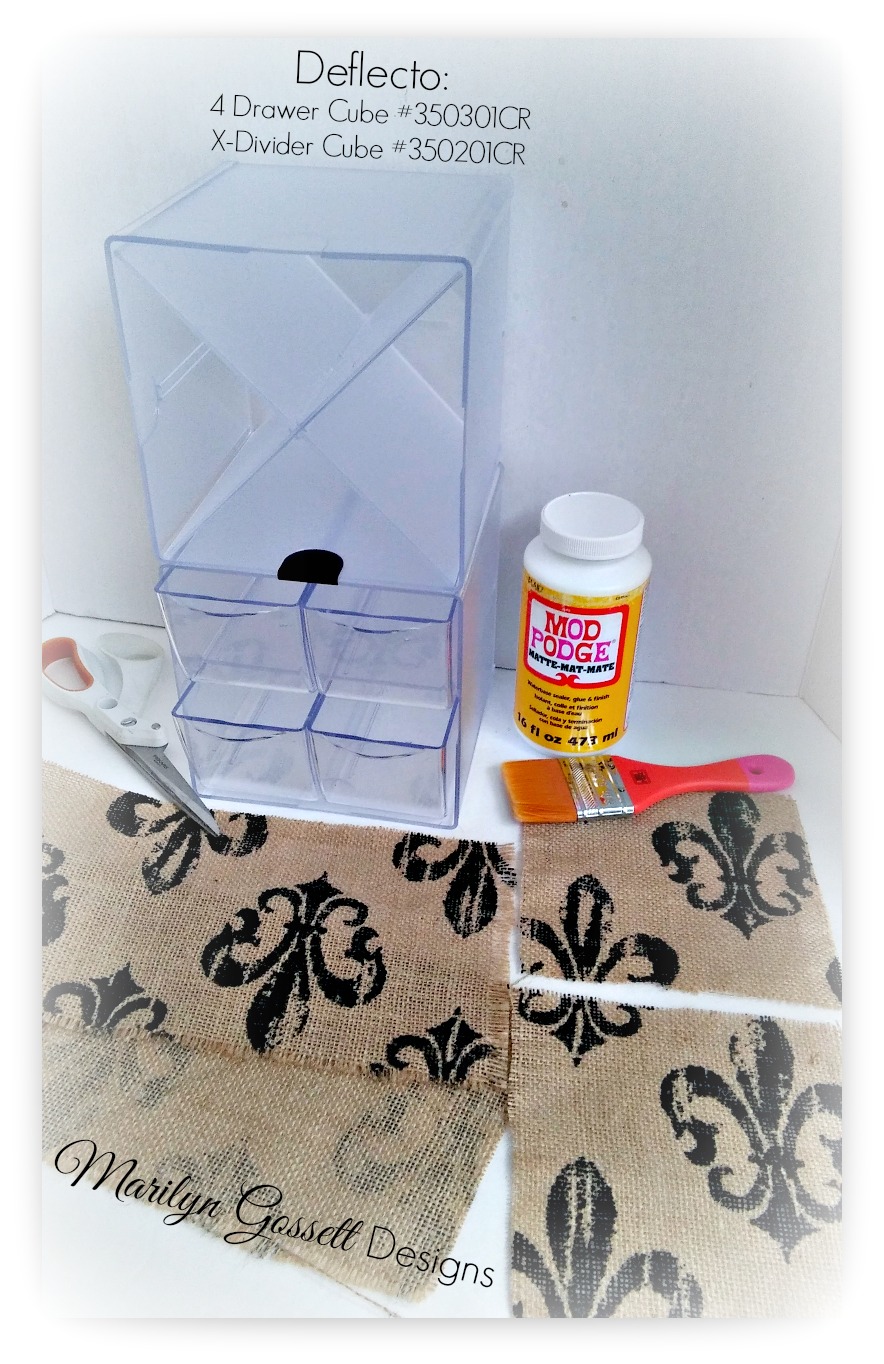
You will need:

Joy embroidered letters

Deflecto 4-Drawer Cube

Deflecto X-Divider Cube

Cylindrical storage containers with lids

Cording in 1/8" and 1/4" widths (several yards of each) 

Decoupage medium  

Patterned burlap

Scissors, paintbrush, glue gun, tacky glue


Instructions:

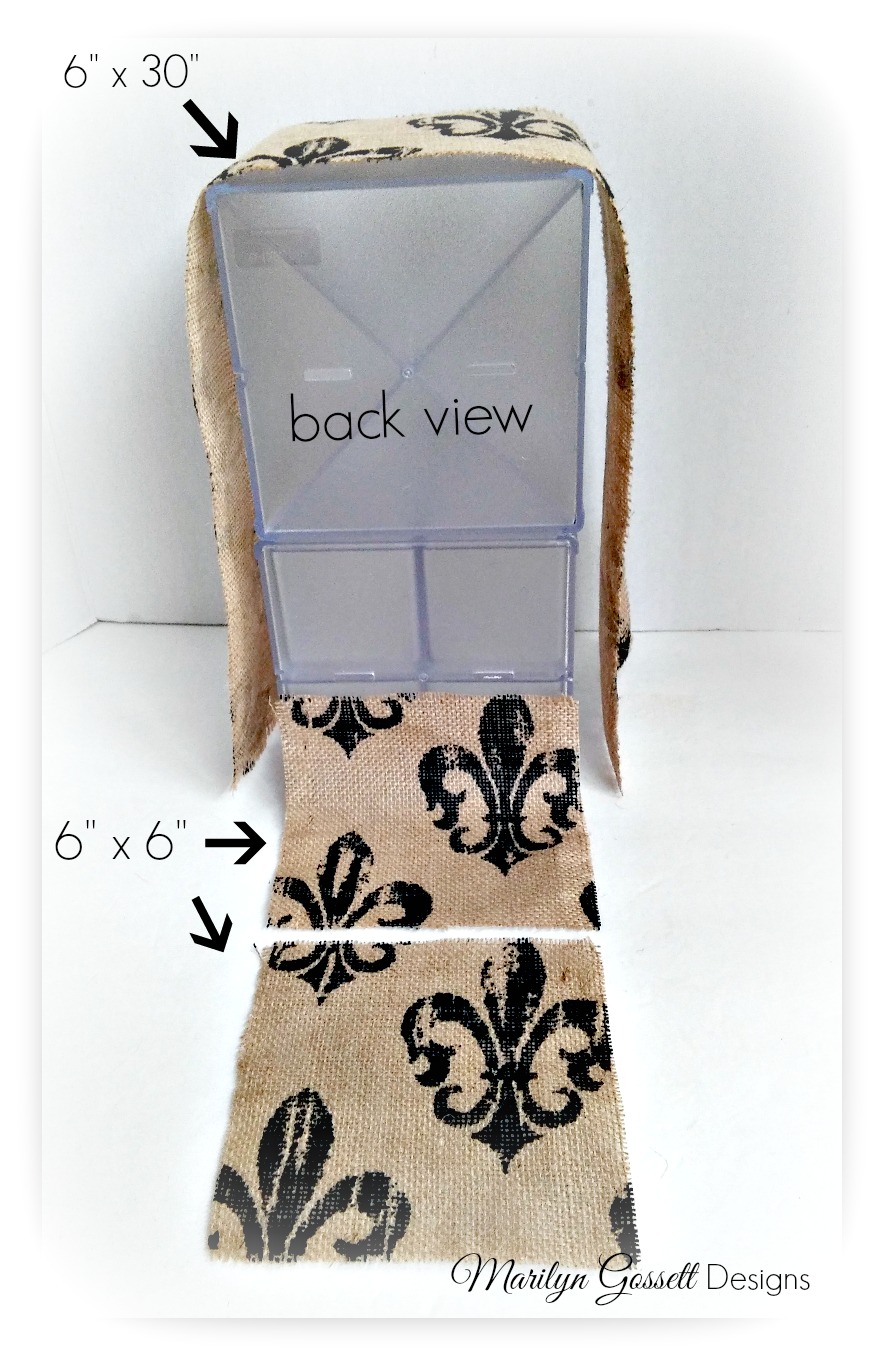
1.  Measure for the width and length that you want to cut your fabric. The cubes are 6" x 6".  I measured and cut a 6" x 30" piece for the sides and the top. The back pieces were measured and cut in 6" squares with the patterns matching up before adhering to the storage containers.

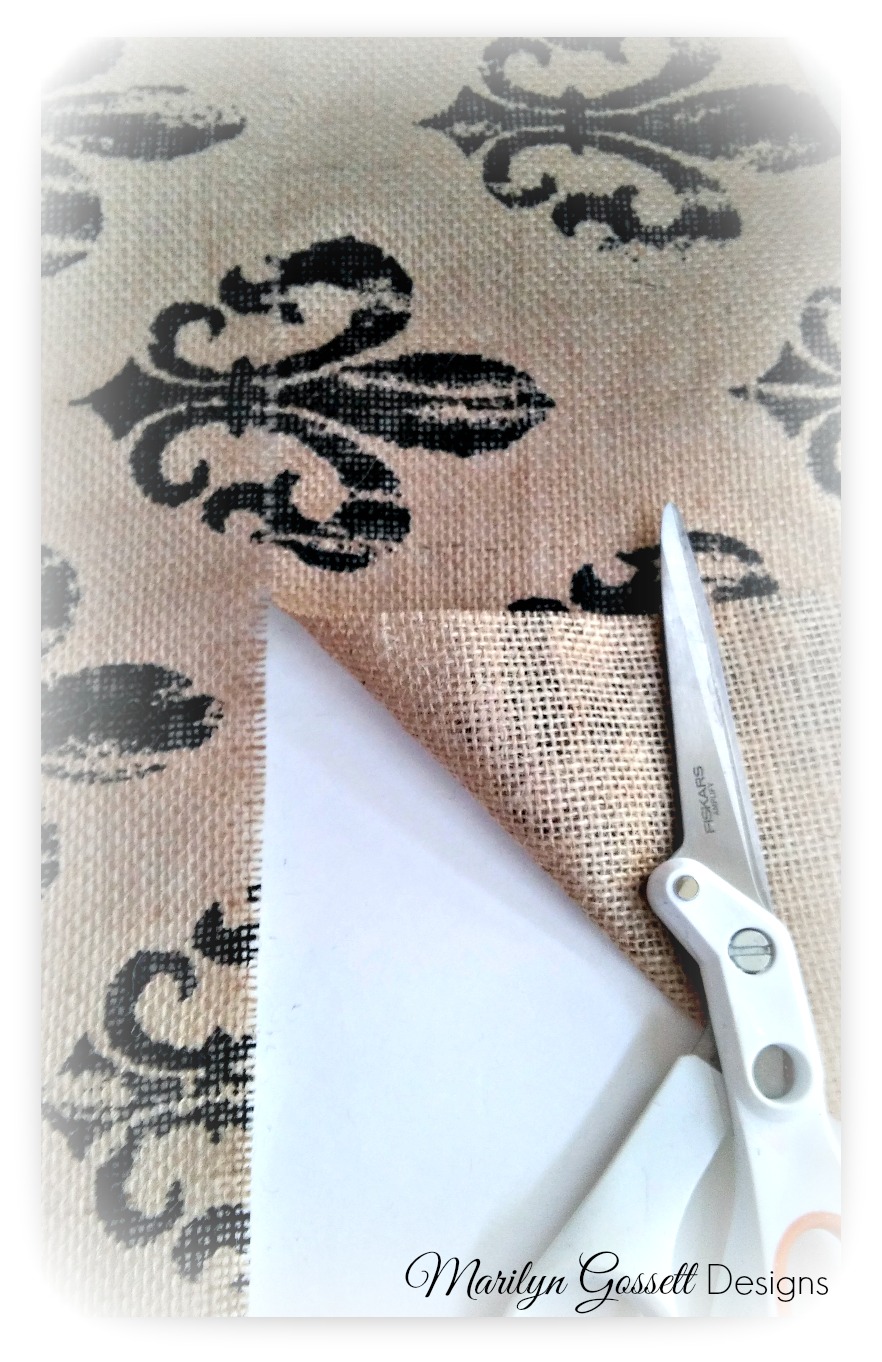
2.  Find a string in the burlap and pull it to the length of the piece you will be cutting. Pull the string all the way out without breaking it. If the string breaks, cut up to the place the string broke off and continue pulling the same string.  This will give you the guide you need to cut the burlap straight and not get fraying.

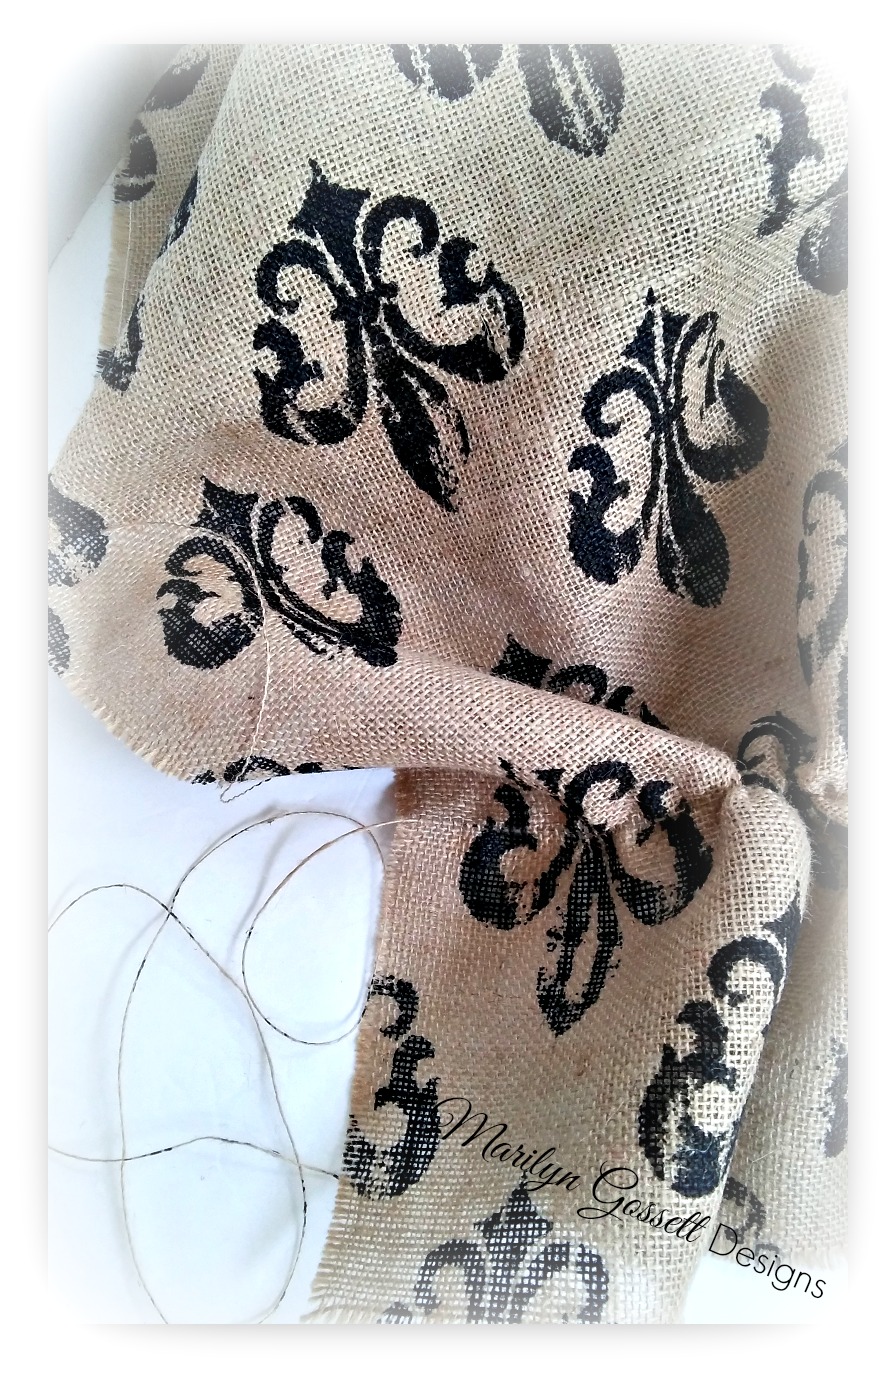
3.  Below is a photo of the burlap being cut along the guide line.  This is a sure-fire way to cut your burlap and be happy with the results! 

Designer tip:  If you are cutting individual pieces for a placemat or the like, pull and remove the strings around each side to create a fringe.

4.  I applied decoupage medium to the surface of the storage bins and to the wrong side of the burlap. Make sure to cover your surface with wax paper or freezer paper before moving on with this step. Adhere the burlap to the top and sides of the containers. Then finish by adhering the squares to the back. I left the bottom without fabric.

5.  Glue the cording to the edges of the containers as shown.  

6.  Create the cording medallions by pinching one end of the cording together and gluing to a scrap of burlap. Continue by creating a spiral; gluing as you go; until you have the size that you desire for the drawer "handle" or the lid to the cylindrical container. Cut the medallion out; concealing the burlap edges. Glue to the storage containers as shown.

7.  Glue a Joy embroidered letter to the medallions. Enjoy!

One comment on “Add style to your vanity storage”

Leave a Reply to Unknown Cancel reply

Your email address will not be published. Required fields are marked *

Recent Projects

Luck O' the Irish DIY Door Hanger

St. Patrick’s Day is just around the corner!  Celebrate the Luck O' the Irish with this colorful door décor that is a fun alternative to a traditional wreath.  You will need: Joy® Iron On Embroidered Letter sheet - Gold Script Kunin Classics™ Felt 9” x 12” Craft Cuts– Red, Orange, Yellow, Apple Green, Lagoon, Royal Blue, Orchid, Pirate Green, Neon Green, Gold and Goldenrod (one each) Kunin Premium™ Felt 9” x 12” Craft Cuts– White and Black (two each). Expo International – Claudia 2” Fan and Lattice Lace.  Ric Rac assorted Rayon – Red, Orange, Yellow, Green, Light Blue, Royal…

Rustic Happy Fall Y'all Pumpkin Sign

HAPPY FALL Y'ALL! I am always on the look out for cute items that can be upcycled to create one of a kind home decor pieces.  This rustic pallet pumpkin was just calling out to me from the Target dollar spot and with the addition of some Joy® iron-on embroidered letters, it quickly becomes a custom keepsake. Select a combination of white Joy® iron-on embroidered letters to spell out your message. To create the apostrophe, I carefully cut the leg from the capital letter Q with a pair of detail scissors. Place the embroidered letters on an old towel in a cardboard box…

Back to School Welcome Banner

Create a "Back to School" welcome banner for your favorite teacher's classroom! Materials: JOY® Embroidered Letters 9” x 12” sheets of Kunin Classicfelt -Black , Gray, Sandstone, Candy Pink and Gold Craft glue Glitter glue Cardstock Ruler, pencils, scissors 4-foot length of ribbon Instructions: Draw a simple pencil pattern (5 pieces as shown) on cardstock and cut out.   Trace and trim each pattern piece seven times on the appropriate color of felt. Glue the pencil pieces together, overlapping as shown and let dry. 4. Peel back liner paper from the JOY letters and attach to the center of each pencil, spelling…

Scrabble-Inspired Tote Bag

I am all about recycling, but most of the tote bags that the grocery stores sell are not very cute or crafty. So in honor of family game night, I created a Scrabble-inspired bag to tote around town! This project makes the perfect quick and easy handmade gift to create for Mom for Mother's Day! Decide what words you want to spell and how they'll connect, making sure the arrangement will fit on the front of your tote bag. Draw a grid of square tiles on graph paper to fit each of your letters. I selected the Joy 1.5" Cooper Style…

Happiness Pillow

Joy® Iron-on embroidered letters in white are great for creating any color you can imagine! You can use dye, markers and even acrylic paint! To Make this Happiness Pillow you'll need: Joy® Embroidered Iron-on Letters - Letter Shop White  Acrylic Paint and Paintbrush NEW Joy® Iron-on Embroidered Flower Appliqué    Canvas Pillow Blank Pillow Form or Polyfil Iron Instructions: 1. Paint each letter to create a rainbow of H-A-P-P-I-N-E-S-S.  Set aside and let dry. 2.  Insert cardboard into pillow blank then paint the pillow with white and light blue paint.  Let dry. 3. Set iron on cotton setting; approx. 350 degrees,…
closearrow-circle-o-downtagtagsminus-circlefacebook-squaretruckpinterest-squareinstagrammenu
0
    0
    Shopping Cart
    Your cart is emptyReturn to Shop