FREE Standard Shipping with $50 Order
|
Minimum Order is $15
10% Discount on $300 Order
|
25% Discount on $600 Order
Witch Hat Halloween Decoration
Anita Scroggins
|
September 26, 2015
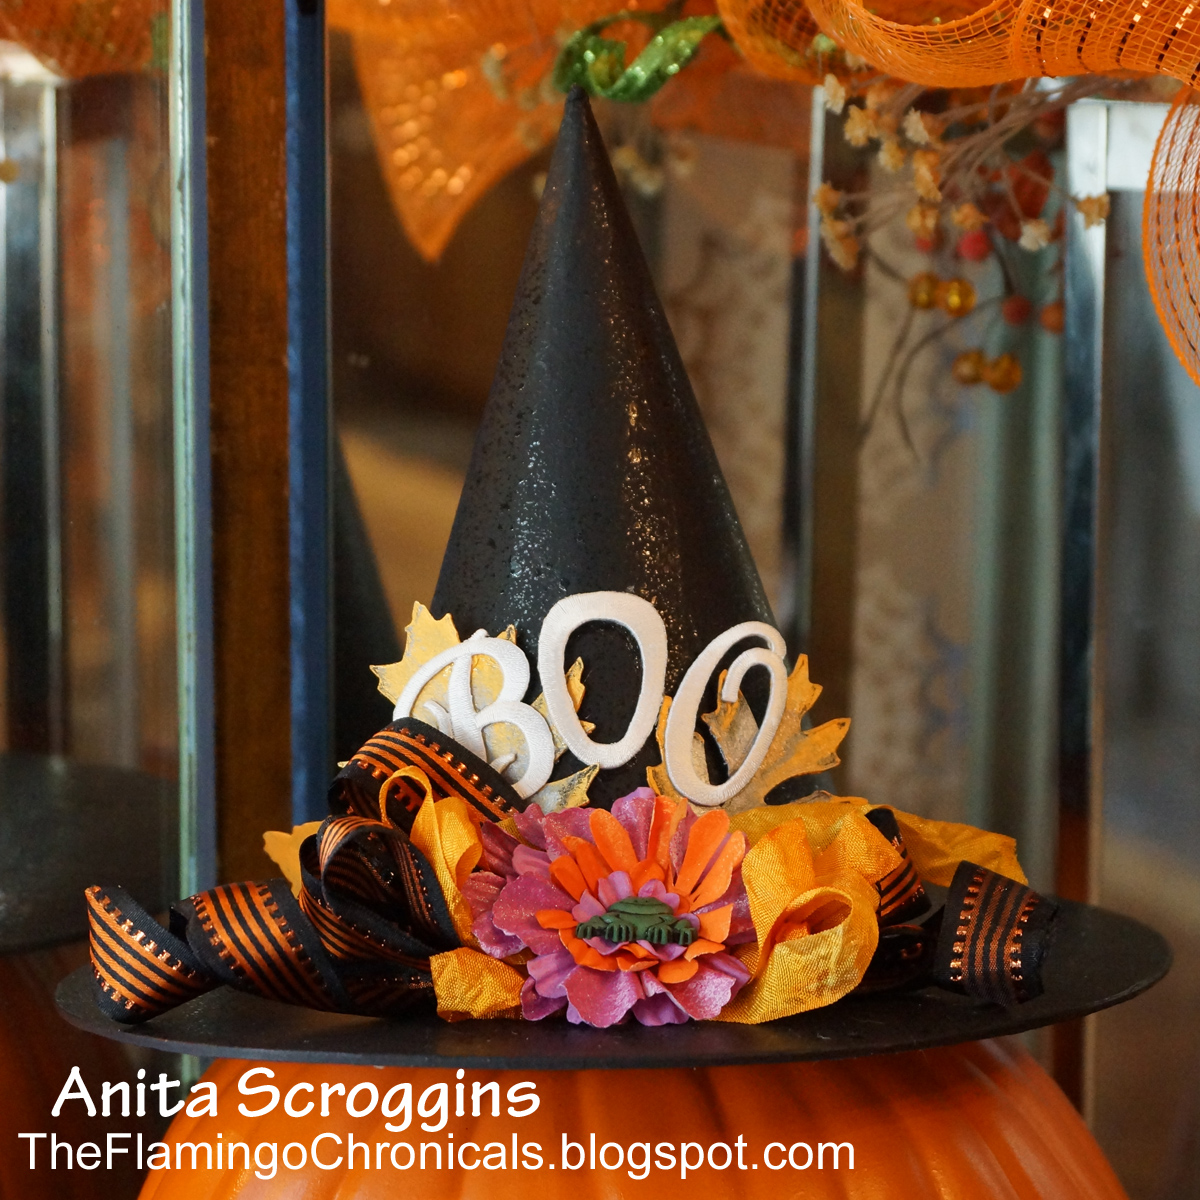
I created this fun little witch hat to adorn one of my pumpkins for Halloween! Supplies:
- Joy embroidered iron-on letters (2")
- Paper maché witch hat
- Acrylic paints - black, green, tan
- Wired ribbons, seam binding
- Paper flowers, button
- Chipboard leaves
- Adhesive, paintbrush
- Glimmer spray
Paint the witch hat black and the leaves with a blend of green and tan; set aside to dry. Make bows from the ribbons and glue to the front of the hat. Curl the tails of each bow. Layer and glue the flowers together with a button, then glue to the center of the bow arrangement. Tuck and glue the leaves behind the bow as shown. Glue the letters on the front of the hat. Mist the entire project with glimmer spray.
One comment on “Witch Hat Halloween Decoration”
Leave a Reply to m1ch3113lee Cancel reply
Recent Projects
Luck O' the Irish DIY Door Hanger
St. Patrick’s Day is just around the corner! Celebrate the Luck O' the Irish with this colorful door décor that is a fun alternative to a traditional wreath. You will need: Joy® Iron On Embroidered Letter sheet - Gold Script Kunin Classics™ Felt 9” x 12” Craft Cuts– Red, Orange, Yellow, Apple Green, Lagoon, Royal Blue, Orchid, Pirate Green, Neon Green, Gold and Goldenrod (one each) Kunin Premium™ Felt 9” x 12” Craft Cuts– White and Black (two each). Expo International – Claudia 2” Fan and Lattice Lace. Ric Rac assorted Rayon – Red, Orange, Yellow, Green, Light Blue, Royal…
Rustic Happy Fall Y'all Pumpkin Sign
HAPPY FALL Y'ALL! I am always on the look out for cute items that can be upcycled to create one of a kind home decor pieces. This rustic pallet pumpkin was just calling out to me from the Target dollar spot and with the addition of some Joy® iron-on embroidered letters, it quickly becomes a custom keepsake. Select a combination of white Joy® iron-on embroidered letters to spell out your message. To create the apostrophe, I carefully cut the leg from the capital letter Q with a pair of detail scissors. Place the embroidered letters on an old towel in a cardboard box…
Back to School Welcome Banner
Create a "Back to School" welcome banner for your favorite teacher's classroom! Materials: JOY® Embroidered Letters 9” x 12” sheets of Kunin Classicfelt -Black , Gray, Sandstone, Candy Pink and Gold Craft glue Glitter glue Cardstock Ruler, pencils, scissors 4-foot length of ribbon Instructions: Draw a simple pencil pattern (5 pieces as shown) on cardstock and cut out. Trace and trim each pattern piece seven times on the appropriate color of felt. Glue the pencil pieces together, overlapping as shown and let dry. 4. Peel back liner paper from the JOY letters and attach to the center of each pencil, spelling…
Scrabble-Inspired Tote Bag
I am all about recycling, but most of the tote bags that the grocery stores sell are not very cute or crafty. So in honor of family game night, I created a Scrabble-inspired bag to tote around town! This project makes the perfect quick and easy handmade gift to create for Mom for Mother's Day! Decide what words you want to spell and how they'll connect, making sure the arrangement will fit on the front of your tote bag. Draw a grid of square tiles on graph paper to fit each of your letters. I selected the Joy 1.5" Cooper Style…
Happiness Pillow
Joy® Iron-on embroidered letters in white are great for creating any color you can imagine! You can use dye, markers and even acrylic paint! To Make this Happiness Pillow you'll need: Joy® Embroidered Iron-on Letters - Letter Shop White Acrylic Paint and Paintbrush NEW Joy® Iron-on Embroidered Flower Appliqué Canvas Pillow Blank Pillow Form or Polyfil Iron Instructions: 1. Paint each letter to create a rainbow of H-A-P-P-I-N-E-S-S. Set aside and let dry. 2. Insert cardboard into pillow blank then paint the pillow with white and light blue paint. Let dry. 3. Set iron on cotton setting; approx. 350 degrees,…
Get FREE Standard Shipping with $50 Order
Get a 10% Discount with $300 Order
Get a 25% Discount with $600 Order
Love this idea.